Heller Greek TF-104G Starfighter
Project start 2025-09-05
I've built this one before, even foolishly attempted to blitz it. I hope I won't DNF again, but given that I have roughly 20 times as much time this time, it should work out. Another advantage I'll have this time round, is that the kit is actually complete this time, which should help. That said, the actuators have broken off the main undercarriages of both sides. I'll have to come up with something clever to fix that.
The presence of this kit in my stash is something of a mystery. I know where the one from the Blitz came from, and why I had it. I know why the later edition with the black rimmed box is in the stash, but this one? Not a clue. I found it in the pile maybe a year back, and have been wondering since then. Maybe I'm just getting senile..
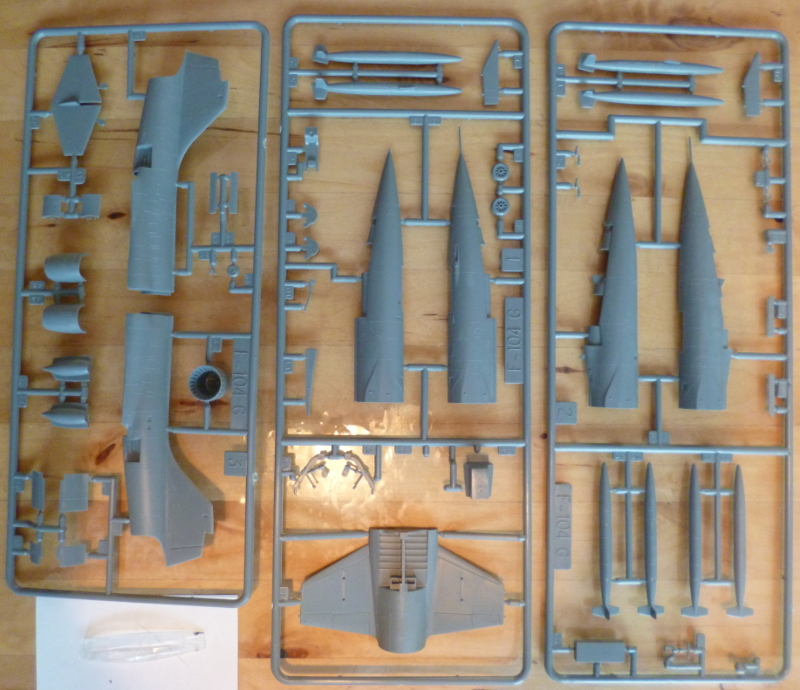
Anyway, it's there, the previous built has shown it to be a halfway decent kit, and I just found a purpose for it. Here's what's in the box (well, almost, this is actually the previous one with parts missing. I dig the whole re-use mentality..
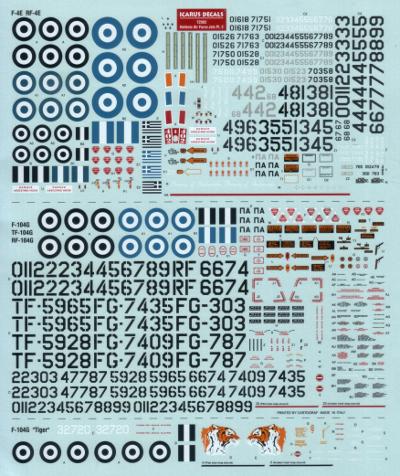
After my previous experience with Heller decals this old, I'm not even going to try using them this time. Instead, I'll be using the TG-104G markings from Icarus Decals' "Hellenic Air Force Jets part 2". This machine carries the SEA camouflage, and as such is almost identical to the kit's Belgian two seater. Not that I had other TF-104G decals available, but it's a nice coincidence.
The instructions from Icarus show this particular machine completely clean, not even carrying
external fuel. Suits me just fine, since the external tanks from the Heller kit are still too
thin. You'd think that in the two years since my previous build they could have retroactively
fixed this, but no such luck
It does mean I'll have to remove the bases for the wing pylons and associated locator holes from the wings.
Fit of the rear fuselage halves isn't perfect, but clearly, this particular kit has suffered less warping than the previous one. I'm going to give the cement on the rear fuselage and the front wheel bay plenty of time to cure before continuing; I don't want to risk the current bonds loosening when I put tension on them, or the wheel bay getting whacked out of alignment while I mess with the cockpit tubs.
2025-09-11
My apologies for the lack of updates to date; it may not look it, but the interior took
a lot of small and fiddly steps to reach this point, without much to show along the way.
My earlier build was a blitz (well, at this point of the process), so I took a more rough and ready approach to getting stuff lined up correctly, but I wanted to get it right this time. Which meant that most parts had to be fettled to fit, with no real way to check alignment before fixing things in place. Normally, I'd build and paint the tubs, and then install them as a whole, but here I've built them in situ, and reinforced the flimsy joins with small blobs of UV curing resin (not really visible in the image). Hopefully, I'll still be able to pull of some decent paint work.
The ejection seats are neither the kit parts, nor the printed parts I'd originally planned. I messed up scaling the latter, and they came out seriously undersized. Still, the same print job included a pair of MB-7 seats, mostly as a test to see if the designer was any good (yup ;-) ), which should do even better; I think they were actually the correct seats for a G, although these are intended for Phantoms and thus probably a bit different.
The seats are the only parts not yet glued in place; I can insert them much later even with the fuselage closed up, which means I can spend more time properly painting them.
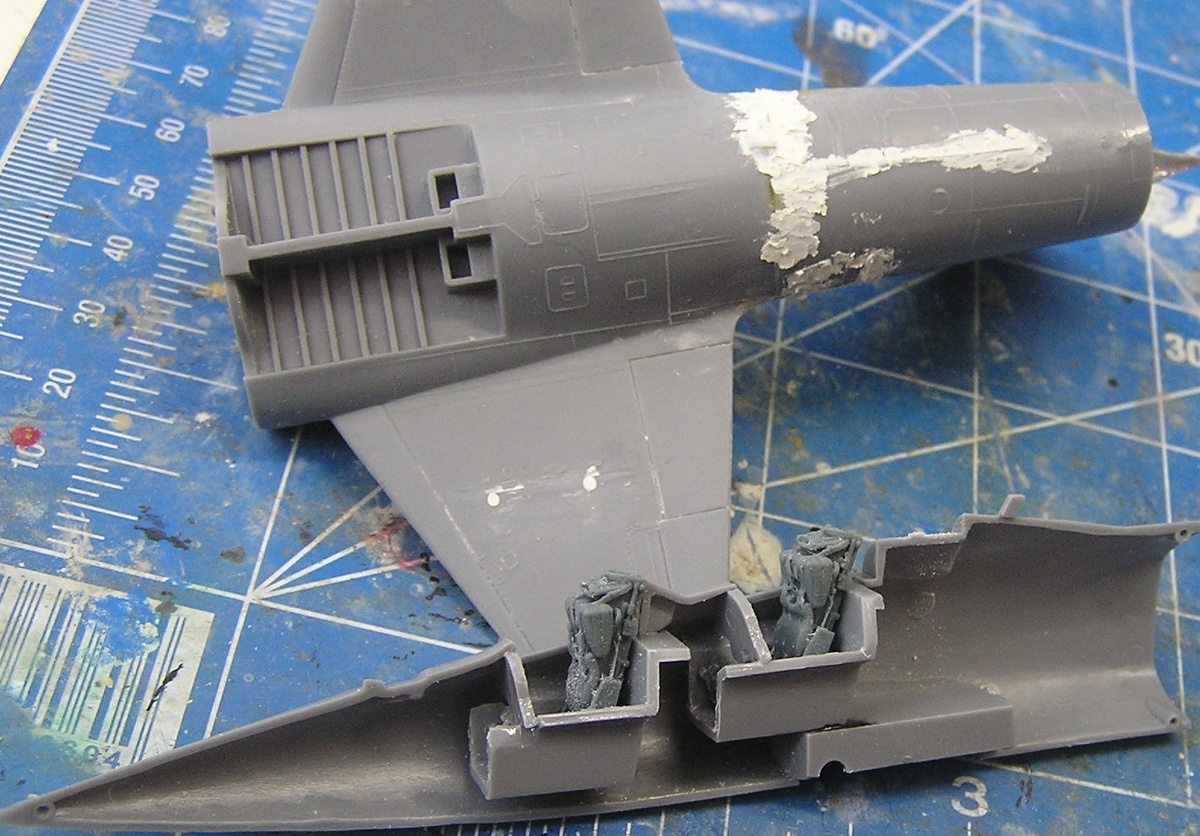
The three parts that make up the rear half of the plane have been 'persuaded' into place; this particular kit suffered less warping than my previous one, but some force was still required.
The second batch of filler is curing. I think I'll be able to keep the loss of surface detail to a minimum.
2025-09-18
Right then, where was I...
Again, progress was baby steps style. I've made a start at painting the ejection seats. This isn't the
highest priority now, as they'll only go in just prior to fitting the canopy.
The rear end of the fuselage needed only minor corrections after sanding smooth the filler from the
previous picture. I ended up losing much of the paneling at the very bottom, and some bits around the
air brakes, but this was expected. I just happy the top of the spine didn't take too much work.
I've spent some time dry fitting the engine, and widening the hole in the rear end when it flat out
refused to fit properly. Better to do that now than when most assembly is completed.
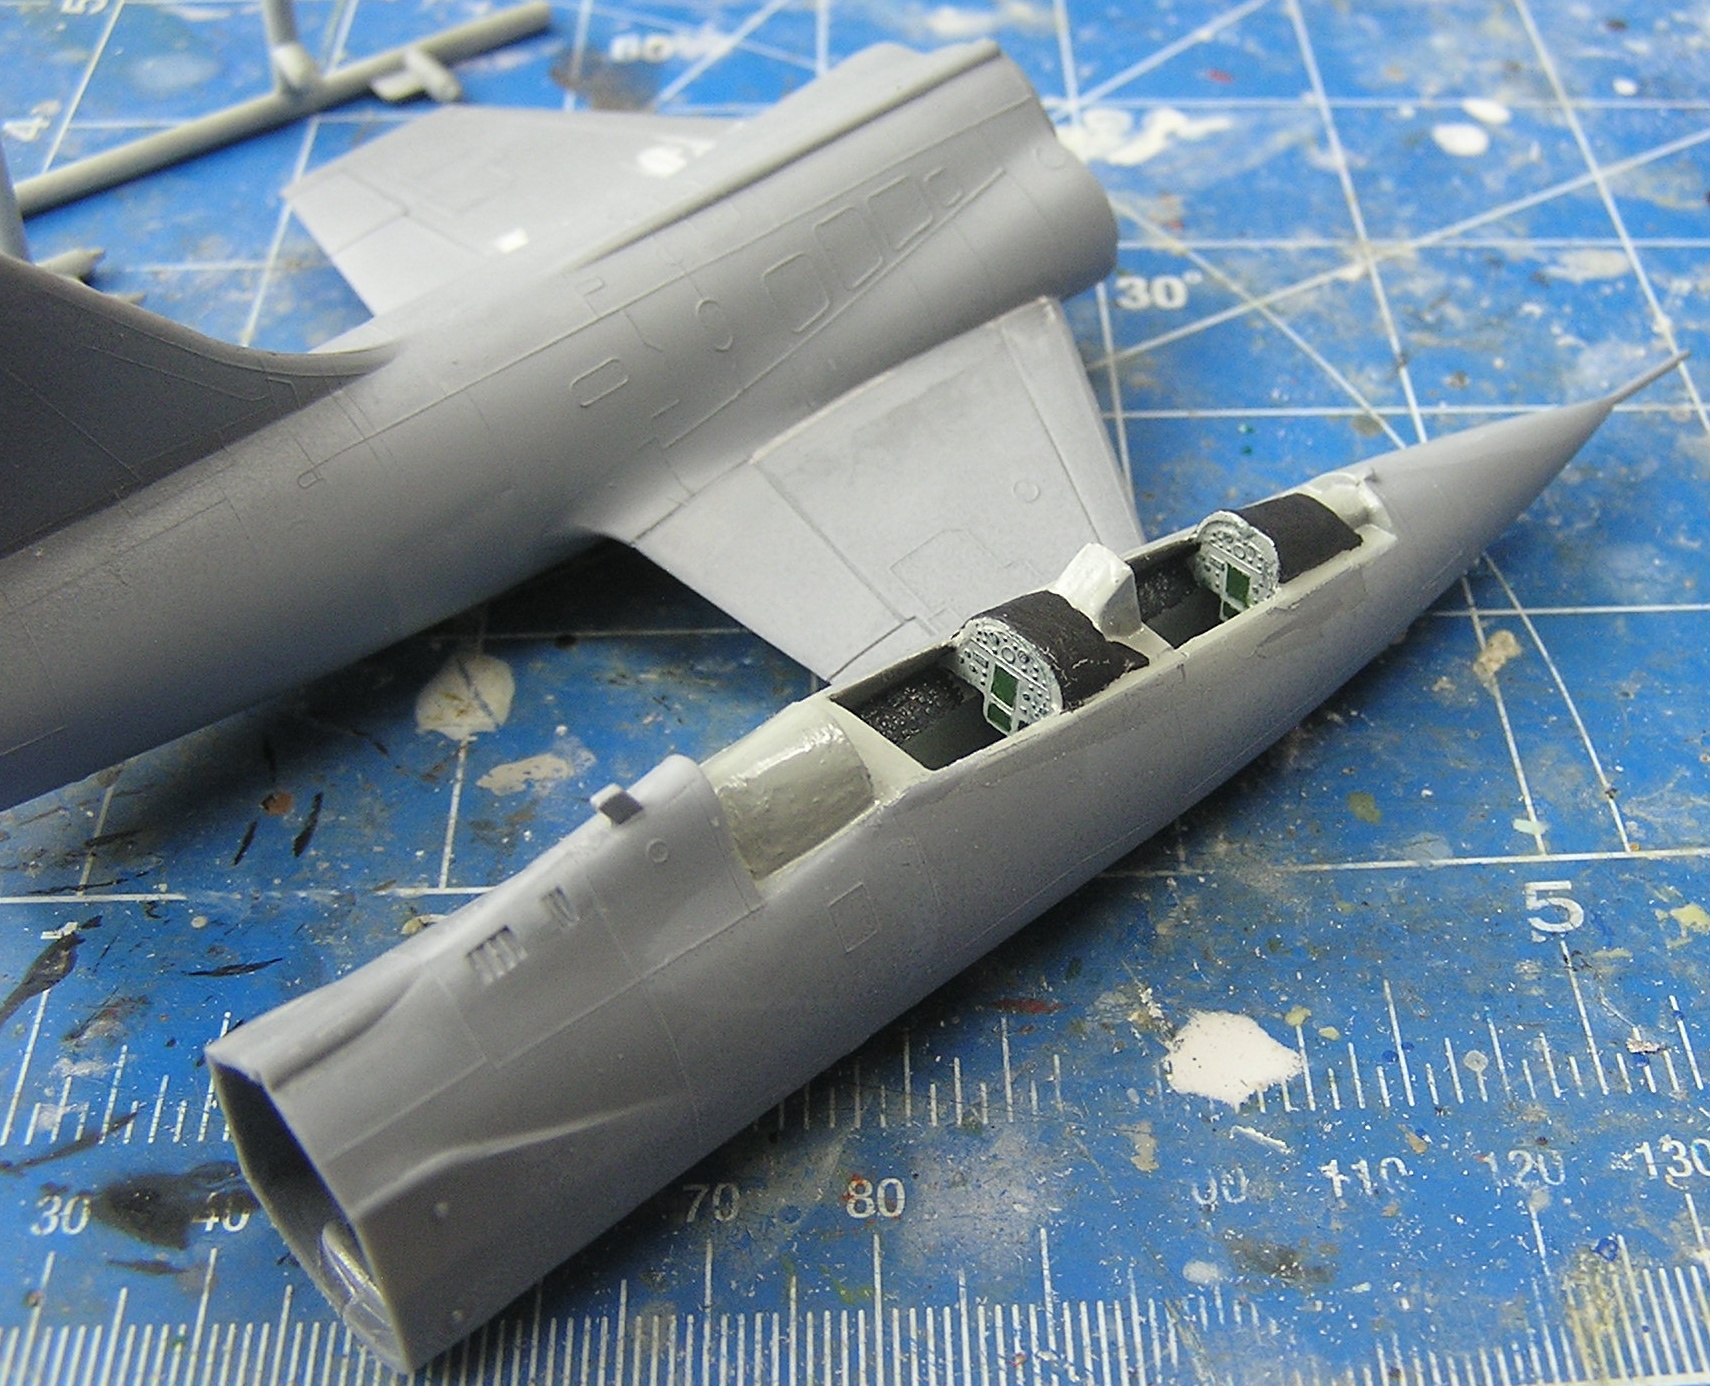
The front fuselage was most recalcitrant. There must have been a lot of very subtle warping there,
because closing it up was only possible in sections and involved quite a bit of brute force. Since I
had no such problems on the earlier build, I think the design is sound though. Even after the wrestling,
the interior bits were badly mis-aligned, so I had to go at it with filler and file more than any other
part so far, including the rest of the forward fuselage. Again, panel losses are limited to the immediate
vicinity of the seam on the bottom, so so far, so good.
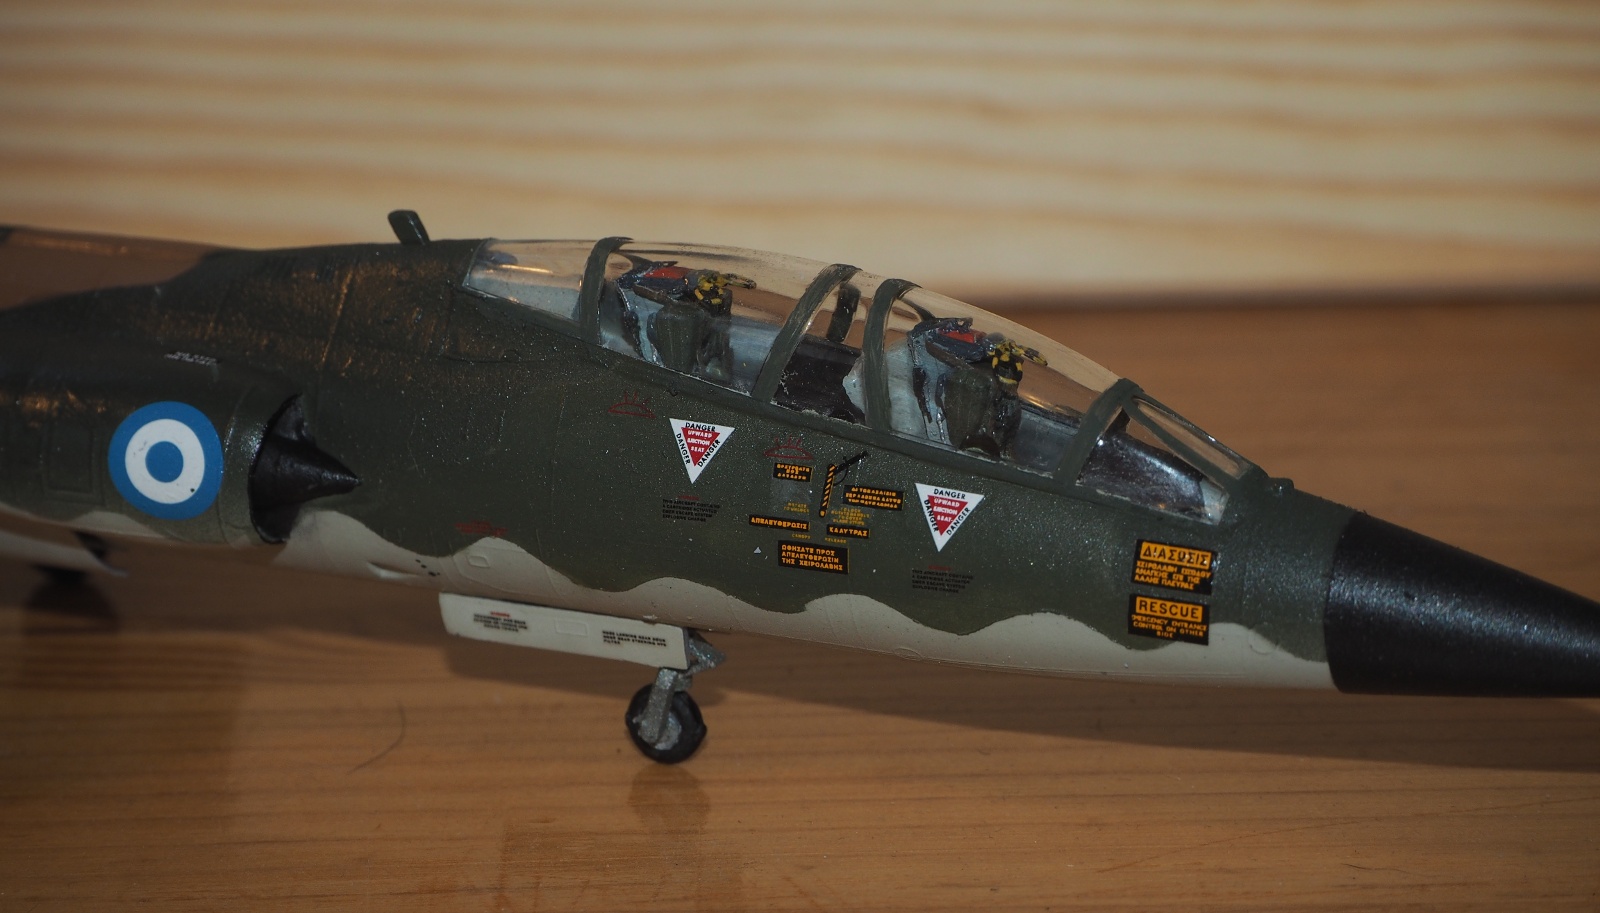
The offices were just lightly drybrushed with silver or extremely dark blue; hardly perfect, but at this
scale and with a closed canopy, it will do.
As with the engine, dry fitting the canopy revealed fit issues, and as before, I spent some time
correcting the fit before the rest of assembly is done.
I've discovered a surprising (since it worked perfectly last time) problem with the forward undercarriage
leg: the rod that is supposed to go into a pair of sockets on either side of the wheel well, is so short
it simply fits inside without touching the sides, and is consequently worthless. I'll have to come up with
some clever replacement soonish; I suspect the 3D printer will be involved, as replacing part of the leg
or scratchbuilding a complete replacement is beyond me.
2025-09-18
With some careful pre-fitting, I've managed to get the air intakes on with a minimum of filling and
filing after the fact; I guess all that apparently non-productive preparation work pays off.
While the join between the fuselage halves is never going to be extremely strong, the way Heller
laid out the parts means this join is reinforced by the splitter plates and intakes.
Only the ventral fin and tailplane remain for main construction. I should have it ready for painting
very soon now.
I hacked up a rough (though not rougher than the kit part) front leg in OpenScad.
The printer is churning out a huge number of them as I write this. I had to guess the needed width
of the "bar of the T", which will connect to the nocks in the wheel well, so I rendered a spread of
half a millimeter in six steps, and I'm printing multiples of each in case I wreck something. Making
more or less sure I get one good one is worth a few drops of resin, and it doesn't take a second
longer on a resin printer.
2025-09-19
After a few minor corrections, I decided work on the fuselage was as good as it was going to get,
so I installed and completed the seats.
Next step is to put on the canopy, and put the few remaining large pieces on along with the
undercarriage legs to get it ready for the paintshop. I'm a bit worried about the undercarriage;
I've had to completely replace the front leg, and the replacement is as yet untested, and the main
legs have both lost the connecting rods to the doors, so there's some high risk work just over the horizon.
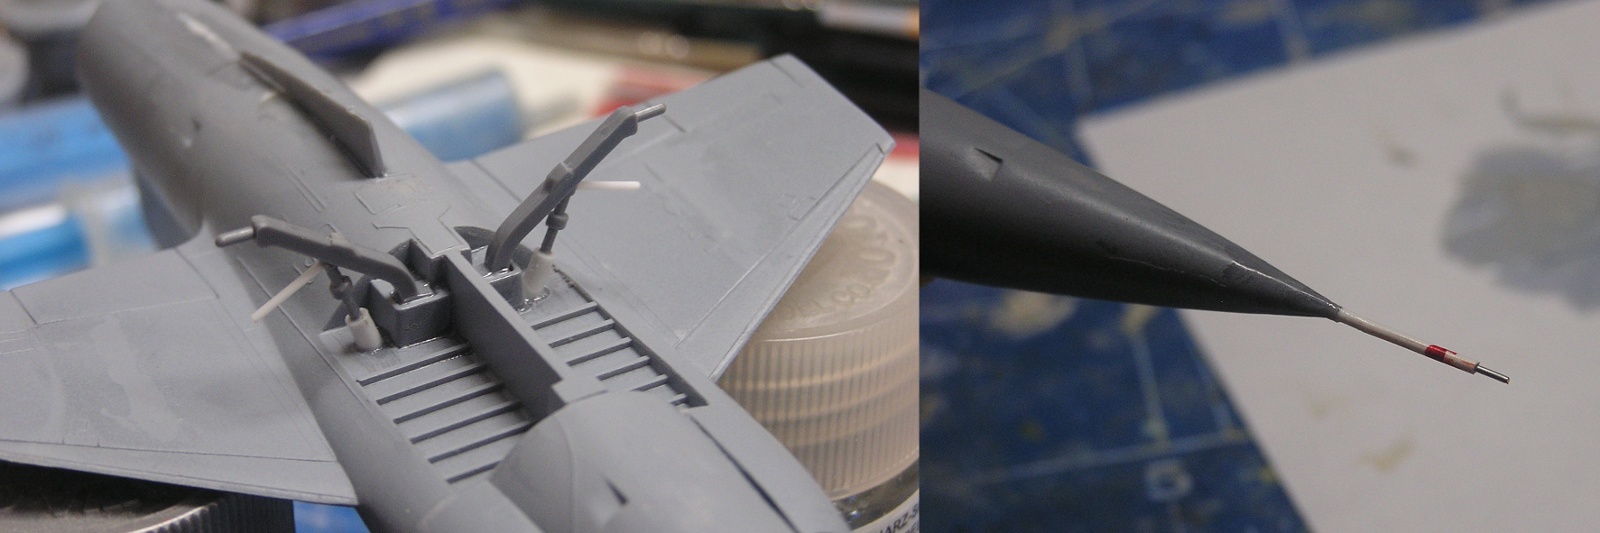
I'm please to report that I've only almost snapped off and repaired the pitot three times so far..
2025-09-20
It was something of a rough day at the bench today..
I'd messed up a bit yesterday while fixing the canopy in place, and there was a nasty trench between
the fuselage and the edge of the canopy on the left side. Note to self: next time, check both sides
before turning on the UV lamp. I stuffed the trench full of white milliput, and smoothed things out
with wet fingers. Labour intensive, messy, and a recipe for disaster if water can still get where it
shouldn't, but it does work quite well and I like sanding right next to transparencies even less.
As mentioned previously, I printed way too many front legs. In retrospect, a good thing too. I'd messed up somewhere, because instead of the various sizes neatly bracketing the correct one, they were all too wide. So much for the easy way, but there's always my trusty nail file do deal with such things. I only overshot the mark about half a dozen times before I had one that fit. Still, the result was worth it.
I then turned my attention to the main undercarriage. I already knew I'd have to repair the legs, since both had lost the connecting rod to the door. What I hadn't realised was that there is a fundamental flaw in these parts: the piston connecting to the bottom of the wheel well is too short. Not specific to this kit, the one I built earlier had the same problem, which leaves the piston comically dangling from the leg, connected to nothing on the other end. I decided to get ambitious, and lengthen the piston. I drilled out some 2mm Evergreen rod to make the new 'fat' part of the piston, and carefully filed down the original 'fat' parts to the same size as the 'thin' part, glued on the replacements, and then cut the new 'fat' parts down to size in the usual test fitting procedure.
I was feeling pretty smug at having pulled this off at this point, and started masking the canopy prior to final assembly and sanding. At which time I fumbled the model, which demonstrated traditional Starfighter behaviour and crashed nose first into the ground. This is not good for Starfighters. It is especially not good for super fragile pitot tubes, and somewhat brittle 3D printed front legs. Much foul language was heard..
Looking on the bright side, 1/72 scale pitot tubes break off so often that I've become quite good at rebuilding them from a bit of network cable; just strip of the insulation for the narrow part, and leave it on for the wide part, and strip an additional section as a connecting pin to the airframe. Drill a 0.5mm hole in said airframe, add superglue, grab a drink, no problem. I did mention it was a good thing I printed way too many legs, didn't I? So replacement parts were available, but I did have to drill out the remains of the broken part and do the whole filing and fitting routine again.
2025-09-21
I have some leftover Aeromaster acrylics which will be used for the underside and tan upper surfaces.
Despite their stellar reputation, I find they handle every bit as horribly in an airbrush as other
water based acrylics, but to their credit, and unlike some other waterbased paints I could mention,
they do deliver a perfect coat of paint.
Leftovers is going to be a bit of a theme here. I still havent figured out why the kit itself was in my house, and in addition to the Aeromasters, I'll be using Humbrol pre-thinned airbrush paints for the greens (must have had those for forty years now, I really need to use them up but I keep forgetting about them).
2025-09-22
Allow me to amend that earlier statement: Aeromaster acrylics are every bit as much a waste of time,
effort, and mojo as all the other crappy waterbased toys.
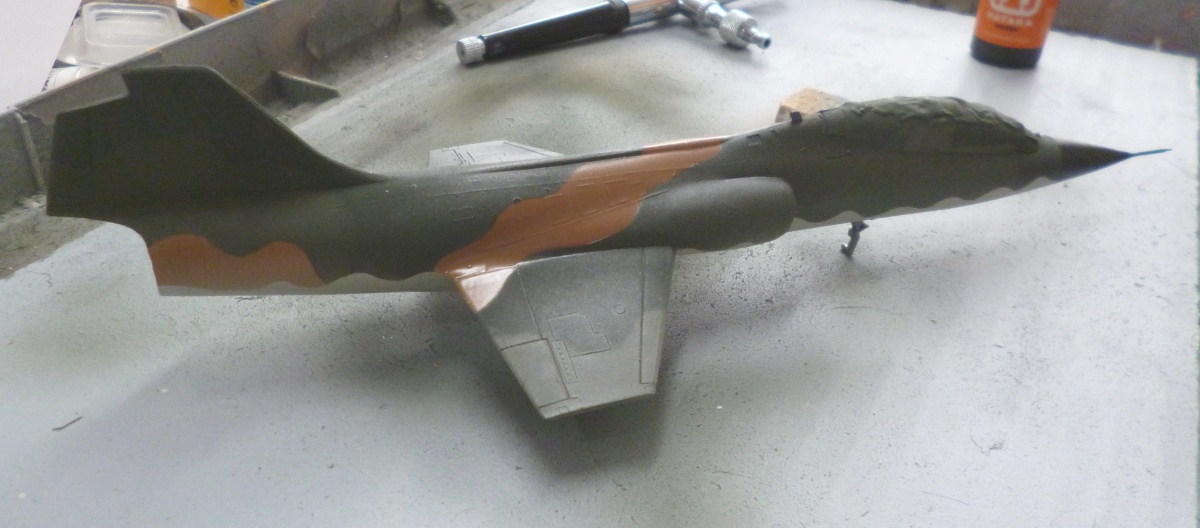
I started the first step of masking the camo pattern. I cut a length of Tamiya tape, stuck it onto
an old plastic bag, and cut the wavy line that separates the lower half from the camo on top. I
then removed the masking tape from it's plastic backing, and transferred it to the actual model.
Of course, I didn't get it exactly right at the first attempt, so I peeled off the misaligned bit
of tape...along with the paint. It separated right off the primer, which stayed on the model, so
it's not the primer failing to stick to the plastic, but the Aeromaster refusing to stick to the primer.
I have the same colour as Humbrol enamel. Once I've wiped off the useless acrylics with IPA, I'll
start over with that.
2025-09-27
I've got the main paintwork done, and way more touch-up than I'd hoped for. I'll do spot
painting and probably some more varnish tomorrow,
2025-09-30
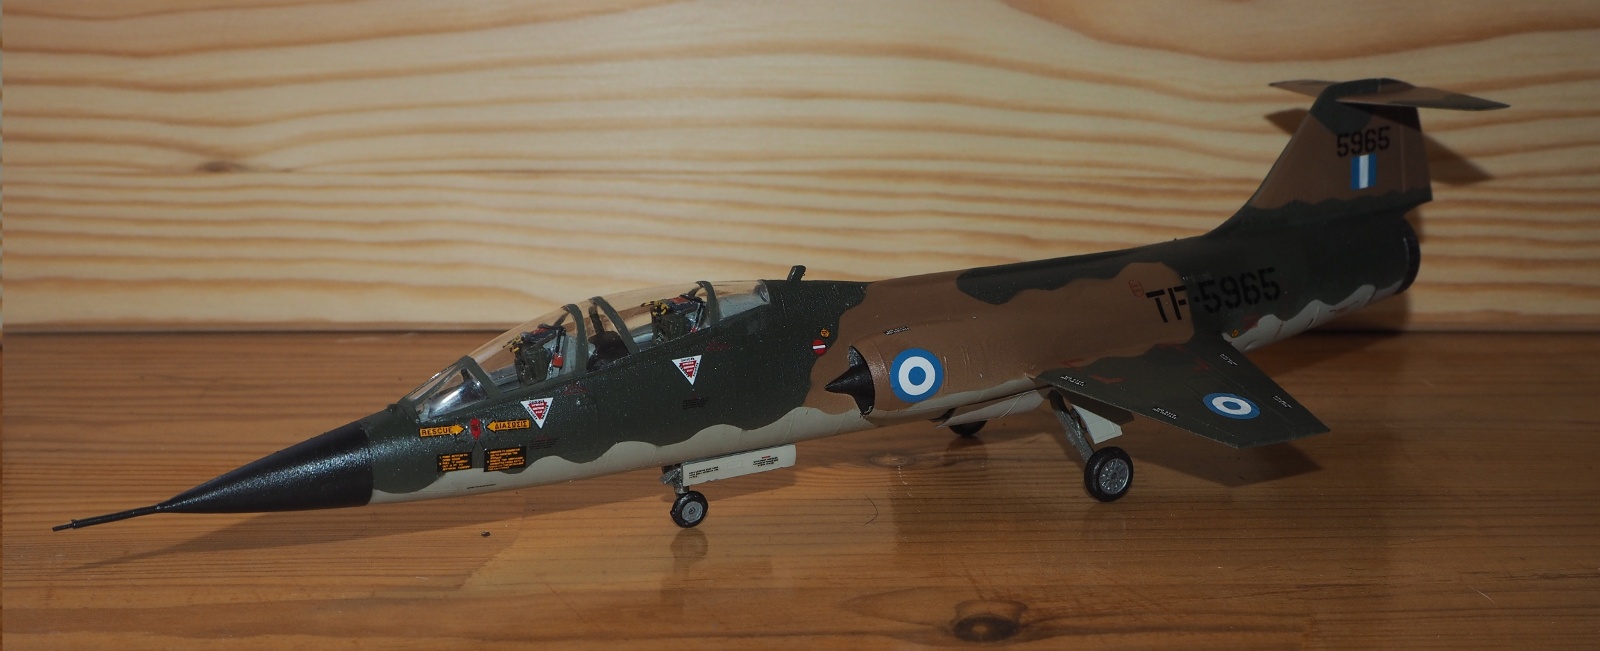
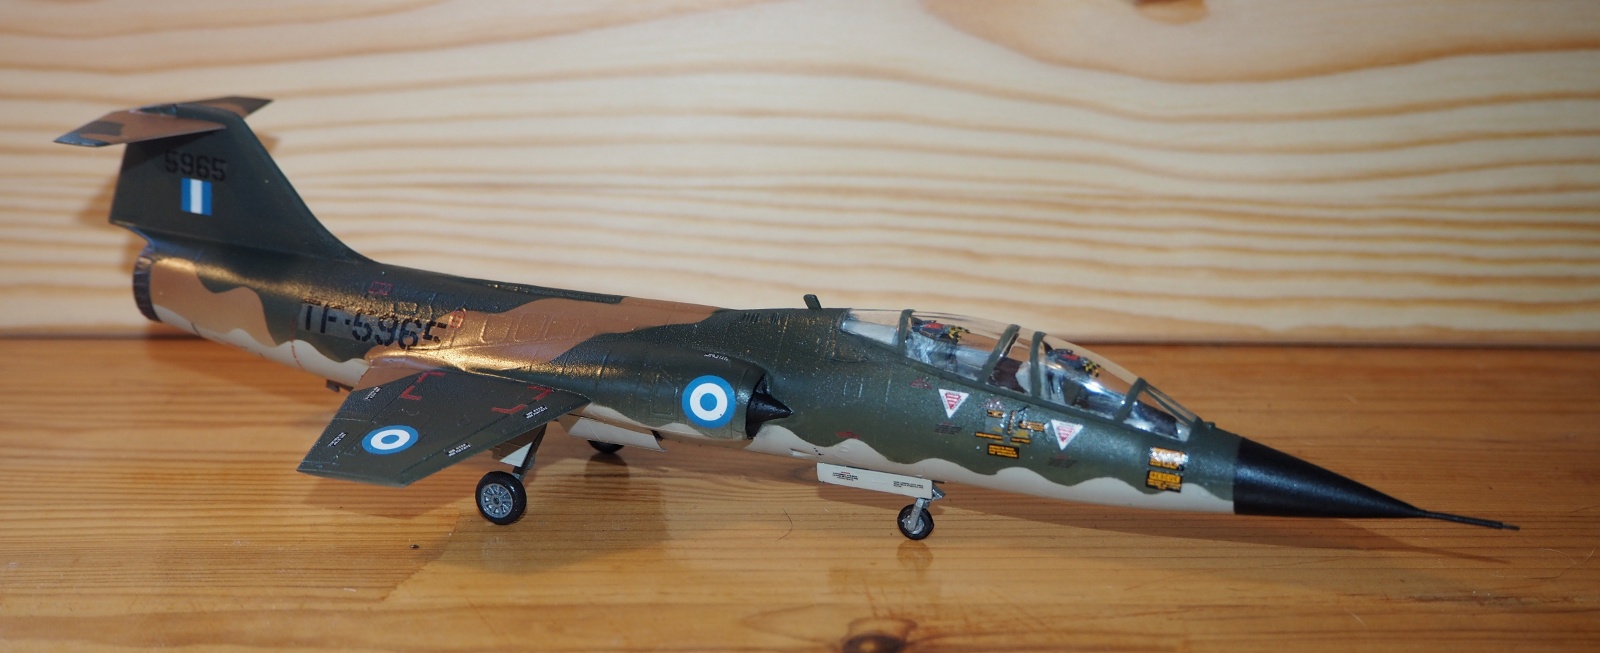
The decals are all on the plane, albeit with more silvering than I'd have liked.
2025-10-01
I just removed the masking from the canopy. To my considerable relief, this revealed no
mishaps in need of correction.
2025-10-01
All done.