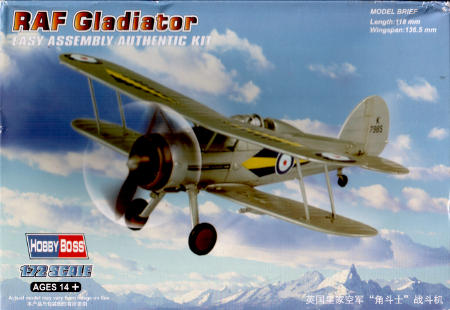

Secret Santa 2019
Project start 2019-12-25
Santa knows me entirely too well ;-)
After the usual ritual of yawning, stretching and scratching, I drifted
downstairs to find this inside that package that had been staring at me
for the past days..
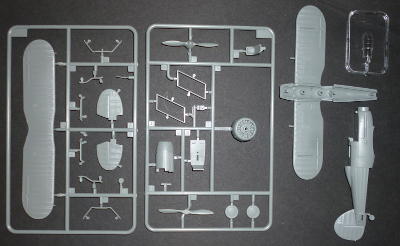
Now, theoretically, these are kits one throws together in an afternoon, but
that's a different GB, and besides, being chronically underappreciated underdogs,
these kits tend to bring out the worst/best/crazyest in me. This will be no blitz.
Some research will be invested before I decide what to do with it. I like the Navy
markings that come with the kit, but I seem to recal those being Sea Gladiators,
with a tail hook and a three-bladed prop, so that will need clearing up. And of
course, being a biplane, rigging is on the agenda.
I have a sort-of-like-this rigging diagram in the instructions of the Roden Sea
Gladiator, but they seem incomplete. I'll try to get my mitts on the instructions
of the new tool Airfix Gladiator, which include a proper diagram.
The Navy markings are out; I have no ambition to scratch a three bladed prop and a hook. The box art markings are also out, since I have a Matchbox kit sitting in the stash destined for these same markings. So, new decals wanted. I've ordered up a set of oddball decals, and this will most likely become a Nationalist Chinese Gladiator.
2019-12-31
I figured I might as well do something useful while waiting for the year to
end, the noise to start, and the cats to freak out, so I started digging into
the rigging. There are, of course small differences between the Hobby Boss and
the Airfix plastic (which I'm using as cheat sheet/template), and one of the
interesting ones is that HB has a bulge where Airfix has a plate, through which
the rigging is run. It's kind of tricky to drill precise holes through bulges,
so the first step will be to kill the bulge (and possibly replace it with a plate,
if I'm feeling ambitious)
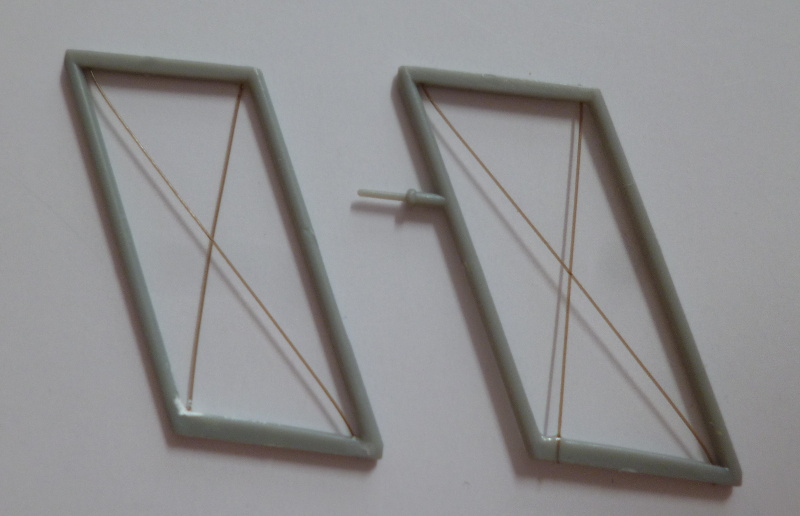
Another interesting point in this respect, is that HB have made the wing struts
into parallelograms, with the horizontal bits becoming part of the wings. Good
idea...unless you're into rigging. There are crosswires between those struts,
and drilling holes for those through the wing, as would be done with the Airfix,
is made impossible by this construct. I guess I'll have to pre-rig the strut
assemblies before assembling the rest of the model. After making sure the join
to the wings is just about perfect, of course..
2020-01-01
I've started drilling the holes for rigging. Nerve wracking and tricky work;
0.3mm drills aren't the most robust of tools, and I'm constantly balancing
between putting enough pressure on to get them to cut, and not putting so much
pressure on the drill bends or breaks. I know, if I put the pressure on precisely
right it won't bend or break, but go the slightest bit off-centre and you're in
the danger zone. So far, I've broken one, and bent another back in to shape too
often to keep count of. Many more holes to go.
2020-01-01
The lower wing and the tail have been drilled (and I didn't even break any further drills),
and I got some construction done.
2020-01-12
I've finished pre-rigging the struts.
Scary business, drilling through the top and bottom of the struts; a 0.3mm hole isn't
large, but when you're drilling it into a 1mm piece of plastic, margins quickly shrink.
Fit of the struts to the wings is not as good as I'd hoped, and I fear I'll be messing
around with filler after attaching them to the lower wings. But that's for later.
I've added a spot of filler to the join between the fuselage halves. Good fit, with
just a bit of refinement needed.
2020-02-29
Things slowed down rather depressingly again, due to a total lack of bench time,
and lots of holes. Still, I finally got all of those drilled, and only broke a
single extra drill in the process.
2020-03-29
Contrary to what Kermit would have you believe, being green isn't that hard.
Becoming green without someone freezing their fingers off in near zero
temperatures is the hard part..
Still, it's good to actually have some progress. Nothing experimental about the green,
just your basic Airfix starter kit paint.
I'll let it cure for a day or so before hitting it with gloss varnish. I'm thinking
something Model Master, because there's quite enough familiar paint on this machine.
2020-04-02
I've done all the damage I can before making a start on the rigging. The wires on
the tail are in place, those that end in 'blind' holes in the fuselage have been
attached, first with a bit of CA, then a drop of clearfix for additional strength.
The latter is now curing; it just won't do to yank them out later when tightening them.
Next step is going to be ever frightning mounting of the upper wing; that's where
I find out if I've got a winner or a wreck.
I'm using 0.16mm fishing line for the rigging. Rigging will proceed from the fuselage to the wing tips, simply because the outer riggin would get in the way of positioning the inner rigging. Note that this refers to the order in which I'll thread the wire through the holes, which is not necessarily the order in which I'll fix them with glue. I'll glue the wires into place under tension with some thin CA, then put a dab of paint over the now mostly filled hole to hide the remaining space.
2020-04-04
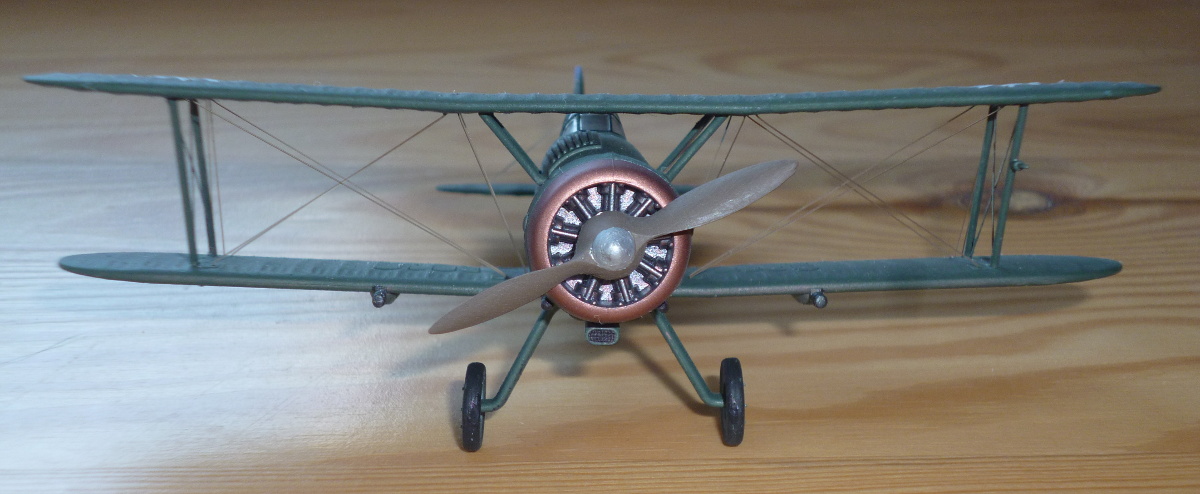
Rigged! It's all rigged I tell you!
Oh, hang on, it's a biplane, it's supposed to rigged. Guess that's alright then..
Quite a bit of touch up was needed on the wings to hide CA spills and damage
from removing the 'stubble'. Just some finishing touches and decals remaining.
2020-04-06
I've put on the first decals. They are absolutely frighteningly thin, and
prone to curling up, but on the other hand, they don't fight being straightened
out, and are very eager to conform to the shape of the plastic. Other than for
the rudder, I may not even need solvents to get the job done.
2020-04-08
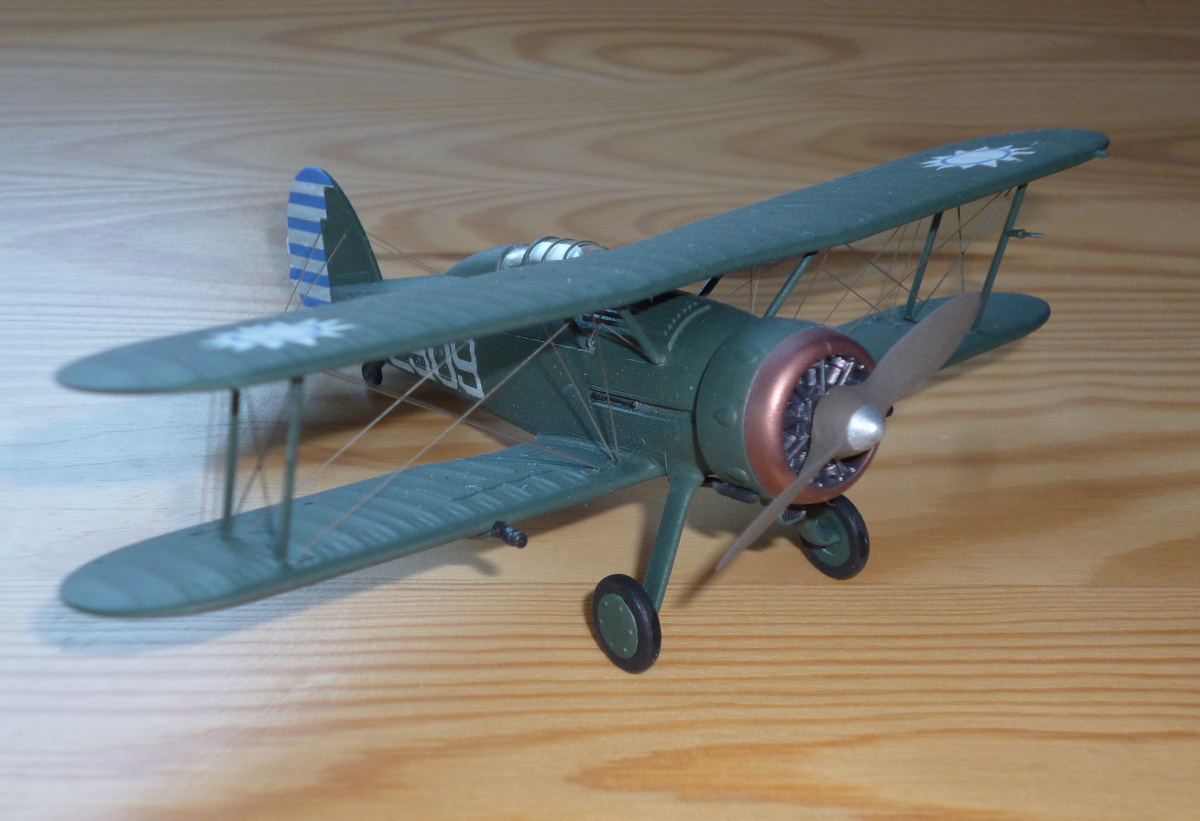
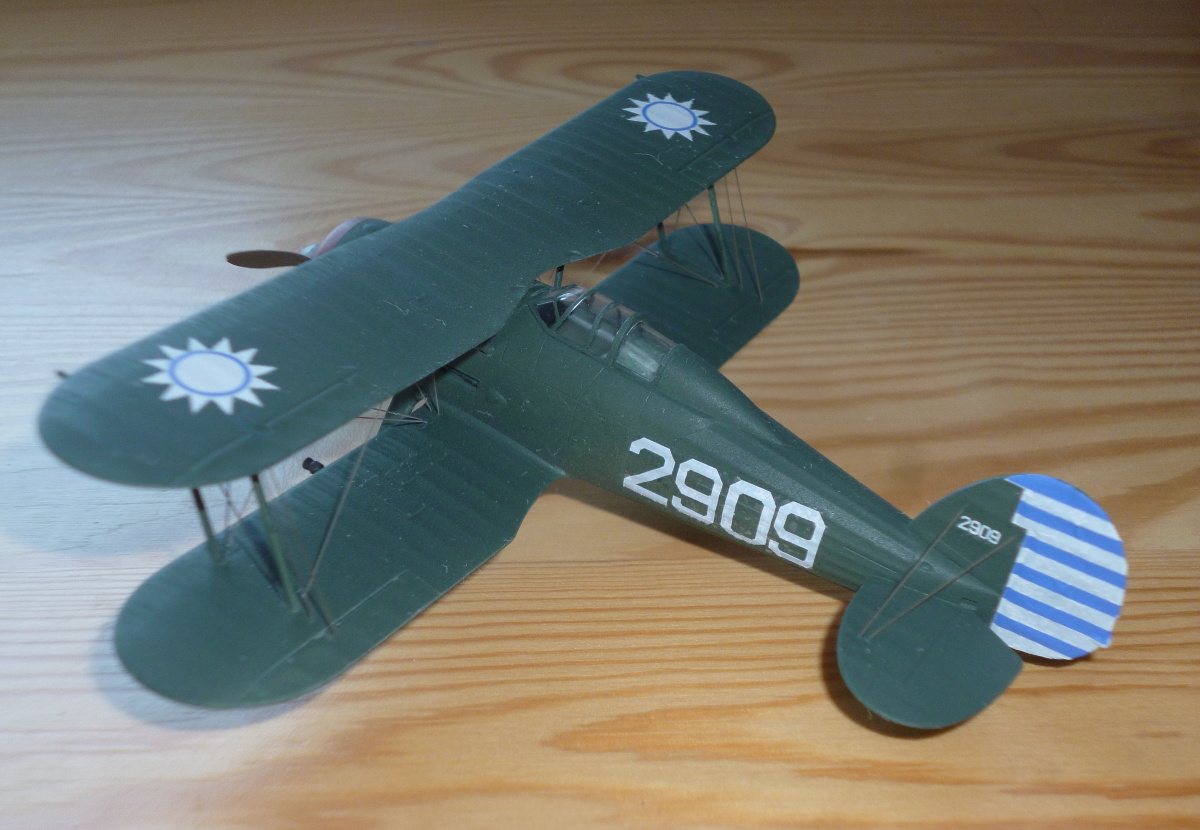
Well folks, here she is, ready to duke it out with imperialist Japs,
communist bandits, or anything else that might get uppity..
|
|
|
Finishing materials:
MM white primer overallHu30 Dark Green (acrylic) overall
MM1561 Glosscoat overall
MicroSol
MM2015 flat clear lacquer overall