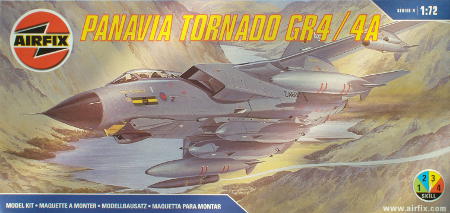
Dambuster group build Tornado GR4
This is the kit that, for me at least, started the whole Dambuster group build.
It was sitting in the stash, and when I read about the GB, I figured one RAF Tornado
was as good as any other, so I might as well build it as a 617sqn plane. Things rapidly
got out of hand from there; on the one hand a bunch of other planes were quickly added
to the 'to do' list, and on the other, I took a good, long look at this kit and decided
some drastic measures involving after market bits were definitely called for.
The kit as it stands is certainly not a bad kit for it's age, but it was first brought
out in 1975, and this shows. Surface detail consists of very scribbly raised panel lines,
which may or may not be accurate, the wheel wells are completely bare, and the cockpit,
though very detailed for those day, isn't up to scratch either. I will consider all of this
perfectly acceptable when I build the other, similar kit, in prototype markings straight
out of the original issue (I think) boxing, but for a later edition of a later Tornado, I'm
a bit more fussy.
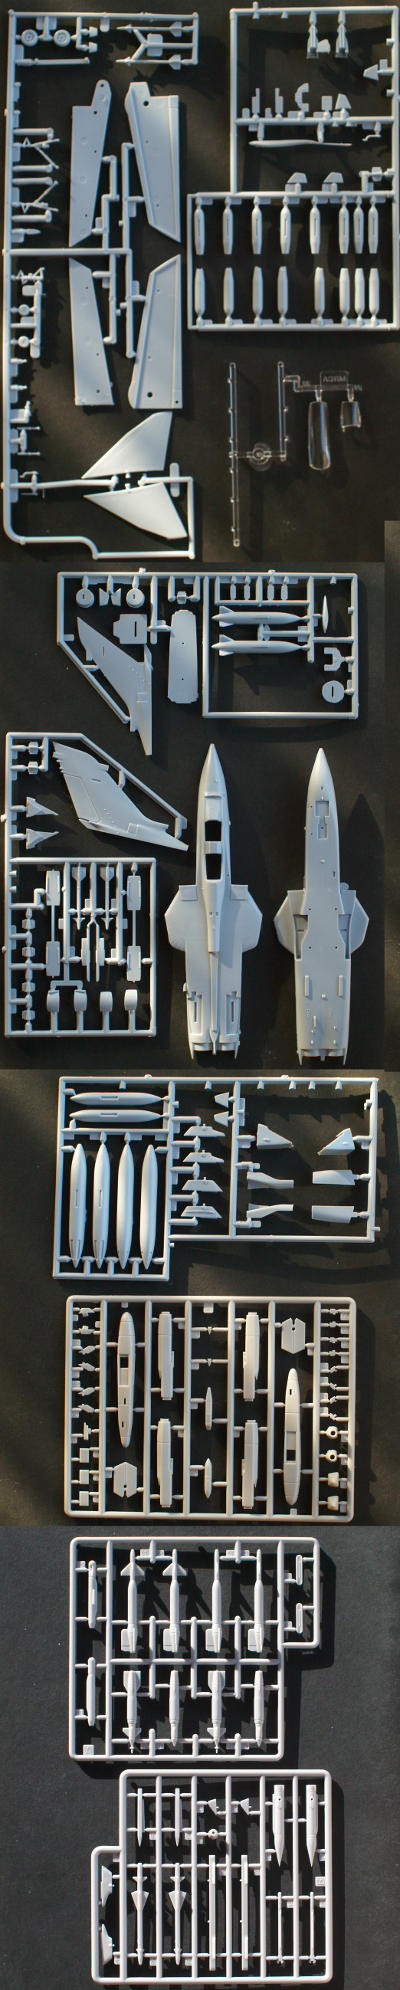
As said, this is a later issue of the same basic kit. The blue-gray parts on the characteristic
hexagonal sprues are almost identical to the 1975 issue, with some of the 'things under wings'
changed. Oddly, the sprue with the wings appears more like a Heller part. Then, there's the
light grey sprues with mostly weapons. These are clearly of a much more recent vintage, typical
(to my eyes at least) of the half hearted attempts to update their kits with Chinese parts
just before the company went broke. Even out of the box, this kit is a hybrid of three generations
of Airfix history. To this mish-mash, I'll be adding Aires resin wheel wells, and photo etch,
resin and cast metal from the Flightpath Tornado update set. And of course paint, glue, filler,
blood, sweat, tears, and a dollop of foul language...
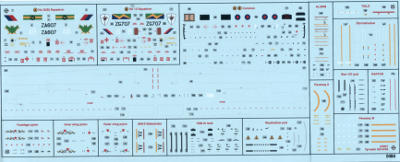
The decals included with the kit appear to be perfectly adequate, although no 617 markings were
included (which is fine, they never promised anything of the sort). Xtradecal has a sheet with
several though, so that's sorted.
The Flightpath cockpit parts are geared towards the Hasegawa kit. The first step in building this kit will involve some serious study to see if they can be made to work with the Airfix parts, or if I'll be making a copy of the innards of a Hasegawa to attach the Flightpath bits to. In parallel, I'll be having a fight with the wheel well replacements, which are also intended for a Hasegawa kit, and may well have a rather strong opinion about being fitted to an Airfix.
2013-04-28
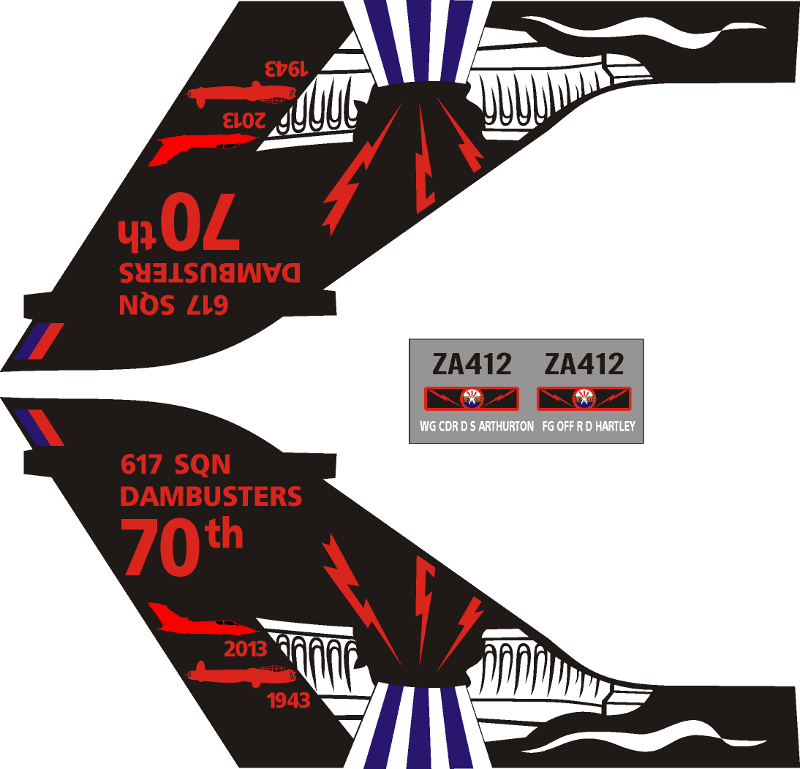
One of the other participants dug up
a set of pictures of the brand new commemorative tail art on a 617 squaron Tornado. This was too
good not to take a shot at, so I spent most of the day drawing decals.
I also finished diggout out and replacing the wheel wells. Looks a whole lot better than the completely bare wells from the kit. The front one is going to need some work; the Airfix wheel well was just over a mm longer than any of the others, so I'll have to fix that gap.
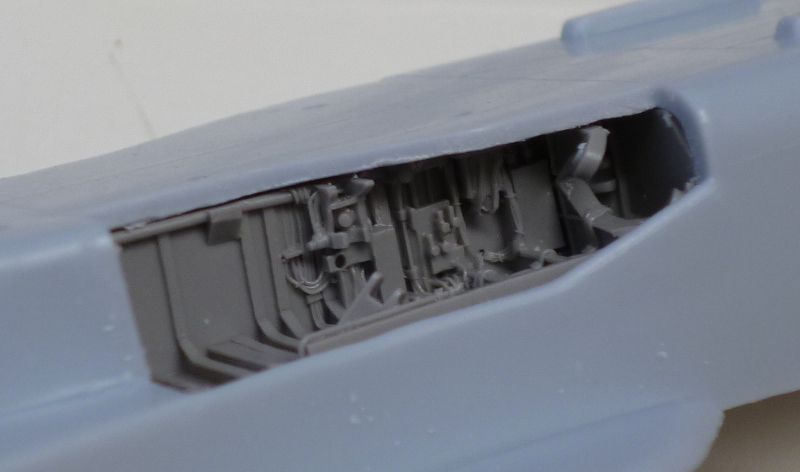
I also assembled the cockpit 'tub'. Quite detailed for 1975, but I think a bit of etch may improve these, and the little console boxes really need to be integrated into a single more tub-like affair. Not today, though...
2013-04-29
Some change of plans has been called for. The canopy on the Airfix kit appers to consist of the transparent
parts only, as opposed to the transparent parts (perspex?) plus frame on just about any other kit. Unless
one intends to cut the frame from the upper fuselage part, opening the canopy is out. I'm not quite that
crazy, especially after a Hasegawa Vigilante tought me just what a horrible amount of work it is to do that properly.
In short, this one will have a closed canopy. There's not much point in AMSing the interior when there's no way to
look at it, so I'll be saving the aftermarket bits for a kit that will allow me to do them more justice (there's a
Hasegawa kit with Marineflieger decals beconing). I'll probably steal the ejection seats from there, and fill up
the visible parts of the cockpit with unidentifiable boxes and pilots.
2013-04-30
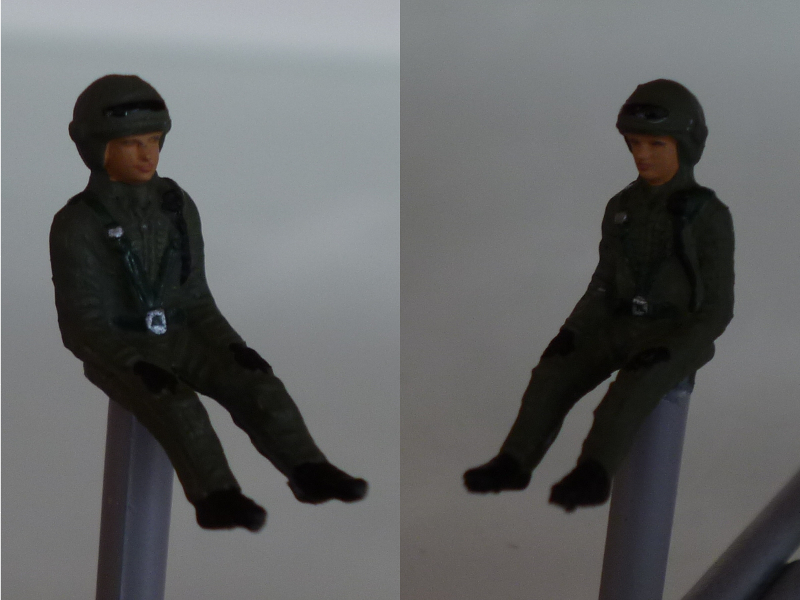
Cleaned up and primed the pilots. Nicked seats for them while their Marineflieger collegues weren't watching, and
assembled those. Filed the tail into shape, sloshed filler over the gaps in the wings, ditto for the Stormshadows.
Small scale work on the cockpit. Some cleanup and filler work on the resin stores.
I'm of two minds about what to do with the Tornado. I really want to do one with the Stormshadow missiles, to honour
617's work with cutting edge weapons (even though those weapons typically don't have cutting edges), but I also want
to do that commemorative tail artwork. Being essentially a display plane, I don't think the one with the fancy tail
is likely to carry cruise missiles often. I'm tempted to grab another Tornado from the stash, and do both, probably
at the cost of getting the Mosquito ready in time. We'll see...
2013-05-03
The connecting blobs between the consoles have been built up sufficiently, and have had slots cut into the to
accommodate the rear instrument panel. I've test fitted the Hasegawa ejection seats, and it turns out they would
stick out through the canopy. They are, of course, intended to very briefly do just that during ejection, but
that's not what I had in mind. To compensate, I removed the elevated bases on the cockpit floor, and about 1mm
from the bottom the the seats themselves. Both cockpit and seats were then primed for later painting.
I've sanded the filler on the Stormshadows and wings smooth, and fitted the airbrakes in closed position to the
upper fuselage.
In related news, I've gotten overambitious. This Tornado will be equipped with the Stormshadow missiles, and given
the markings of a Plain Jane combat machine. The fancy commemorative tail will end up on a second plane, built from
an old Revell/Italeri kit.
2013-05-05
Cockpit, such as it is, is now painted, as are the pilots and ejection seats. I expect to be closing the fuselage
next session.
2013-05-06
Not a whole lot of work today, but the kind that shows a lot of progress. I closed the fuselage halves, which of
course included adding the wings. I'll be putting pylons on he wings, so the wings have been fixed in the open position,
and this left a large and ugly gap between wings and fuselage (it was all too easy to look straight through the plane),
which I blanked off.
I chose not to put the tailplanes on yet, despite what the instructions say. Leaving them moveable was never my intention
anyway, and leaving them off will make it much easier to work on that big nasty seam that runs the length of the fuselage.
Easy enough to add the tailplanes later. The tail also went on today.
2013-05-10
Like the Lancaster, coarse construction is nearing completion. One more good sanding session, and it should look like a
Tornado, after which the various external bumps and bits can be added, and the cockpit filled and closed. Also spent
quite some time on the things under wings. The Flightpath set provides beautiful stores, but they do take some work.
Since I've got exactly one GR4 (or GR1 for that matter), and several planned, I made a mould for the scanner "wedges" under
the nose, and did some plaster casting, to complete several dated stash denizens.
 More general work on the Tornado has also progressed. Of the major parts, only the tail planes and air intakes remained,
and these have now been added, as have the thrust reversers at the tail. As expected, this needed some filler. I was
initially going the leave the airbrakes untouched by filler, but the gaps are just too uneven, so I hit those as well.
Once sanded smooth, I'll see if I can restore some hint to their presence, but even if they are lost, that will look
better than the uneven gaps.
More general work on the Tornado has also progressed. Of the major parts, only the tail planes and air intakes remained,
and these have now been added, as have the thrust reversers at the tail. As expected, this needed some filler. I was
initially going the leave the airbrakes untouched by filler, but the gaps are just too uneven, so I hit those as well.
Once sanded smooth, I'll see if I can restore some hint to their presence, but even if they are lost, that will look
better than the uneven gaps.
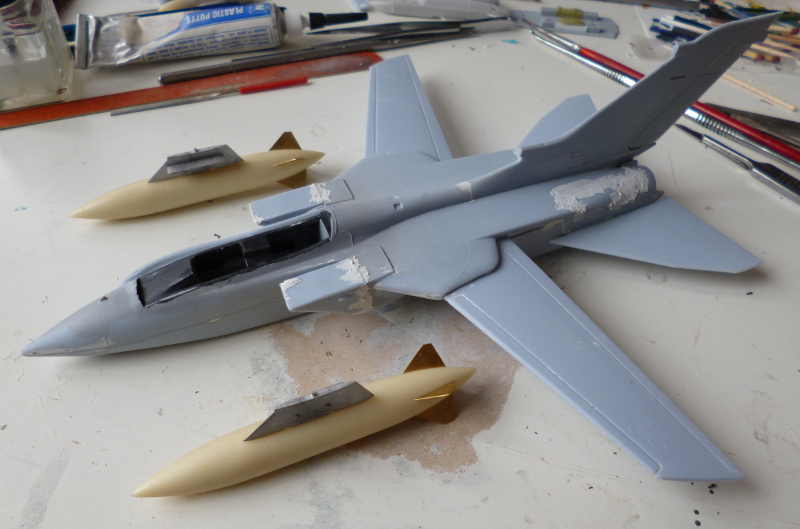
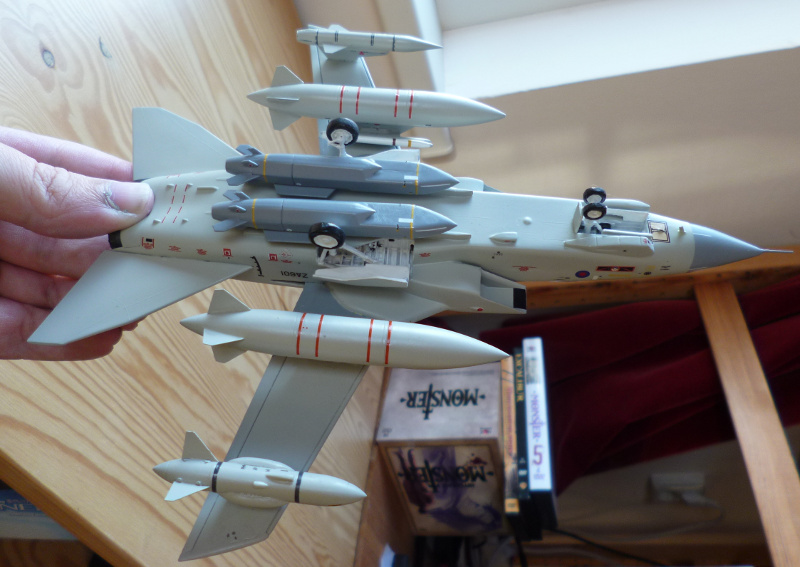
I've started assembling the things under wings, starting with the inner pylons and fuel tanks from the Flightpath set.
So far, all the bits go together nicely. Note that the pylons have not been glued to the tanks yet. There just sitting
there, and despite being asymmetrical, the perfect fit between the tanks and the pylons keeps them upright.
2013-05-13
I've reached the point where all the main exterior parts are on, and I'm one last sanding session away from a thourough
cleaning, putting the appropriate bits in the cockpit, and sealing things up for a first coat of primer. Hopefully,
this won't reveal too many hidden problems..
2013-05-13
So, there I was, all ready to start a second wave on Tornados. Had some interior work done on an old Revell kit,
everything seemed good, until I got to the wings. One of them was as badly warped as Paul's. Didn't particularly
feel like wrestling that wing for weeks, so I stole whatever parts seemed useable from it, and chucked it. After
all, I had plenty of old Tornado kits in the stash.
Next up was an old Esci kit, old both in technology and actual age. This blighter turns out to have fuselage
halves of somewhat different lengths. Again, not my idea of fun to try and fix this, so out it went.
There was another Esci lurking in the stash, but of much later production. Without much hope, I checked to see
if they'd fixed the problem. You can probably guess the outcome. More junk for the trashcan.
Sometimes you're in the mood to fix a problem kit, sometime you're not, and this was definitively a "not" day.
Reduces the stash very rapidly, though..
2013-05-22
The initial coat of primer revealed no major problems, so I finished building to the point where the kit can hit
the paintshop. It looks like I got things on reasonably nicely. However, the metal nose wheel legs appears to be
too short relative to the depth of the resin well. The plane now has a noticeable nose-down posture. There little
I can do about the legs, but I'll seen how much I can still fudge by fiddling the wheels.
2013-05-23
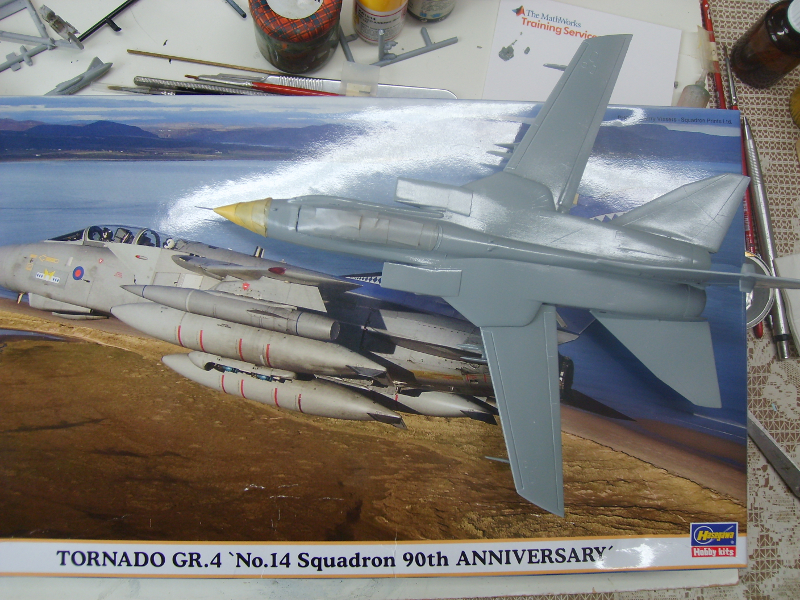
I swear Hannants has it in for me. Not being a great expert on British planes, I followed their colour callouts,
and gave the plane a nice coat of X3: "RAF Medium Sea Grey". It looked horrible. Don't get me wrong, it's a
beautiful colour, it just doesn't belong on a Tornado. For comparison, I photographed the result sitting on top
of a Hasegawa box that features a great photo of an operational GR4 as box art. Not only is the X3 far too dark
(although other references show that this is somewhat dependent on light conditions), it is also has a very strong
green component to it (more pronounced in real life than on the photo). This picture shows grey with just a hint
of dirty brown to it, while other references show a somethat darker blue-tinged grey. Whatever the truth is, X3 isn't it.
I'm beginning to see a pattern here. The Dark Earth on my Lancaster was way too green and rather too dark as well.
Also, it was a rather nice colour (in fact, I'm considering it for the green part of the wrap around camo for one
of the twins).
In any case, this wasn't going to do, so I re-painted with Humbrol 28. This has turned out just a bit too beige,
but I'm hoping a coat of varnish will add just enough gleam to make it look OK. Comparison of Humbrol 165 (also
Medium Sea Grey) with the pictures of the commemorative plane show a much better match to the darker, blue-er
references, assuming the lid and colour binder chip match the contents of the jar. I'll be using that for the
corresponding build.
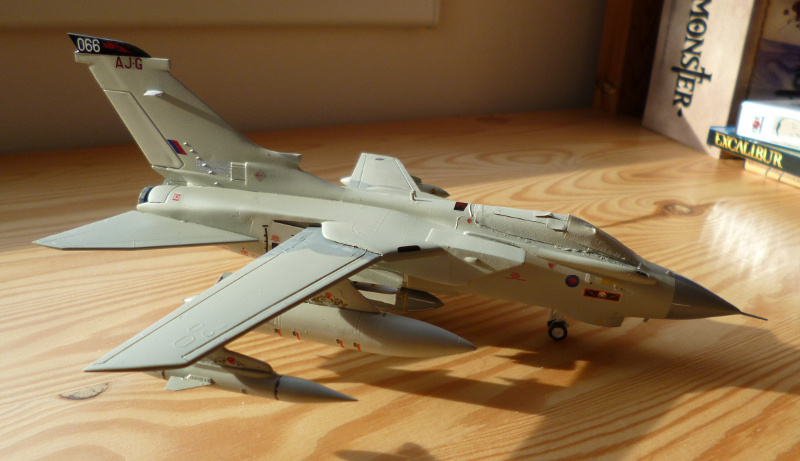
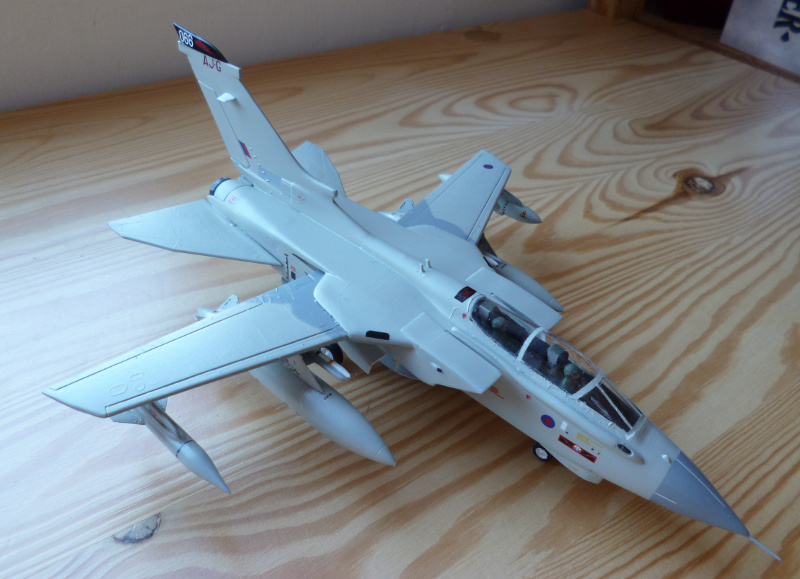
2013-05-26
The coat of varnish did the job, and the colour now closely resembles the picture. This Tornado is now in the
final phase, spot painting, decals and final assembly, and should be ready before the deadline.
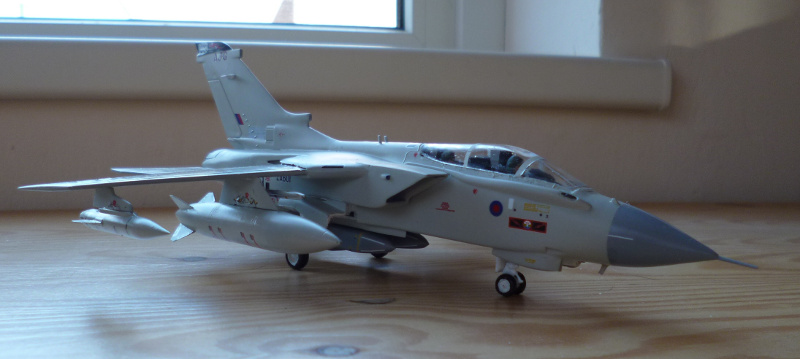
2013-05-31
I've just finished sticking on what seemed like a million decals, and that's after leaving out a bunch. The
Xtradecals and those I printed worked well, but the Airfix decals? Let's just say they'll stick to anything
except the kit. Even after having been on the kit for several hours, touching them is a sure way to have them
jump over onto your fingers. I really, really hate that decal sheet now..
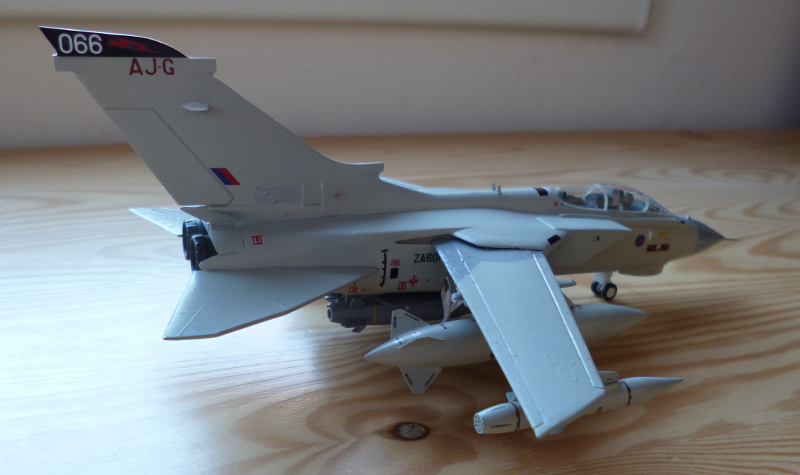
2013-05-31
The varnish went on relatively smoothly: only one decal tried to jump ship.
I think I may have been overly harsh to Airfix with respect to the decal. The escapee was one of the
Xtradecal decals, and those have always behaved perfectly in the past. It may be that the intermediate
varnish I used is just not very decal friendly. Next time, I'll stick to Tamiya gloss for this.
|
|
|
|
Finishing materials:
Motip primer overallX003 overall (bad colour)
Hu28
50/25/25 Sylvacryl/water/alcohol with Talens retarder decal base
Microsol and Daco medium decal solvent
50/25/25 Sylvacryl/water/alcohol with Talens retarder finish