
Dark Fire Designs Z-95 Headhunter
Project start 2024-05-21
I've always had a bit of a soft spot for the Z-95 Headhunter from the Star Wars franchise. A forerunner
of the more famous X-wing, and a contemporary of the elderly Y-wing, it doesn't get much attention in
the movies, but this is a large franchise..
The Headhunter is also quite hard to find; to the best of my knowledge there are no models of it other
than those intended for use a game pieces. Times are changing though, and odd scales have very little
meaning when 3D printers enter the picture.
Although they've stuck a different name on it,
this is most certainly the Headhunter
There aren't all that many parts to deal with. Depending on you needs, scale, and printer capabilities,
you can choose to have the main hull as a single piece, or up to three segments. I figured I could do
without a join just behind the cockpit, but left the nose cone off to better hide the escape holes needed
to hollow out the main bulk.
In addition to the parts shown, there are also a standing and a seated pilot, with two different heads
(which become absurdly small when scaled down to 1/72), and a display base, which I'll ignore.
Dry fitting shows good fit of the parts, with only a bit of filler likely to be needed. Cleaning up the
bottom of the fuselage, where all the supports for printing were, turned out to be relatively low effort,
which was quite a relief. Cleaning off support stubble, occasionally growing into molehills, is not my favourite passtime.
The canopy was printed at extremely low layer thickness (and speed) and is sufficient, if not perfect,
with no further postprocessing than a coat of varnish. This is one of the reasons why I'm gratefull for
the well behaved parts; I want to show off the canopy the club meet next Sunday, and I would much prefer
to take a complete model than just a canopy.
2024-05-22
Well, I did mention that the part count was low, and fit good. Main construction is done.
I glued up the various bits, but with exception of the forward gear bay, this was not really necessary,
as friction would have kept everything in place anyway.
There's some minor seams that need filling. Once the glue has cured I'll whip out the Milliput and deal with them.

2024-05-25
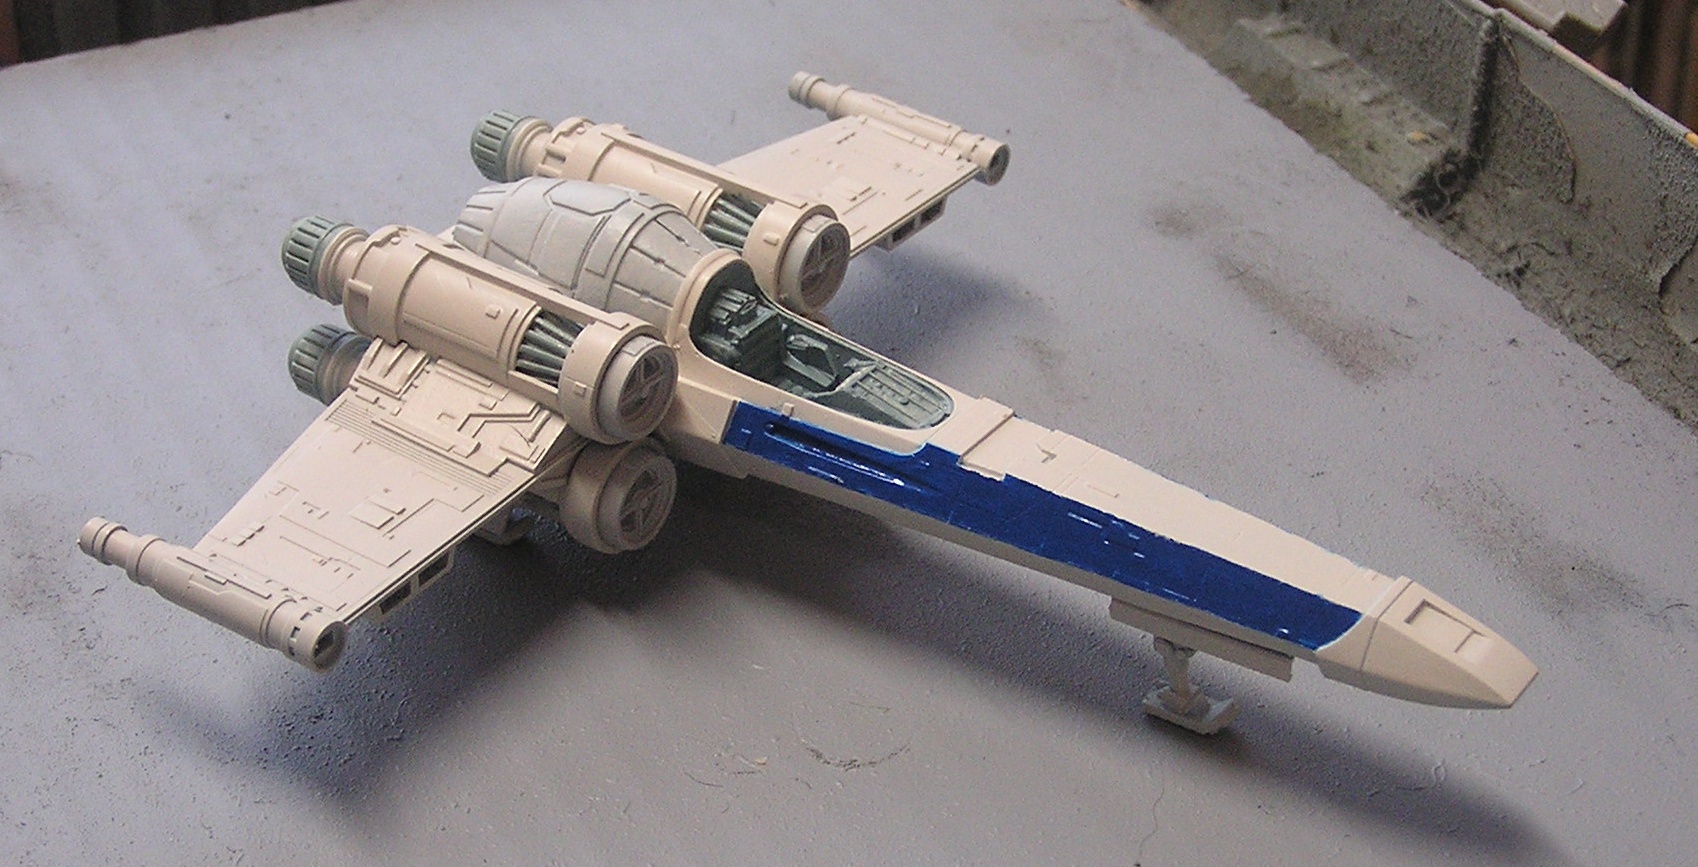
Well, getting this done before tomorrow is not going to work out. Quite apart from real life happening
more insistently than planned, the paints didn't like me. I'd put on a nice even coat of blue, but
hadn't worried all that much about overspray. Then masked as usual, and put on the white/light grey.
Which ran under the tape, and flat out refused to get into many deeper spots, neccesitating a few
recoats to get rid of all the blue, and manual repainting of almost all of the blue. It's not as even
a blue coat as it was (but goog enough), and looks even worse in the picture.
Still, the Headhunter is beginning to show proper colours.
2024-06-06
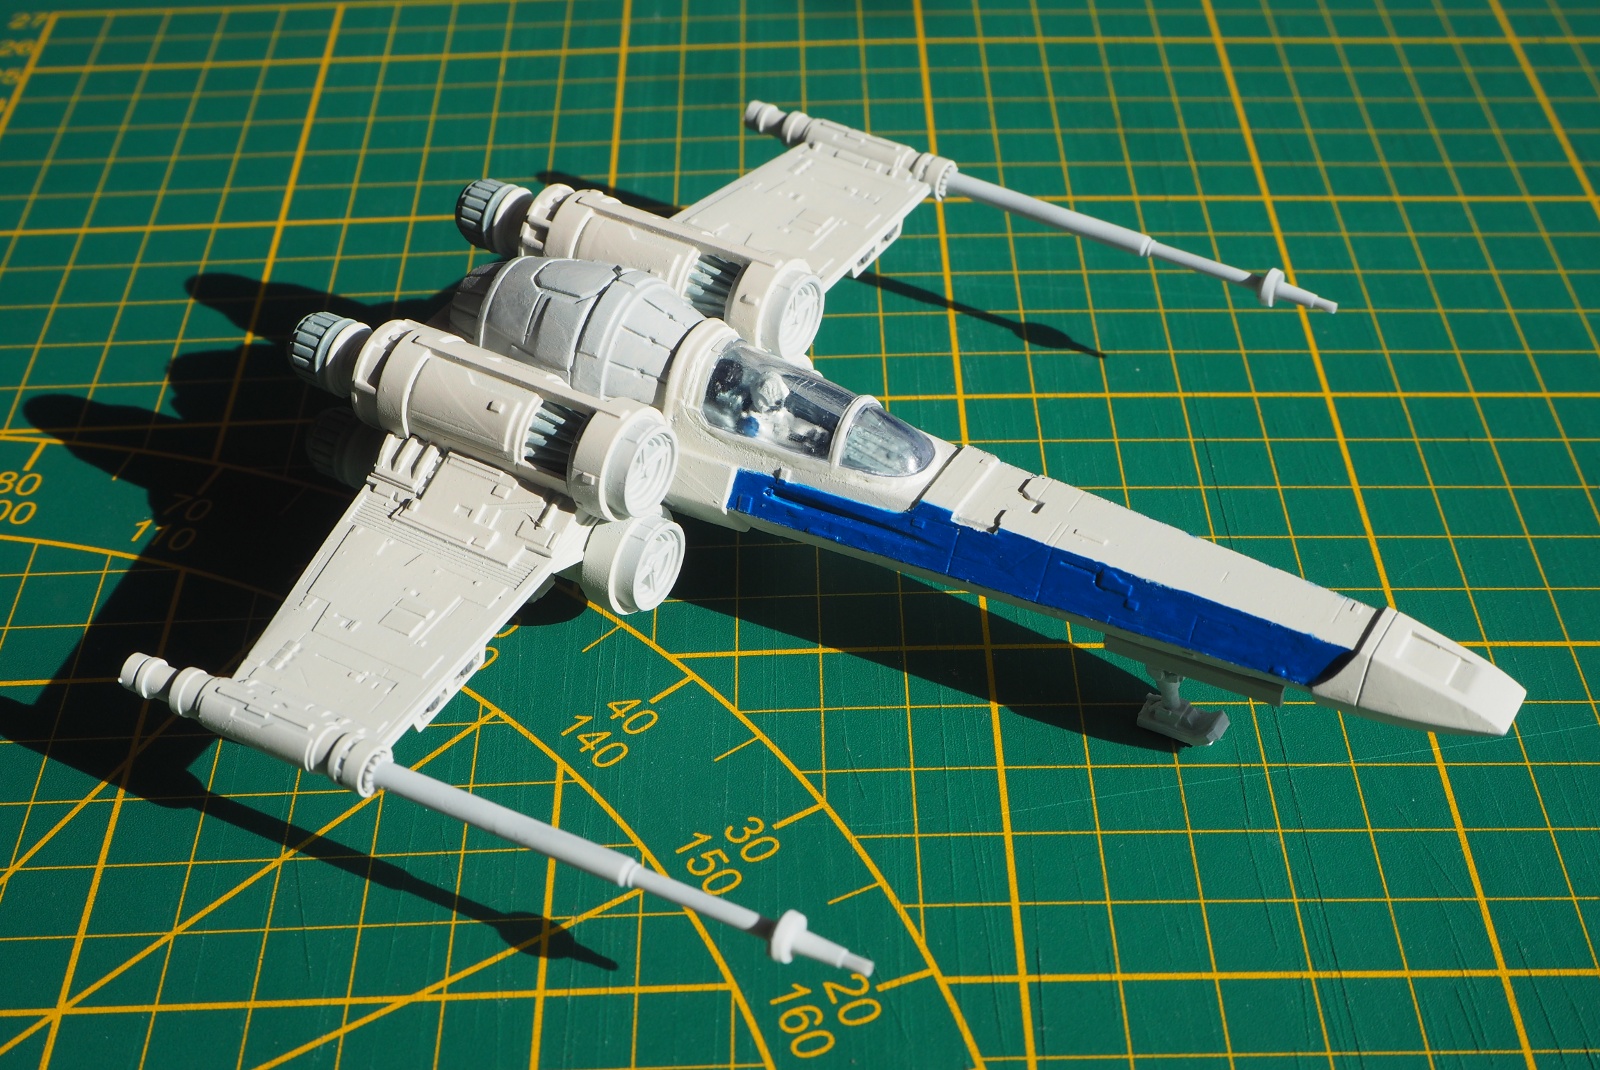
Painting is progressing on the Headhunter.
The main colour is unchanged since the previous picture, it's just the lighting conditions and shaky
white balance that cause it to appear more tan/yellow in this foto. All the additional colours some form
of (blue-)grey, some of which appear much darker by simple virtue of the fact that the rest is lighter;
the darkest colour, in the underwing boxes, is Humbrol 27 sea grey, which seems almost black.
I'm learning a bit about working with solvent based acrylics on this project. I used to have a devil
of a time brushing those, but it turns out the solution is simply a bit of MrColor Leveling Thinner or
generic acrylic retarder. Even the ultra fast, not really suitable for brush painting MrColor range,
which are essentially acrylic lacquers, become quite pleasant to work with with this little extra chemistry.
I'm not overly fond of having to use any kind of thinner that doesn't come out of a tap or the local
DIY, but given the extremely small amounts involved, I think these might get to grow on me.
2024-06-08
I've painted the interior and the pilot, and installed him in the cockpit. I was quite happy with the result,
and did in fact take some pictures of it, but the autofocus on the camera failed and gave perfectly sharp
background clutter along with totally out of focus cockpit snaps. Should have checked before proceeding..
2024-06-09
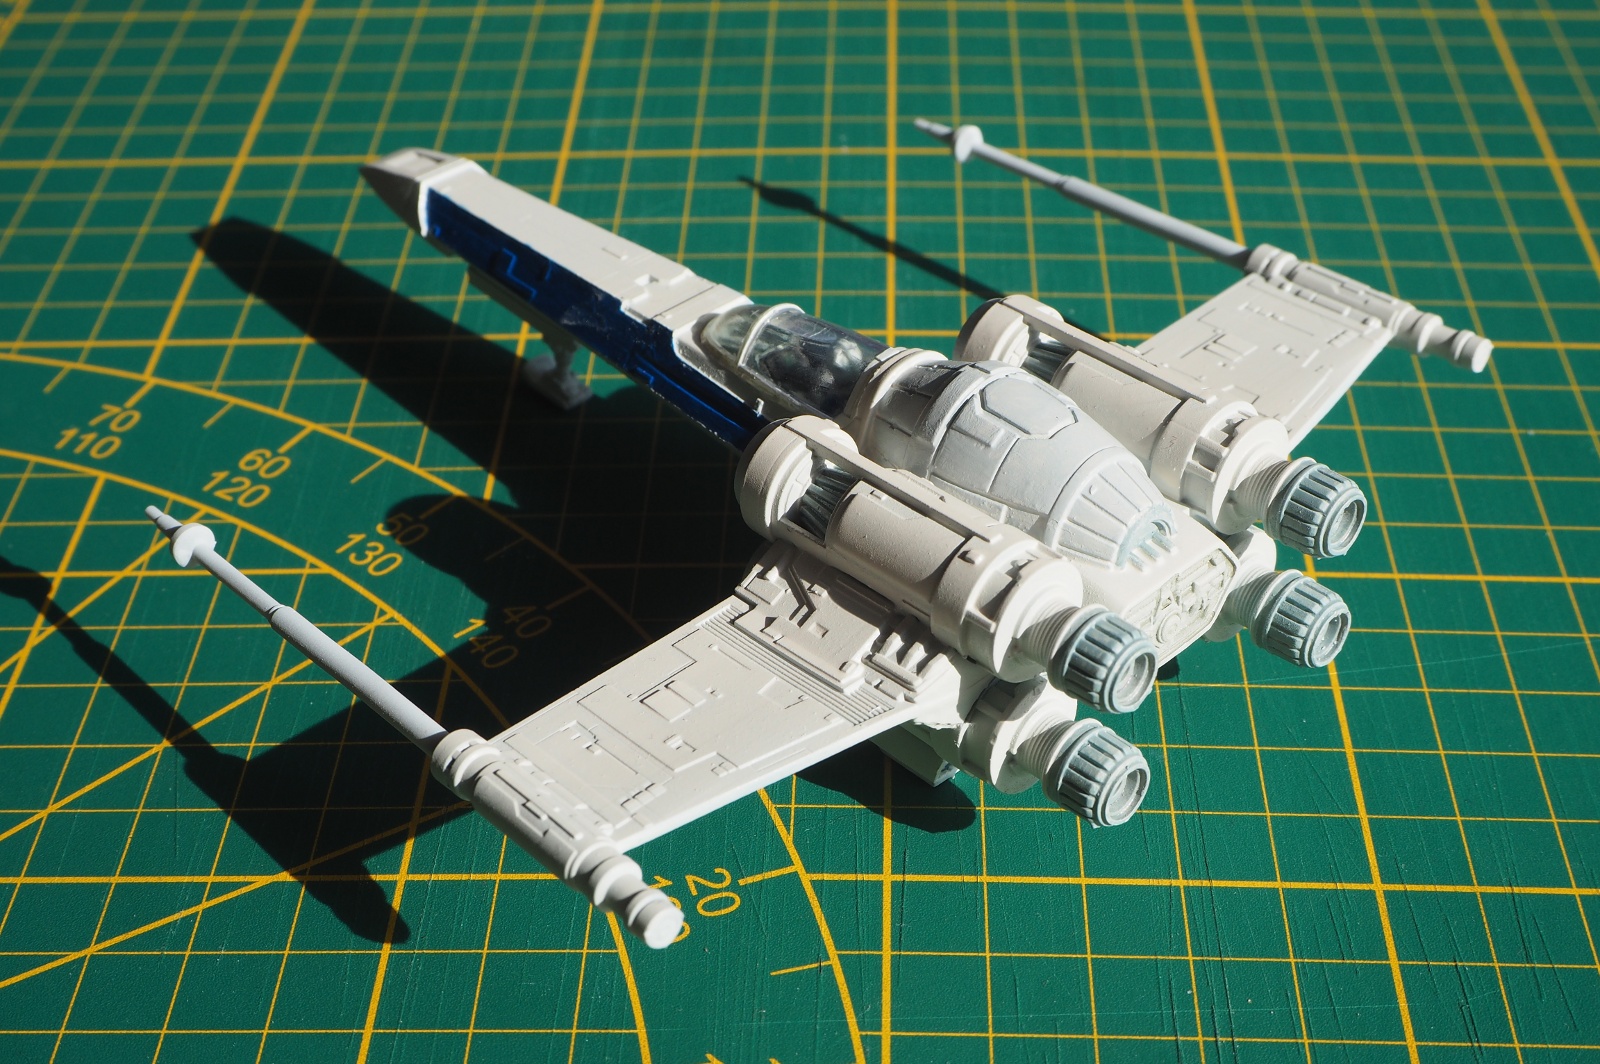
I attached the canopy with clear UV resin, just to see if that would work. It's a bit tricky to spot where
it does and does not span the inevitable gaps, but it actually works very similar to Clearfix. Except of
course that once you're happy with how and where it sits, you hit it with a UV lamp, and it cures instantly.
After that it was a matter of routine painting of the canopy frames and some minor touch up.
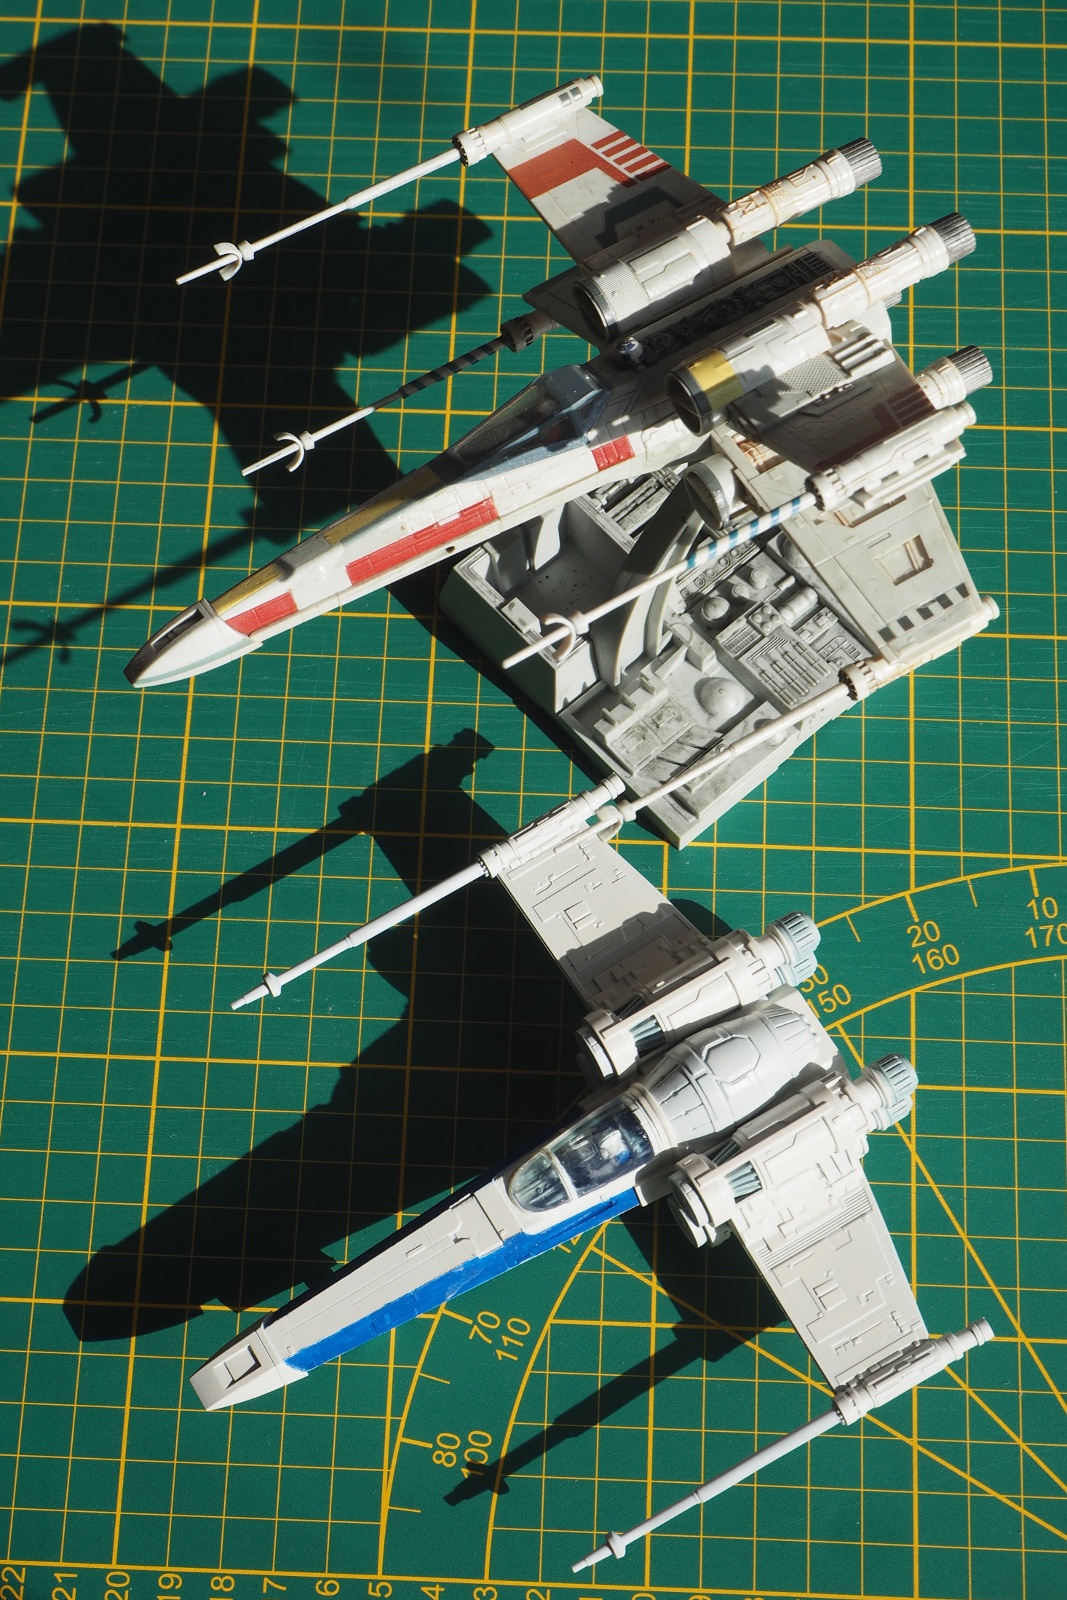
For comparison, I've added a snapshot of the Headhunter with it's more famous descendant.
|
|
|