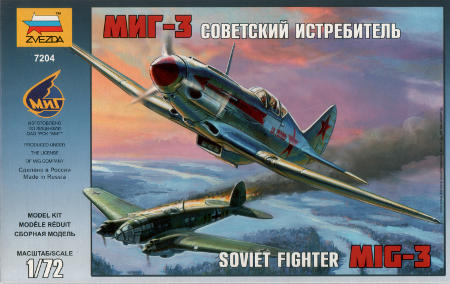
Zvezda MiG-3
Project start 2022-04-27
A few weeks ago, one of the local model shops closed the brick and mortar
part of the business, and while I'm never happy to lose such a resource,
I don't let that stop me from taking advantage of the discounts that often go with
the event. Given that my paint mule is on it's last legs, I picked up some
cheap stuff to replace it. This included a pair of Zvezda MiG-3.
Predictably, curiosity got the better of me, and I took a closer look
at the intended victims before slapping them together. The MiG-3 is
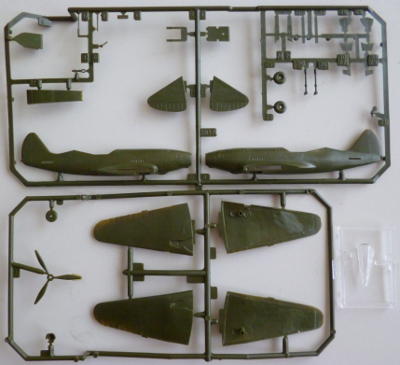
quite an old kit already, and it shows. It reminds me of the kits I
used to build as a kid in the 1970s; very basic, somewhat shaky fit
(I only realised this later of course), but presumably decent shape.
That's hardly a compliment for a kit on the shelves today, but on the
bright side, even without any discounts, at 6 euro it's also at the
price point of the 1970s. Great stuff for a beginning modeller, and
just good enough that I decided to a least take a shot at one of them;
if I ran into more trouble that this subject (which I'm completely
uninterested in) is worth, I'd still have a paint mule, albeit with
a bit more effort.
By the end of the day, I'd gotten to the point where the fuselage
was closed up. There's not a lot going on on the inside, but Zvezda
did construct the innards in such a way that things are easy to line
up correctly. Except for the control stick that is; the seat blocks
the hole it's supposed to be installed in, so for once I'll have
an airplane on the shelves without control stick on purpose (I have
a problematic habit of either losing or forgetting them). Neither the
fuselage halves, nor the panel lines on them line up correctly, but
I have filler and a willingsness to forgive a belated 1970s kit some
transgressions.
2022-04-28
Whoever thought a straight radiator housing can align with a curved
fuselage needs a few knocks on the noggin. More filler required to fudge
things. The wing parts lined up nicely, but the join to the fuselage
is yet another customer for the filler jar. Rather clumsily, the part of
the starboard wheel well that is molded as part of the fuselage sits
about 0.5mm deeper than the part in the wing, so I filled the difference
with a piece of scrap plastic sheet. The port wheel well lines up nicely,
although not unexpectedly, both are completely bare, and entirely too
shallow to accomodate the undercarriage.
Despite all these grumblings, it's actually a rather nice little model
for a weekend project.

2022-04-29
The folks at Zvezda clearly hadn't figured out the difference between straight
and curved at the time they cut the moulds for this one. The exhaust
stacks and whatever the inlet-like things below them are, are completly
straight, and have to be bent into shape to conform to the curved fuselage.
Luckily, they are thin enough to bent under pressure, and some fast curing
cement did the rest. Oh, and nothing but some panel lines to align them with,
of course.

2022-04-30
Some more fiddling had the model ready for the paintshop. Partially unintentionally,
the model has started earning it's upkeep as a paint mule after all.
I had some left over Gunze 20 (I guess it's laquer, but all I know for sure
is that it isn't acrylic) that I was planning to use as a base coat, and
while I'd had technically good results with this type of paint before, I'm not
exactly fond of having to use cellulose thinners to reduce it; the smell is just
nasty, in a "doesn't just stink but will rot your brain" sort of way. Since
thinners are in large part made up of acetone, I decided to see if I could
use that as a reducer. I think the test was successful, except for one minor
complication. It seems Gunze doesn't appreciate being slapped on as
"a good wet coat of paint". I'd ended up with a grainy surface on an earlier
test, but assumed this was due to a worn out paint mule with a bad surface.
Looks like it wasn't.
Once the paint is cured, some sandpaper will have to restore sanity.
2022-04-30
Now this is interesting.. I didn't even need sandpaper to clear the 'sand',
just an old toothbrush, or even my big fat fingers.
That got me thinking that perhaps the paint was pretty much dry by the time
it arrived on the model, and that would imply the solvents used were entirely
too volatile. So, looking for something slower, I mixed up a batch with IPA
instead of thinner or acetone. To my pleasant surprise, it actually worked pretty well.
Still no idea what Gunze paints are, but apart from white spirits (which
cause the paint to shift and separate), it appears quite tolerant with respect to thinners.
2022-04-30
Once more, I couldn't resist experimentation; I got some antique Humbrol Authentic
"underside blue" as part of a batch of paint I bought a while back, which is
supposedly is just the thing for the undersides of Soviet WWII aircraft. I'm
not burning through irreplacable paint for this one, so I mixed up something
from Humbrol 15 (very dark gloss blue, old paint and not nearly opaque enough)
and 44 (pastel blue, which looks for all I can determine just like middle grey,
and was thus rejected for duty on a Flanker). I ended up with a ridiculously
small amount of blue and almost a whole jar of grey, and the blue still seems
to dominate, but it seems close enough to the theoretical colour. Time will tell..

2022-05-01
It's a good thing no two photos or drawings seem to be able to agree on the
correct colour for the bottom side of these machines; while it will probably
frustrate the heck out of anyone looking for the perfect paint job, for a
"lets just have some fun with this" build it means I can almost get away with
murder where the colour is concerned. Good thing too, because I'm pretty certain
the colour I mixed up is too dark. Still, I like it, and since it's my kit,
I'll build it any way I want..
The colour plate/back of the box shows a tan and very dark green camo pattern.
I'll probably be using some leftover USAF SEA scheme paint for that. Probably
also incorrect, but it will do given the amount of uncertainty, inconsistency,
and fading this era is afflicted with.
2022-05-07
The tan I'd originally intended to use seemed much too dark, so I substituted
"Radome Tan" for it. Once that was dry, I freehanded US Dark Green camo over it,
plus a light mist over the lot, since the box art seemed to imply something like
that. Didn't come out all that bad.

2022-05-14
I managed to get the usual post-airbrush paintwork done in time, but starting
this Monday, part of my home, including the modelling cove, was invaded by
a building crew doing unspeakable things to my old bathroom with the intent
of putting in a new one. Needless to say model building activity ground
to a halt at that point. Only today did I get around to digging out the MiG
for the finishing touches.
Somewhere along the line, I slapped the second one together as a piant mule, as per original intent. Half the parts were left off, and the 'undercarriage' was replaced with something more sturdy.
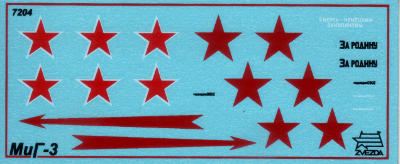
The decals weren't the greatest I've ever worked with, being a bit stubborn about coming off the backing, noticably out of register, and impervious to microsol. 1970s kit from start to finish. Still, it was a fun little build, and to me, it looks the part. No doubt half a million things will need improvements for anyone set on getting the best MiG-3 possible, but I'm not convinced the competing toolings are much better, just different.

|

|