Airfix Red Arrows Hawk
2011-06-10 Project start
This kit represents the first of the new airfix kits I'll be working on, so more that just
a kit, it is also a testdrive for the entire line. I had seen a few of these kits earlier,
and so far, work on this kit confirms what those hands-off encounters suggested. Airfix
have not tried to become the next Tamigawa, but have remained true to their original premise,
that is, kits that are simple, and above all cheap, enough to appeal to younger modelers on
a budget, while maintaining a level of quality that might not astonish, but will keep more
experienced modelers pleasantly occupied with building. Whether that is commercially viable
remains to be seen, but I for one like it.
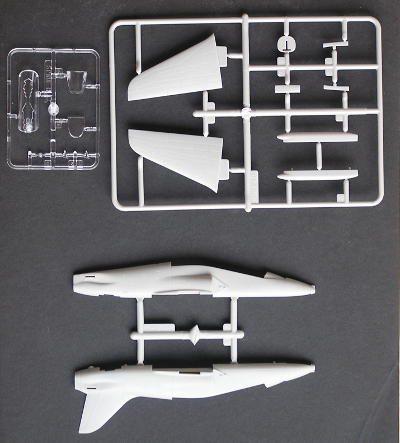
In keeping with these apparent criteria, the kit so far seems basic, but adequate. Fit so
far seems to be good, although the intakes for example needed a spot of filler, but then,
I've had to use filler on the far more refined Italeri kit in much the same spots. There's
an interesting construction for the nose wheel. Rather than seating the leg into a socket
in the wheel well, the leg attaches to the forward cockpit bulkhead. This means the leg will
installed during most of the building process, something I'm not too fond of, but it also
appears to be a sturdier way on mounting it, and easier to get straight. If this kit is
indeed aimed at younger modellers. I think it's a good idea. Also in keeping with their
earlier releases, this kit has crew figures, something which is sadly missing from most kits
of the more prestigeous brands. Maybe someone should explain to all those others that without
the control systems installed, none of these planes are worth anything in real life.
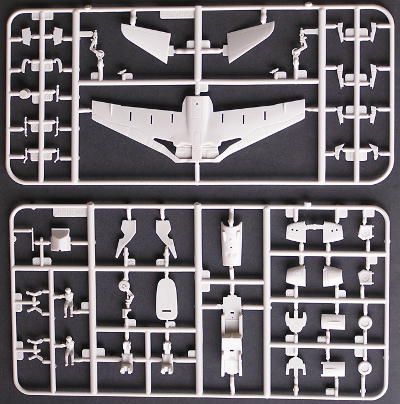
Less pleasant is that the kit is somewhat crudely executed. I have some suspicions I know where
the dreaded Matchbox Trenchdigger went after that brand collapsed, although he seems to have
learned some restraint. Worse, the gates between the sprues and the parts are on occasion
ridiculously large, which may lead to damaged parts.
2011-06-13
At this time, some basic assembly has taken place; the smoke pod, intakes, and cockpit
bulkheads have been put together, and the cockpit parts have been fixed to the right side
of the fuselage. For some reason, Airfix think I should stuff 5g of noseweight into the
nose wheel well, but that won't fit, and besides, it will be very visible. There's a perfectly
good unused space below the rear cockpit, so that's where the weight will go.
2011-10-30
More gripes I'm afraid. The kit, quite thoughtfully, comes with two sets of doors for the main
undercarriage, one set of single piece cover for building a wheels-up aircraft, and two sets of
half doors for a wheels-down configuration. Alas, 'half' in this case is an exaggeration, as the
two halves of eacht door don't add up to a complete door. Easy enough to fix, I can take a knife
to the complete doors, but why on earth make such a sloppy mistake?
The fuselage halves have by now been joined, and a bunch of smaller parts added, but some filler
remains to be sanded smooth. The wing has been assembled save for the leading edge fences, which
will only go on near the end of the assembly work. The pilots have been built up and are halfway
through painting.
2012-11-10
I've been negligent in updating this log, but that doesn't mean I haven't been working on kits.
By now, this Hawk is finished.
Construction, for the most part, went smoothly. The various parts fit together as they should, with
minimal filler required, and that only for the usual suspects. There are two notable exceptions to
this: the canopy, and the main undercarriage. I'm not entirely certain about the canopy, I might
have messed that up myself during a rather too late at night building session, but in any case, the
frame stuck out beyond the fuselage on the starbord side, and required some nervewracking work
with milliput to blend it back in, as can be seen on the picture of the built and primed plane.
The undercarriage I blame fully on the folks at Airfix. My fight with the doors, as it turned out,
was not over yet, as the doors I'd made earlier now ended up dragging along the floor when attached.
Looked totally ridiculous, so I ended up using the doors that came with the kit after all. Something's
very odd here, since the original doors are definitely too small to cover the wells, but are the only
way to make this look even remotely correct. Also, the centre part of the main wheels, which is moulded
as part of the leg, is about a millimeter too thick for the slot intended for it in the wheel itself.
Come on guys, I know you can do better than that.
On the more positive side, this is the only kit I've seen so far that includes an accurate
smoke pod. All other offerings suggest cutting off the gun barrel from the gunpod, and pretending
it's a smoke pod, but this one is nearly indistinguishable from the one that came in the Flightpath
aftermarket set. If you want to do a Red Arrow (of Saudi Hawk, for that matter) without resorting
to aftermarket sets, this is probably the only candidate. Of course, being cheaper than most
aftermarket sets, one could also argue that the best way to build a Red Arrow is to buy whatever
Hawk kit you consider best, plus this kit for the pod and decals.
Next up: paint. Overall red isn't the most challenging scheme to paint, but I did suffer a glitch
with the Extracrylics I used. For some reason, thinning it with it's dedicated thinner turned a
serious amount of paint into useless glop. A rematch with plain old alcohol worked better, except
that the deep trenches used as panel lines are apparently a problem with acrylic paint. It just
doesn't want to run into them very well. I suspect issues with surface tension are to blame. The
primer didn't have this problem, and the result looks like I did a masterfull, if somewhat exaggerated
job of pre-shading most of the plane. Funny how I keep running into issues with acrylics that never
seem to bother me with enamels. Progress isn't all it's cracked up to be.
Once I had red paint more or less all over the plane, I coated it with the one Tamiya paint I'd hate
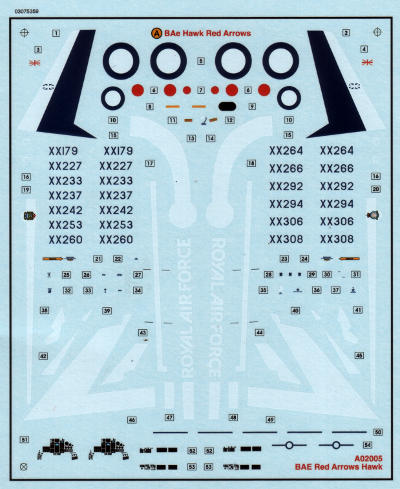
to do without, gloss varnish, and started work on the decals. The decals are very thin, which is both
excellent and very annoying. Being thin, they are also fragile, and that is a problem with the very
large and in many cases narrow markings called for by this subject. No gaps in the decals are provided
to fit around the fences on the lower wing surfaces; not uncommon, but it would have been a nice, and
easy to implement, though.
After that, adding the final itsy bitsy parts was predictably unremarkable. A final coat of gloss
varnish finished the job. I don't usually use high gloss finishes on my models, but for show birds
like this, it seems appropriate. Note the lettering being reflected on the wing, and the brilliance
of the canopy, both testament to the quality of the varnish.
I ran into some criticism over my comments about the main gear doors. That's good, criticism keeps us sharp. The picture on the right shows the gear doors from another, similar kit. The one still connected to the sprue is the closed position, single piece door, which I blackened on this side. On top of that are the two parts that make up the same door in the opened position. Judge for yourself if there is any way this is the same set of doors..