
Broken Wings: Phantom
Project start May 2017
Early last year, at a meeting of the local IPMS group, our host had several large tables covered in crates with old, worn out models (as in, one step short of being binned) which he offered for sale for parts of restauration for peanuts. I saw an opportunity to turn this into a little restauration contest, enough people took the bait, and a fair number of us went home with some wreckage, and the promise to revitalise said wreckage for a meeting roughly a year later.
I took pity on a very sad looking Revell F-4B (and a still sadly neglected Hasegawa F-14, but I'll continue to ignore/neglect the poor thing here). Today's meeting was the one sheduled for the big reveal, so the Phantom can now be shown in public.
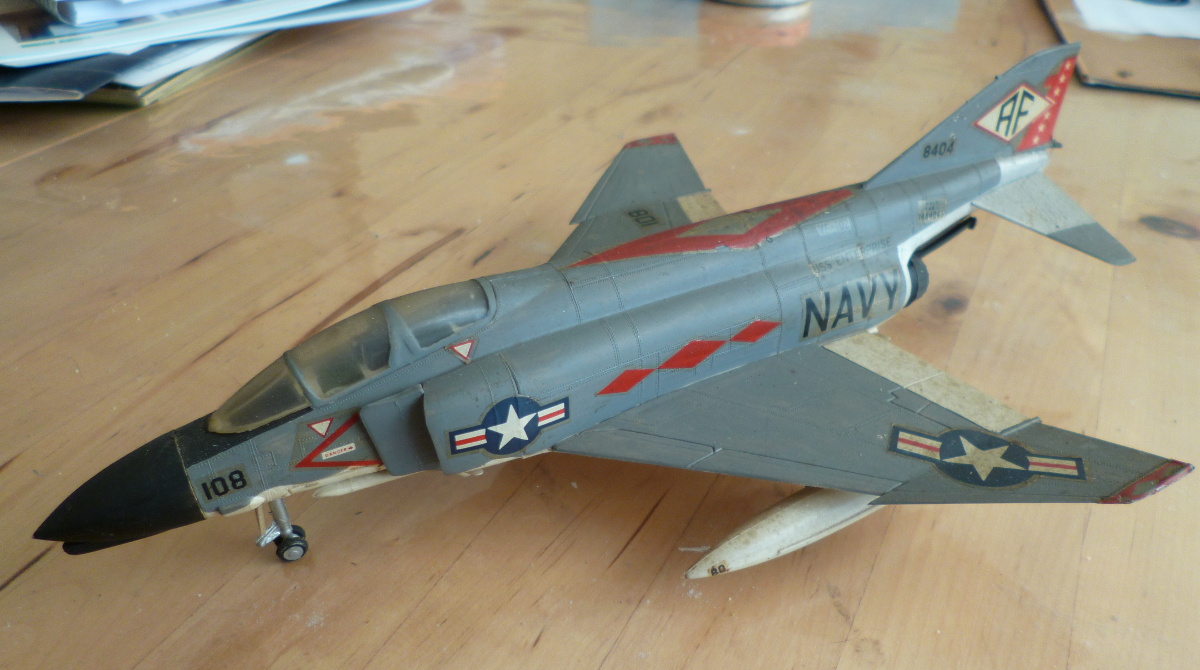
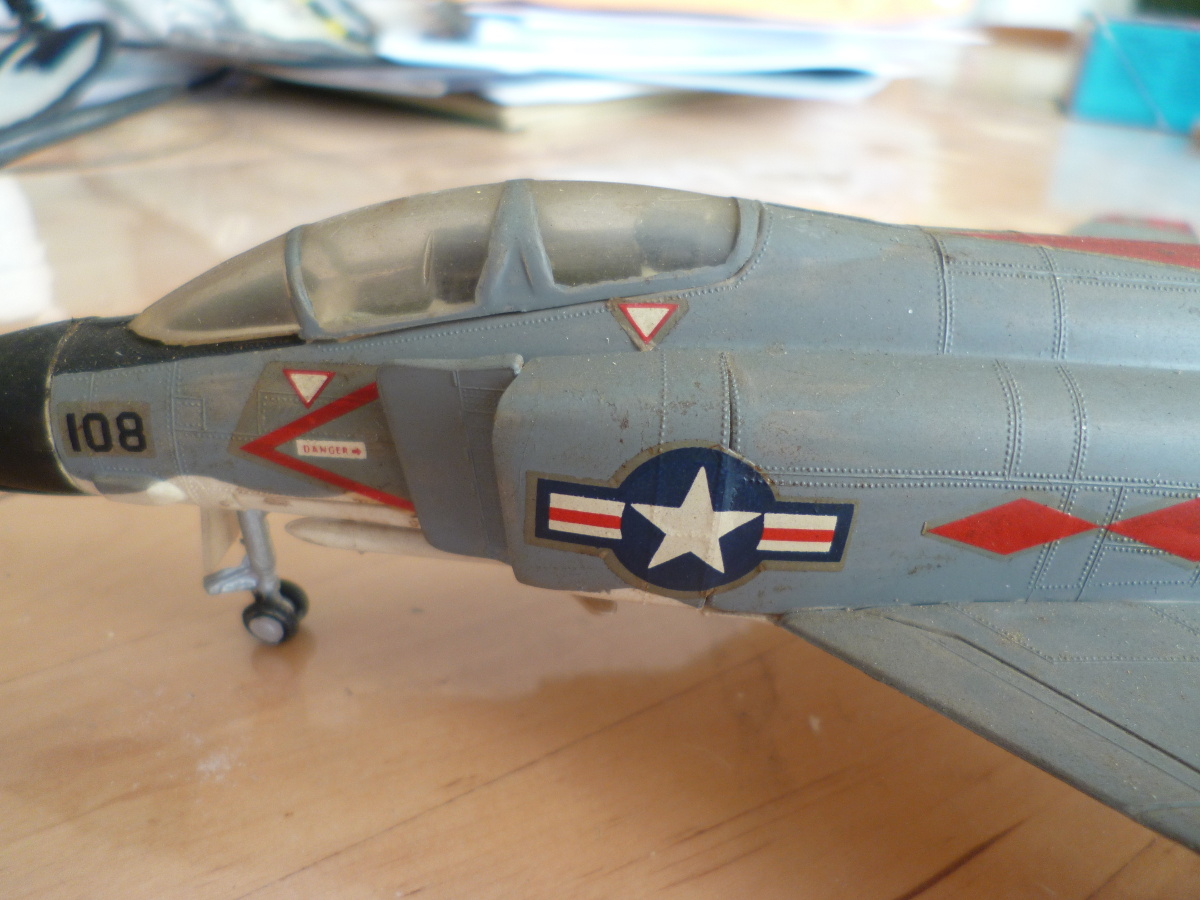
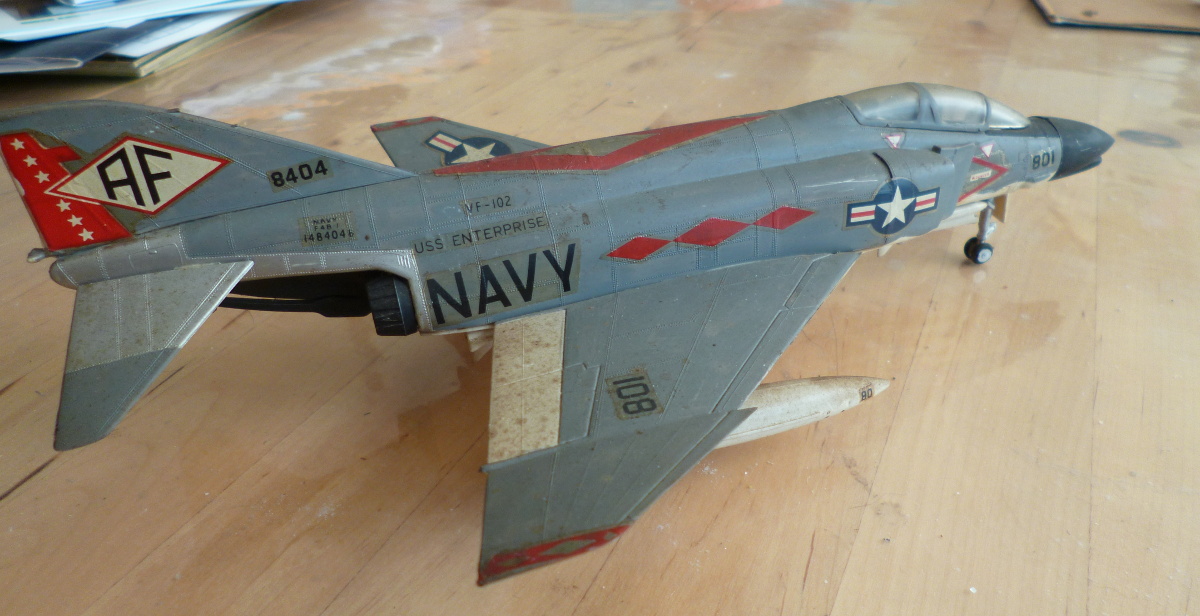
What I got home can be seen on the right.
This is the 1960s Revell rivet horror, a kit which, to my mind, had only one desirable component, which was the decal sheet for a VF-102 plane. So there I was, looking at a kit I had not only promised myself never to go near again, but also in a shoddily built up state and with years of decay on the clock. This was going to be fun..
First step in the recovery process was a bath of hot, concentrated lye with which to brute force all the paint off it. This has the additional benefit of loosening up any imperfectly glued parts, so after scrubbing off the paint and washing off the remaining lye, I gleefully ripped loose every part that would budge, and a few that wouldn't :twisted:
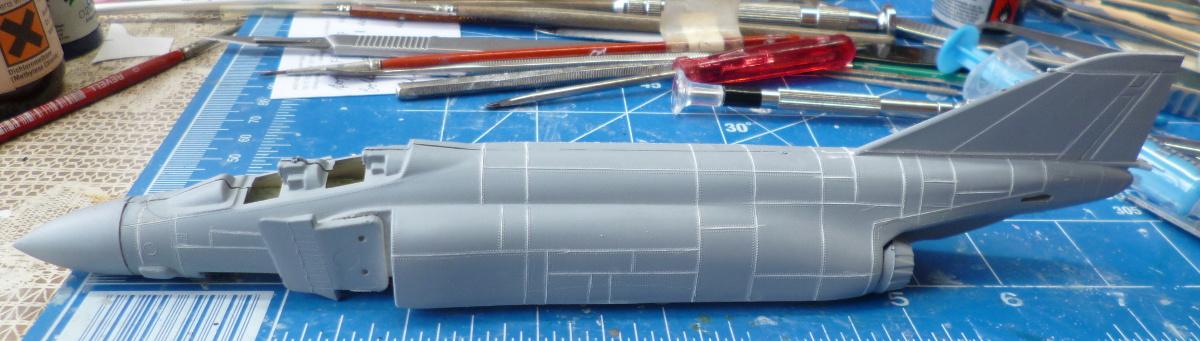
Since this kit was a write-off anyway, I decided to inflict further suffering on myself and rescribe the panel lines. Not something I'd ever done before, and I wanted to learn a bit. So for months I scraped away with pin, etched saw, diamond file and sandpaper and sunk those panel lines, removing the the mad rivetter's work in the process.
Where the lines were too vague or too much trouble for the expected result, I left them off, but most of it is there once again. No idea if they are even remotely correct, I just followed the original plastic in this.
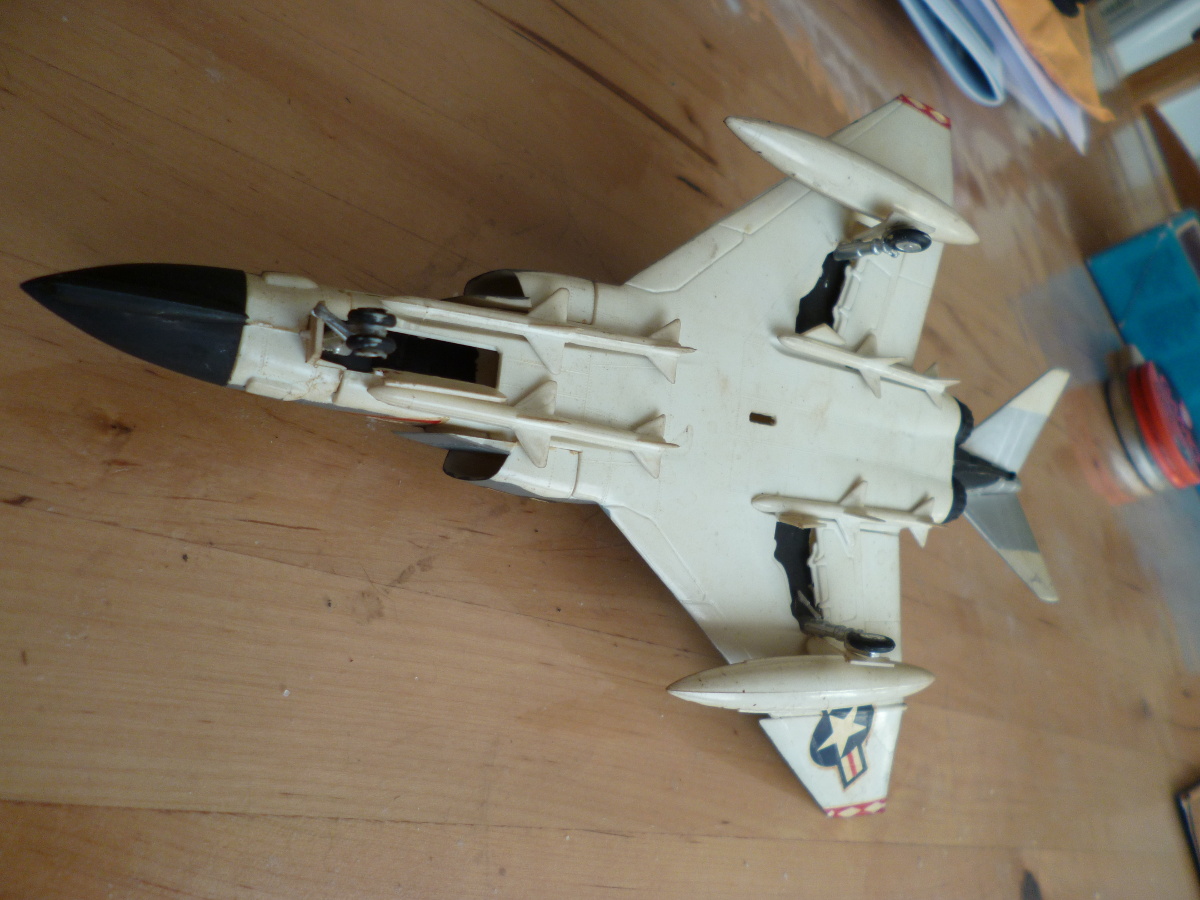
This then gave me a brand spanking new (ahem..) model kit of the F-4B to build. There were a few minor niggles with my new kit. No inner wing pylons were provided, nor was there a centreline pylon of fuel tank. There was, however, a nice gaping crater on the centreline where the display stand used to be, and I guess that counts for something. The undercarriage legs were broken off unevenly, with bits of the locator lugs remaining in the sockets. No decals remained. Access to the cockpit was impossible. Oh, and of course it was really a low detail 1960s kit..
By this time I'd already decided there was a traditional use for old, worn out airframes pulled out of the scrapheap: they get turned into drones. I will of course deny all rumours that this decision was influenced by the fact that I had quite a few copies of Hasagawa's QF-4N in the stash, and thus a glut of markings for just that type.
These drones are mostly unarmed (unless they're used for weapon systems testing), so the wing slots in the sparrow wells needed filling along with the centre crater. A centreline tank was called for, as were inboard pylons and DECM antennas for the intakes. A bit of larceny obtained these from Hasegawa and Esci spares.
I couldn't do much about the cockpit, other than close the gaping holes behind the chairs with blobs of milliput and paint the whole interior black. The undecarriage legs were drilled and pinned with Evergreen rod. The rest of the build took the expected amounts of filler and sandpaper, but was otherwise straightforward. Other than having to take some extra care with the orange (needs a fairly bright colour underneath to work well) painting was also routine.
And so, yesterday evening (I seem quite unable to avoid cutting this sort of thing danger close), I had this chap ready for presentation:
The decals were a bit shaky; the orange shore right through the white areas. I doubled up the stars-and-bars on the wing panels, but doubling up the toothy mouth at the front seemed like asking for misalignments which could turn out worse than a bit of orange shining through.
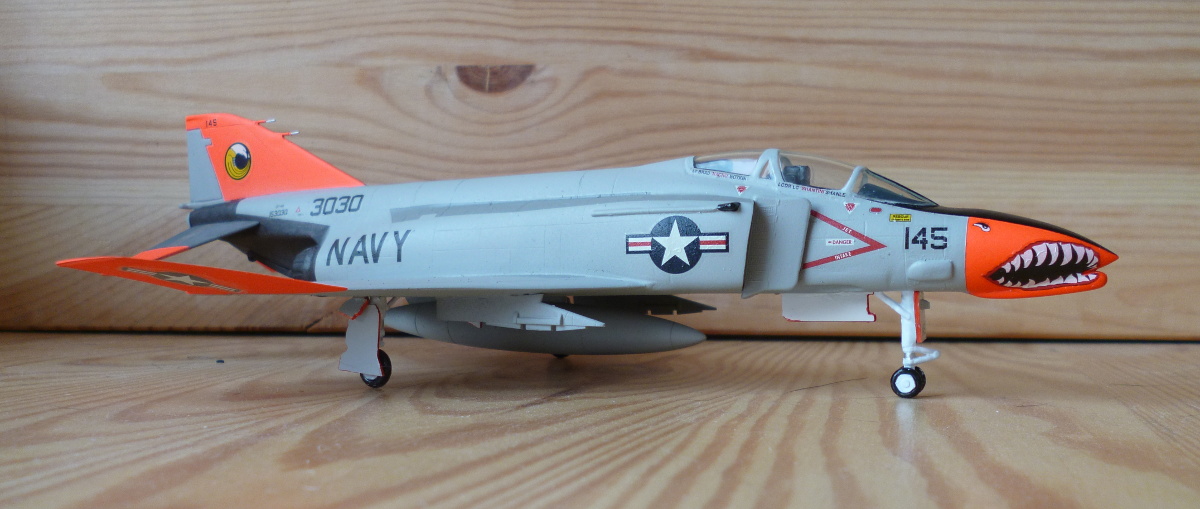
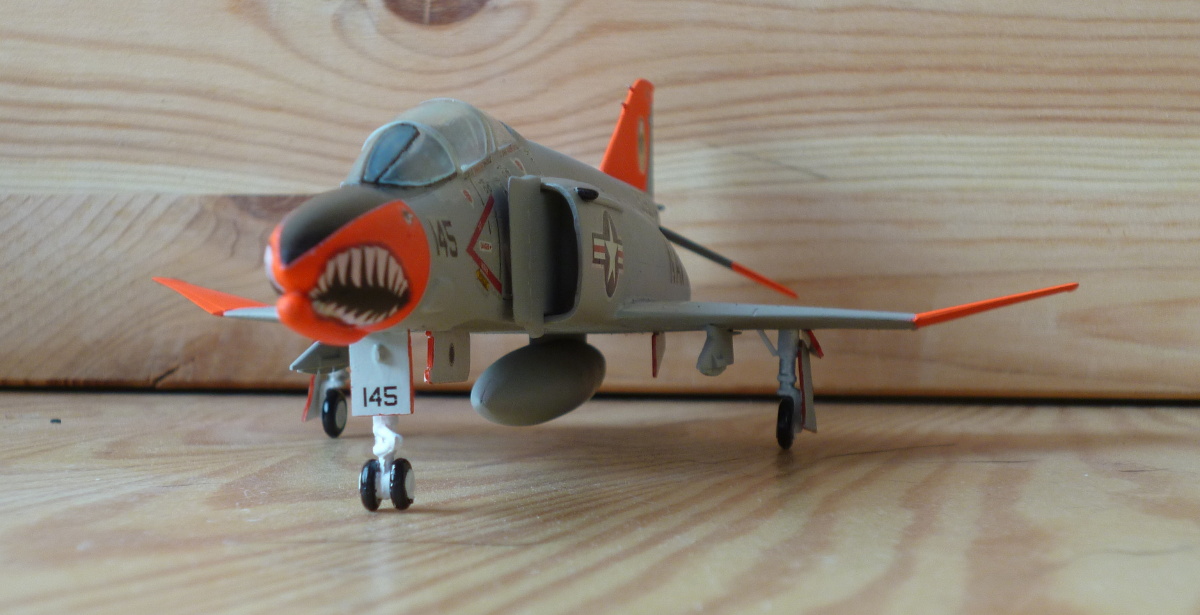
Keen observers will note that the front undercarriage door is on the wrong side. I fixed that this morning just before getting in the car to the meeting..
Finishing materials:
Motip primer overallMotip Jet Black nose
Motip White orange areas
MM2041 Fluorescent Red-Orange
Hu129 overall
Daco Medium on decals
Motip matt varnish overall