Civilian Brisfit
2003-11-02 Project start
We were setting up a short roleplaying campaign (can't have too many hobbies, only too
little time), and we figured an aircraft would be a nice thing to have for my character.
The GM wanted details, so I started digging around the web for some references to mail
her. On the way, I ran into links to a kit of this plane. I figured, why not make this
thing a lot more real by providing a 3D model, so I ordered the kit. Of course, it was
out of stock, and ended up on the backorder list. Then, I ran into another kit of the
same aircraft at the Dutch IPMS nationals, so I decided to speed things up a bit.
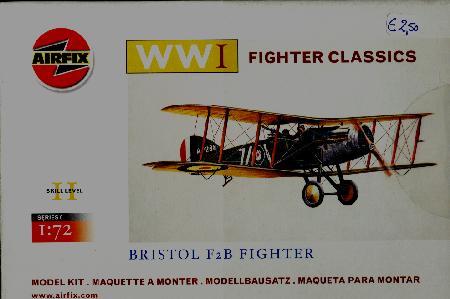
Now, I'm picking a fight with an antique Airfix Brisfit. The box might be new, but the
copyright notice inside the fuselage says 1957. The age is noticeable. For one thing,
there's no way to keep the wings in aligment, so that's going to be absolutely great
fun.
2003-11-07
Since the kit has some serious problems, I decided there was no reason not to add a
bunch of my own making. I'm doing a green and yellow sunburst paintjob on the kit,
and in my astonishing wisdom I chose to use some leftover paints for it. The yellow comes
from an old jar of Pactra paint, which is actually doing a great job. It would have
been so much nicer though, if I'd had the wits to keep some of it unthinned for touch-up
work. The green is some of the paint I've been using on the inside of my house. It
does not particularly enjoy being airbrushed, and makes sure I share the sentiment.
Aside from creeping under the masking tape like nothing I've seen before, it also
defeated my heavy handed correction of that problem by reacting unpleasantly with
the rattlecan primer I shot over the whole mess.
Wise lesson for me to keep in mind: Don't use limited availability paints unless
you have no choice, and make sure you know the characteristics of what you use
before you commit to using it.
I'll just go and sit in the corner and be embarrassed now..
2003-11-08
The upper wing has now been
stripped, reprimed, recoated with yellow, and is in the process of being recoated
with green with extreme care. I don't want to strip the entire bird, and I don't
have that exact colour in more reasonable paint, so I'm stuck with this stuff.
The masking tape just came off from the top of the upper wing. To my immense
relief, I'm looking at very crisp lines with minimal, and best of all, correctable
traces of spray under the tape. There is considerable profile on the wings, so
this is to be expected. I suppose I could rub the masking tape down real tight,
but I prefer minor corrections to ripping off bits of the masked colour along with
the tape, especially as I don't have all that much yellow left.
2003-11-23
The top wing has been joined with the
rest of the airplane, after a fierce struggle.
All of the struts are moulded separately, with nothing to keep things properly
aligned. I recognised this problem from the start, so I built jigs to keep the
wings in the correct relative position while I add the struts. In theory, that is.
In practice, the jigs failed to take into account that the top of the lower wing
isn't flat, so they don't fit all that well, and in any case, fiddling the struts
into position between two wings held loosly together by jigs and gravity is an
interesting experience I don't really care to repeat.
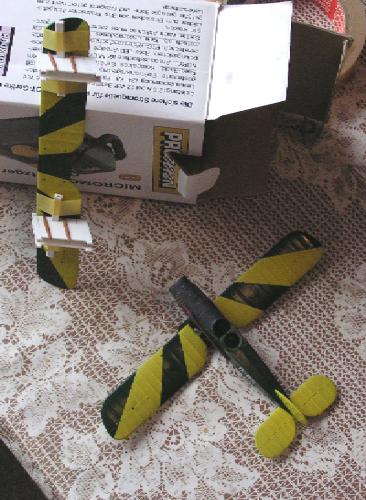
I decided those jigs were going to earn
their upkeep after all, so I taped them to the upper wing, and laid two struts
on top of each in a reasonable approximation ot their correct position,
as can be seen in the picture. There was, of course, a small amount of glue at the
ends of the struts. When I removed the jigs after the glue had set, I found that
on of the struts had become glued to the jig instead of to the wing, but three
fixed points are enough for stability, and this allowed me to mount the upper
wing on top of the lower one, and then add the remaining struts a few at a time.
The struts connectiong the fuselage to the upper wing were useless, and were
replaced by micro solder. The same thing applied to the axle, although I replaced
that with streched sprue.
The green paint has added another insult to the injuries I've already suffered at
its hands. I coated the entire plane with Tamiya varnish, which in my experience up
to this point leaves everything oil based untouched. Unfortunately, I've had rather
unpleasant results when airbrushing it, so I applied it by hand. Of course, the
green paint mixed with it ever so slightly, resulting in a very faint green sheen
over the yellow. Hardly noticeable, except for the fact that I had to touch up one
of the yellow sections on the top wing afterwards. This does not have the green
sheen, and now it seems off colour, especially when you know the problem is there.
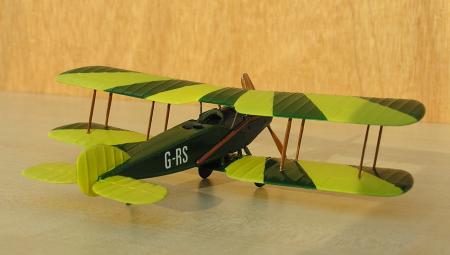
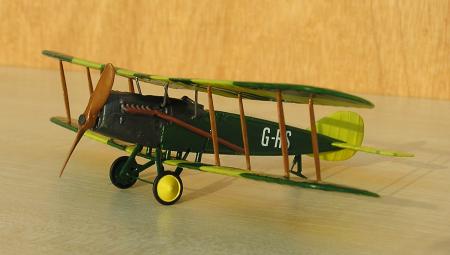
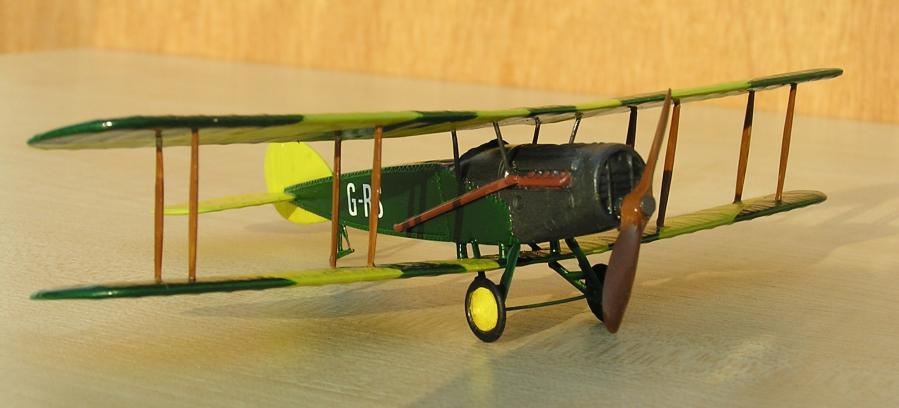
Still, all previous grumblings aside, I think the little plane didn't turn out all
that badly. To wrap up the story, some pictures of the final result. The picture
with the plane taped to the top of a carrying case shows how I lug it around when
I need to take it outside the house. Crude, and somewhat vulnerable to outside
influences, but very effective.
Navigation trail:
home »
others »
Civilian Brisfit