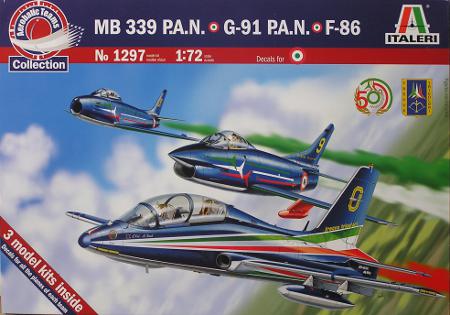
Italeri-Supermodel MB339 Frecce Tricolore
2012-10-07 Project start
Ages ago, I'd picked up Supermodel's MB339 kit, in hopes of finding decals for the Frecce Tricolore
team for it later. Inspection of this kit confirmed the brand's reputation: interesting subjects, but
expect very basic kits that are likely to put up a fight. The kit languished in the stash, and I never
got the decals for it, in part because I didn't really hunt for them.
I still wanted to do a Frecce Tricolore plane though, and when this set showed up, it was a welcome
surprise. Finally, there was a good kit of the MB339, and in the right colours too. You can probably
imagine my disappointment when I found out it was just the old Supermodel kit with new paperwork.
Still, this at least gave me the decals I needed.
In it's own way, this set is quite interesting. It carries the Italeri brand, but none of the kits
inside are, in fact, made by Italeri. To their credit, they don't claim otherwise, and all kits are
properly attributed to their respective manufacturers: Supermodel for the MB339, Revell for the G91,
and Academy for the Sabre. This seems to be a trend I quite like these days, openly stating who's
kit is being reboxed.
My disappointment at finding the Supermodel kit should not be considered
criticism of Italeri's offering; the Supermodel kit, to my knowledge, the only kit of the MB339 in
this scale, so short of cutting a new mould, they had little choice in the matter, the G91 is
probably the best in this scale (certainly better than the Matchbox), and although I can't judge the
relative merit of the Academy Sabre, it certainly looks like a good kit that will largely build
itself.
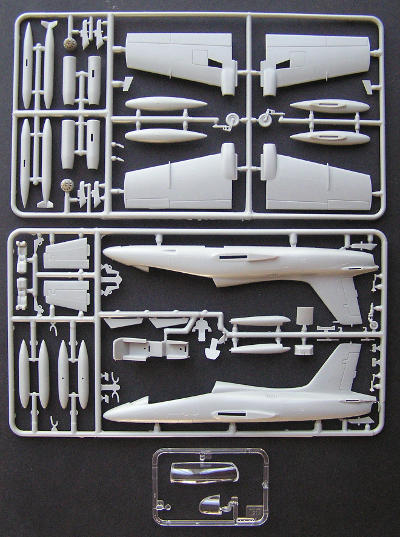
The kit itself is, as can be seen from the sprue picture, very basic, especially when one keeps in
mind that about half a sprue's worth of parts will not be used. Frecce Tricolore typically carry
a single fuel tank under each wing, so the other four are obsolete, and they never carry rocket
pods either. Cockpit detail is non-existent, and the ejection seats have hollow backs. There is
not the slightest indication in the plastic as to where ventral fins at the rear of the fuselage
are supposed to go, and the nicest thing that can be said about the undercarriage, is that it is
included. Like I said, it lives up to Supermodel's reputation..
2012-11-23
Once their backs are stuffed with filler, the ejection seats look like they might actually look
good when painted. The cockpit, such as it is, has been glued up, and the fuselage and main wings
assembled. The wings are OK, but will take some doing to join with the fuselage. The fuselage,
on the other hand, is problematic. The two halves don't quite fit as well as they should, and
the now inevitable filler and sandpaper sessions will destroy all those raised panel lines running
accross the join. Whoever came up with the idea of having the gate between runner and fuselage
right on top of one of the panel lines, ought to be shot. Repeatedly..
I've resigned myself to the fact that I'll have to sand the whole thing smooth, and forget about
panel lines alltogether. Not necessarily bad, in this scale it actually looks quite good, but it
ticks me off. Once I've dealt with the fuselage, I'll have to do some serious hacking on the
backseaters console, which is too narrow to span the width of the cockpit. Just for the heck of it,
I've also assembled the rocket pods, which will go into the spares bin all ready to go. No idea
where they're supposed to go, but who cares.
2013-11-10
Over the past year, this kit has seen a minimal, but steady amount of attention,
and is now approaching the point where the paintshop will come into view. Generally,
fit was only so-so, in the case of the airbrake below the fuselage so bad that I
preferred to leave the part out completely, and stuff the hole with filler. The canopy
also had little interest in fitting nicely to the fuselage, which meant some scary
activity with Valejo filler and a file. The rest of the main parts took the anticipated amounts
of filling and sanding, but nothing excessive. I've just given the kit it's pre-primer
bath, and will probably prime it next weekend, presumably followed by some further
corrections once the primer has pointed out the imperfections.
2014-01-03
Surface finish turned out to be quite nice, so I moved directly to airbrushing on the dark
blue. I gambled this would provide a proper background for the silver underside instead
of bothering with a black base, a decision which by now has turned out to be correct. The
blue paint wasn't overly interested in covering the primer, which was surprising, but some
spot painting and a second coat convinced it. I'm now in the process of painting the undercarriage
prior to starting work on the decals. This implies I'm getting really nervous just about now,
because in this case, the decals will make or break the kit, and I'm expecting a serious fight from
some of them.
2014-01-17
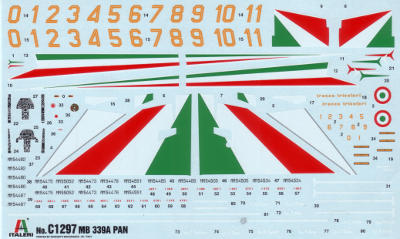
Decal fit has been nasty, as I feared. The decals covering the wings are too big, extending
well past the edges, while those on the horizontal stabilisers are too narrow, leaving
a gap between the decal and the fuselage. These things really shouldn't happen; the size
of the various parts is constant, and some test fitting before sending it all off to the
printers could have prevented this. The white isn't opaque enough, making patching hard,
another unneccesary problem. So far the wing bottoms take the price for shoddy fit though.
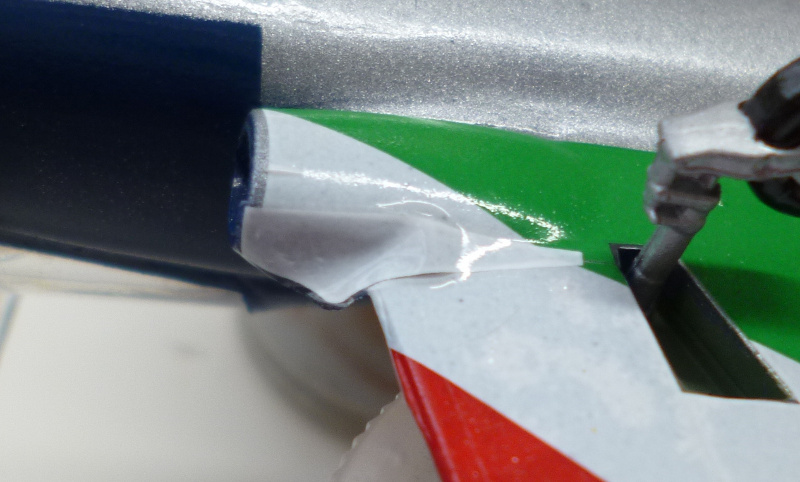
The spot where the wing and the air intake meet is tricky, of course, and was split into
two decals. Refer to the picture above for the "excellent" fit of the decal intended
to cover the gap. I ended up sacrificing a bit of decal from the Sabre from the same set in
order to get some extra white, in the expectation that at least it would have the same
opaqueness level as those from the MB339. Predictably, they were better, which isn't good
in this case, but due to the location of the patch, I think I'll get away with it.
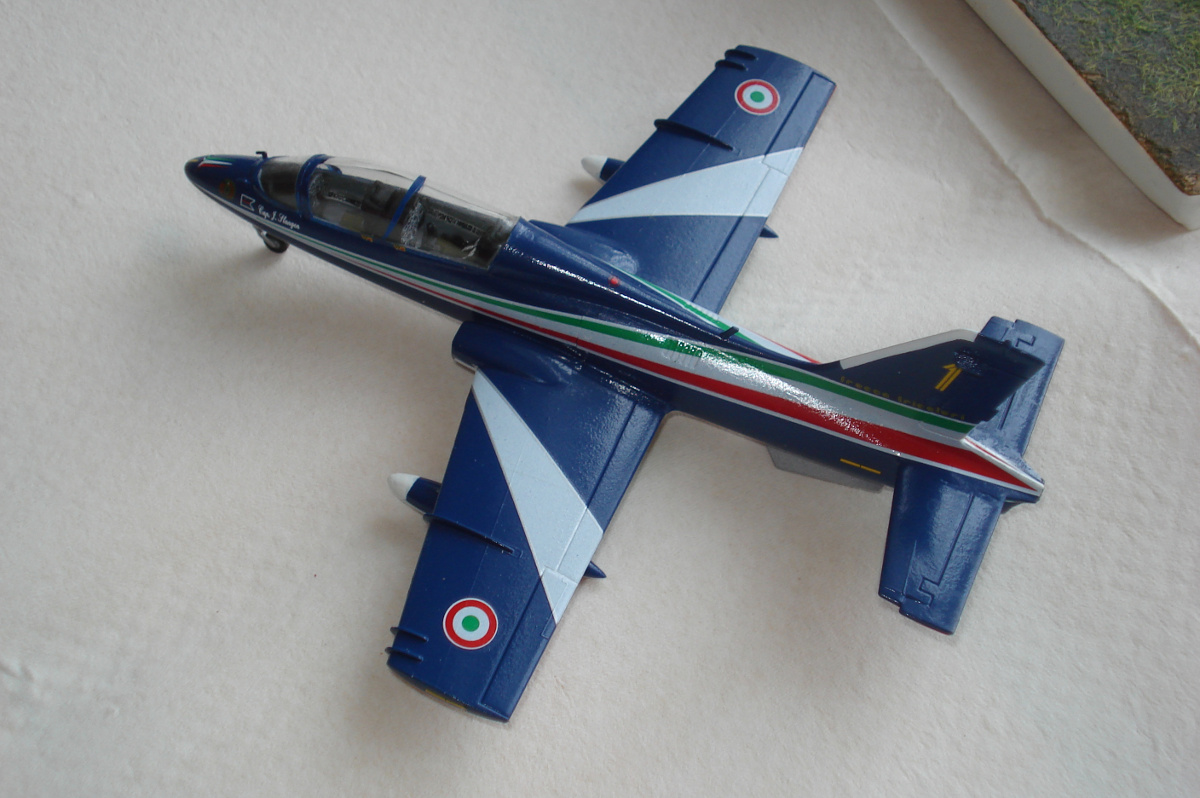
2014-02-23
Somehow, this kit just kept dragging on, but in the end, I think I managed to do a reasonable
job of it. Completely in line with the build process, I then ended up forgetting to take
proper pictures of it. Should have been easily remedied, if not for the fact that the model
ended up in a different collection here.
Fortunately, someone else took a good shot at the meeting of the local IPMS chapter..
Finishing materials:
Motip primer overallX374 overall (2 coats plus spot)
Hu11 bottom
Tamiya Gloss bottom (2 coats)
Daco strong decal solvent
Tamiya Gloss finish