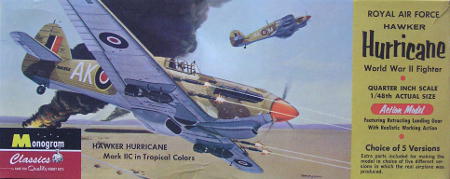
1:48 Monogram Hurricane
2010-07-19 Project start
This kit is sold as a "Monogram Classic". "Classic" is of course marketeerese for "lets see if we can shift this old junk by appealing to nostalgia". I'm not dumb enough to fall for that, by I do occasionally get the urge to grab a really outdated kit, and see what I can do with it without any embellishments. This, in fact was my first impulse when I received my stack of vouchers. As it turned out, there were nowhere near enough interesting old clunkers for sale to make this a workable theme, but by that time I'd already picked out this kit and the Airfix Spitfire, which in turn led to the choice of 48 scale warbirds. Anyway, this Hurricane was the first kit selected, and it is only just that it should also be the first one started.
I expected and old clunker with serious issues, and up to some extent, that's exactly what I got.
Inevitably, this writeup will mention loads of technical problems further down the line, but let's
point out the more pleasant surprises first.
The kit was first issued in the early 1960's, so technically it is literally half a century behind
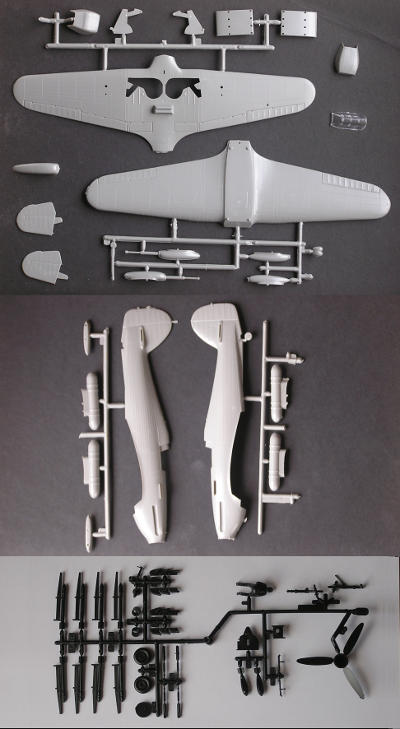
the times. This is noticable. What is also noticable, is that Monogram really did their best all
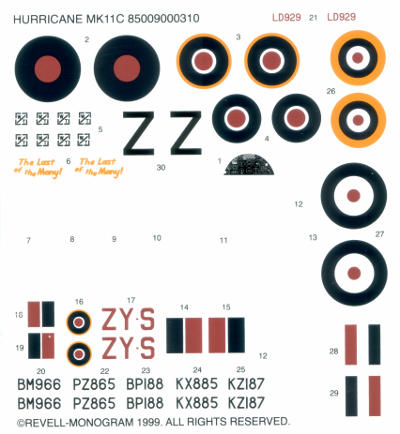
those years ago. Not unusually, the decal sheet has markings for umpty variants, but I had great
fun when some fellow modelers, looking at the instructions, kept saying things like "a pity you can't
build this version accurately, because it requires a different so-and-so", and everytime I would
look at the parts and say "yes I can, the part is right here". Uncharacteristically for those days,
Monogram had made sure the plastic matched all the different variants mentioned on the instructions
and decals. The decal sheet itself was also a pleasant surprise. I suspect it is a reprint of the
original, and although multiple variants were not uncommon even in the 60's, six different sets of
markings covering three versions of the basic aircraft should be considered a luxury.
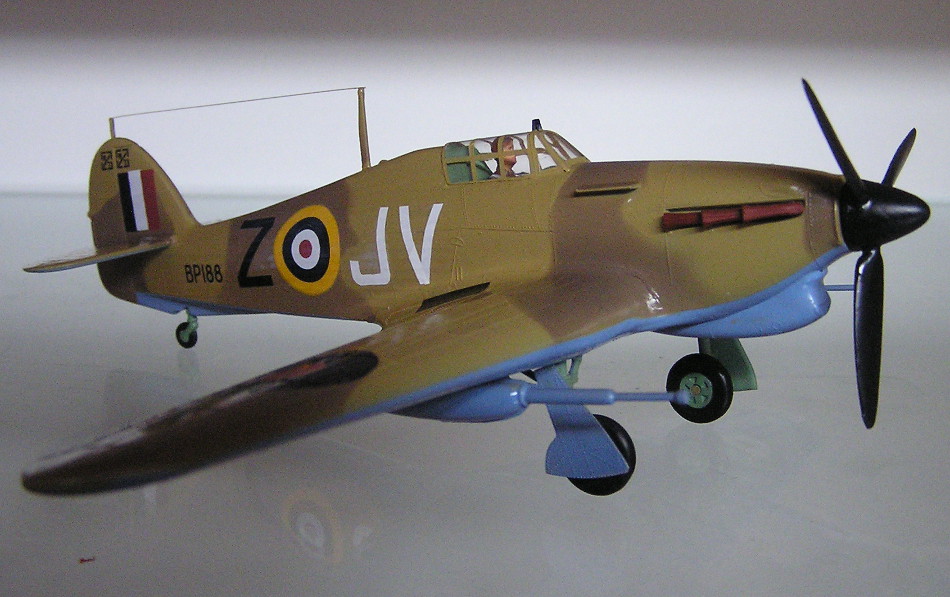
Deciding on which of the many versions to build might have a tough call, but not in this case. You see, I like desert camouflage schemes, I don't like tanks one bit, and I've always liked the idea of sticking whopping big guns under the wings. There are markings for a North African campaing tank buster with 40mm cannon under the wings, instead of .30 calibre machine guns in the wings. Problem solved..
Cockpit detail is mostly non-existent, which was to be expected, although a rough attempt was made to
supply an instrument panel. Their is a decal for this, but the instructions specifically say not
to use this as a decal, but rather to cut it out very precisely, and to glue it complete with backing
directly onto the tabs inside the fuselage. This is a bit odd. The tabs are almost the size of a
complete panel, and the only reason not to paint them white and put the decal on them would be the
gap between the left and right halves. But why is that gap there in the first place? It seems to
me they could just as easily have made the tabs slightly larger, and closed the gap. Really odd.
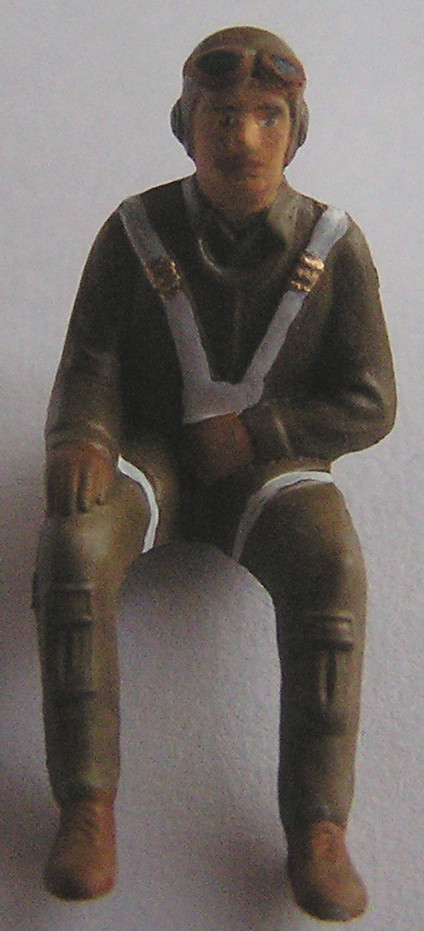
The pilot, which in those days almost every kit had, but which is sadly missing in just about every
modern kit, is typical of the sad cases that came with early kits. The poor chap doesn't get a seat,
but instead has a great big locator tab stuck in his back with which to glue him to a bulkhead.
Plastic pilots had it rough in the 60's..
The lack of interior detail is also found in the wheel wells. No detail there, in fact, no wheel wells
at all, just holes in the lower wing. Again, this is to be expected in an old kit, but I would really
have appreciated it if they hadn't come up with an annoying construction that is probably designed to
make the landing gear retractable on the finished kit, but is so clumsy that it's almost impossible to
get the legs to fit in the first place. For a while I considered building the kit with the wheels
retracted because of this, but the fit on the doors is even worse. This is going to be a nasty fight
indeed.
I should say this is a bit of a surprise, considering that in general, the fit is quite good. I've seen
considerably worse on far more modern kits.
2011-01-30
Predictably, the 48 scale warbird idea has escalated a bit, and a second Hurricane has been added to the
stash. A Hasegawa kit this time, which simplifies the choice of specific version to build from this kit.
A usual, the Hasegawa decals are yellow instead of white trash, but with a small bit of careful planning,
the Monogran decal sheet will provide for two complete sets of markings; MkIIC "The Last of the Many" and
MkIID BP188 have exactly two decals in common apart from stencilling, and those two do not contain any
white. It would have been even nicer if I'd correctly deduced this before sticking on the wrong radiator,
but I caught my mistake before it was completely irreversible.
The undercarriage, after some serious fiddling, surrendered, so that wasn't nearly as bad a fight as I
was by now anticipating. It's still going to be a bother though, because the construction is such that
the legs have to be installed before the wing halves are joined. This means a fair amount of construction
will have to be done with some very fragile parts sticking out of the wings. It doesn't help that one of
the parts that make up the main undercarriage arrived broken; entirely fixable, but it does weaken an
already fragile and dangerously exposed part. We'll see..
The guns pods are assembled, and mounted of the lower half of the wing. I'll let the bond cure a bit, and
then hit the lower wing with an initial coat of primer to reveal any areas requiring further work. Once
the lower wing checks out, there's nothing for it but to build in the undercarriage, and start joining
the wing halves to each other and the fuselage. The fuselage is coming along nicely as well. The halves have
been joined and had some initial filling and sanding done. A second helping of filler is now curing. Once that's
ready and sanded, this too will be primed and checked, before dealing with the interior, such as it is. Finally, I've
put a face on the pilot, who now only needs a bunch of finishing touches before he's ready to get to work.
 2011-03-01
The pilot has been completed, as can be seen in the picture to the right. I airbrushed the interior of the
cockpit and the wheel wells (I'm being generous here, there just gaping holes really). The pilot is now
firmly stuck in his 'office', and for once, I didn't forget to put the control column in this time. It
probably helped that there was no such part in the kit.
The undercarriage took considerable fiddling, and some improvised shims on the inside of the wells to come
out straight, but I think it now looks just like the folks at Monogram intended. The people at Hawker
might disagree, but I feel it's adequate. The wing halves are joined to each other and the fuselage, all
of which took very few corrections. All in all a very basic, but relatively problem free kit.
 2011-03-20
The kit is now assembled as far as it'll go before final finishing and touch up, so it's time to bring
out the airbrush. As usual, I've been unable to resist the urge to experiment with all sorts of finishing
materials. In this case, the experiments involve masking, and cockpit frames.
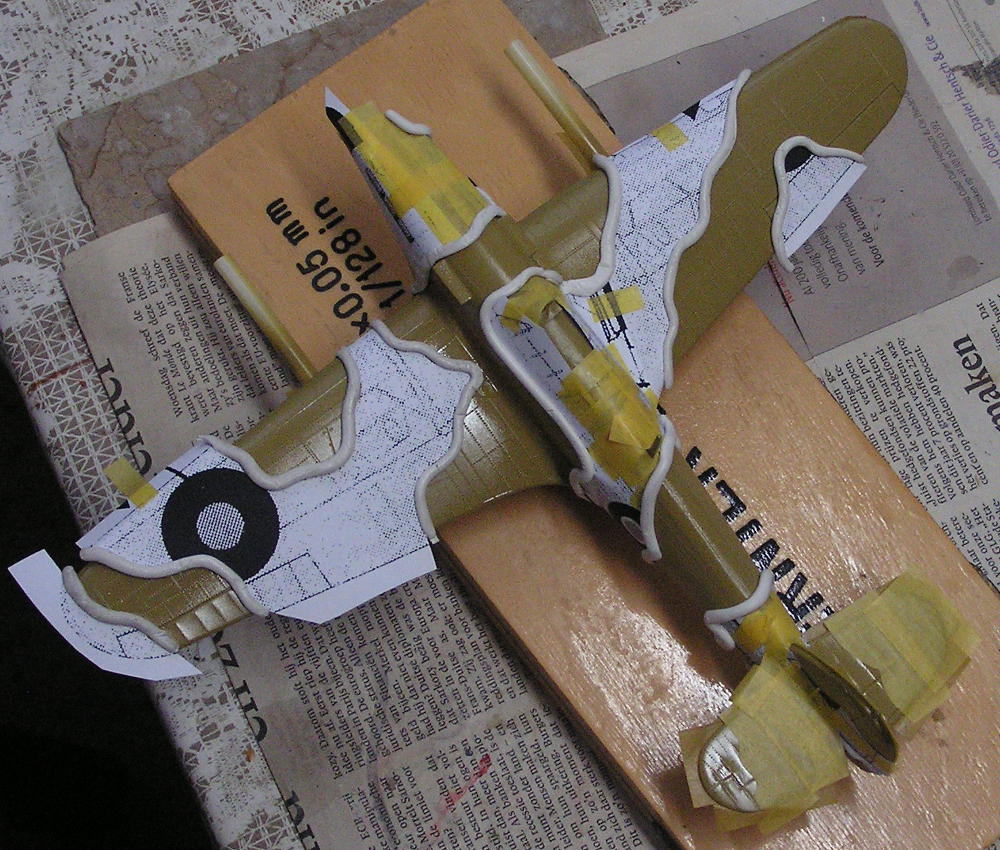
There is just no way that I'm ever going to be able to cut a smooth camouflage pattern out of masking tape,
and it's almost as unlikely that I'll ever be able to free-hand such patterns with an airbrush. And yet,
many aircraft sport camouflage schemes. New trickery was called for. I scaled up the drawings that came
with the kit's instructions to roughly the same size as the plastic, and cut out the lighter parts of
the pattern. That gave me the shape I wanted to mask, but plain paper doesn't stick to plastic. Any normal
kind of glue was out of the question of course, as this had to come off again later without damaging the
underlying layer of paint, like masking tape is supposed to do (all too often, it doesn't). Then one of the
kids of friends of mine quite unwittingly gave me an idea, by mentioning the local equivalent of blu-tack.
I believe others have come up with the idea of using that to mask patterns before, but I can only remember
so much, and needed this reminder. Blu-tack goes on nicely, but it's scary as all hell to stick blobs of
glue onto relatively fresh paint. So, a combination of blu-tack (actually white around here), printer paper
and some masking tape for camouflage patterns, resulting in the sorely abused looking Hurricane in the picture.
Blu-tack is also scary coming off again, because up to a considerable extent, it appears not to.
Wherever the blu-tack lines were, rims of white gunk initially refused to come off the kit. Once the heart
attack passed, I attempted to blot the gunk off with a ball made up of the part that did come off the plastic,
on the suspicion that sticky gunk would like more sticky gunk a lot better than it would like painted plastic.
To my immense relief, that hunch was correct.
Cockpit frames are another problem area for me. Paining them by hand is dicey at best, masking out the clear
parts with tape well nigh impossible, and using sticky metal foil for masking leaves so much residue on the
clear parts that the results are not too good either. I've masked the complete canopy and used custom decals
for the frames before, but only in black. Getting exactly the same colour as the surrounding paint out of
the printer is beyond me. However, a printer is not the only way to get colour onto decal paper. It turns out
that an airbrush can work brilliantly as well. Enamel directly onto decal paper resluted in disintegrating
decals, but with a barrier coat of liquid decal between paper and paint, it works like a charm. The decals
remain thin enough to blend into the plastic with solvent, and because the very same paint is used on both
plastic and decal, the colour matches exactly. Cutting the precise shape of the window frames remains a problem,
but combined with some careful work with a brush, it should turn out fine.
Speaking of decals, I sorry to say the decals that came with the kit turned against me. They are extremely
fragile, and prone to breaking up at the slightest provocation. I was able to fix most of the damage done
before I realised I had a problem, and prevent further trouble with a coat of liquid decal on the thus far
unused decals, but this should not have been neccessary.
Anyway, the Hurricane is now almost complete and awaiting the last finishing touches. Shouldn't be long
before the completed product shows up here.
2011-03-29
Finishing was uneventful, and I'm now the pleased and proud owner of another airplane.