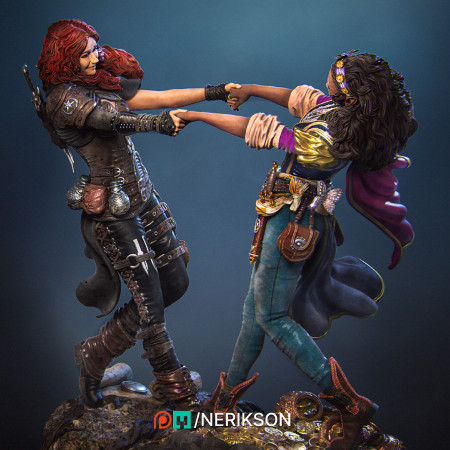
Nerikson "Ode to Joy"
Project start 2026-05-03
I was always going to build this one at some time, but the designer decided to have a painting competition,
so "some time" has become "now". Even if I don't end up DNFfing this, I don't stand a chance in the actual
competition, but who cares..
This vignette is one of many models sitting on my harddisk by Nerikson. Many of his works are a bit different
from the usual offerings, and while that may or may not appeal to you, the quality of execution is typically
very high.
I called it a little vignette earlier, but that's not really accurate; the figures are in 140mm scale, so it
will actually be quite large. A 75mm version is also supplied, but I decided to go big for once.
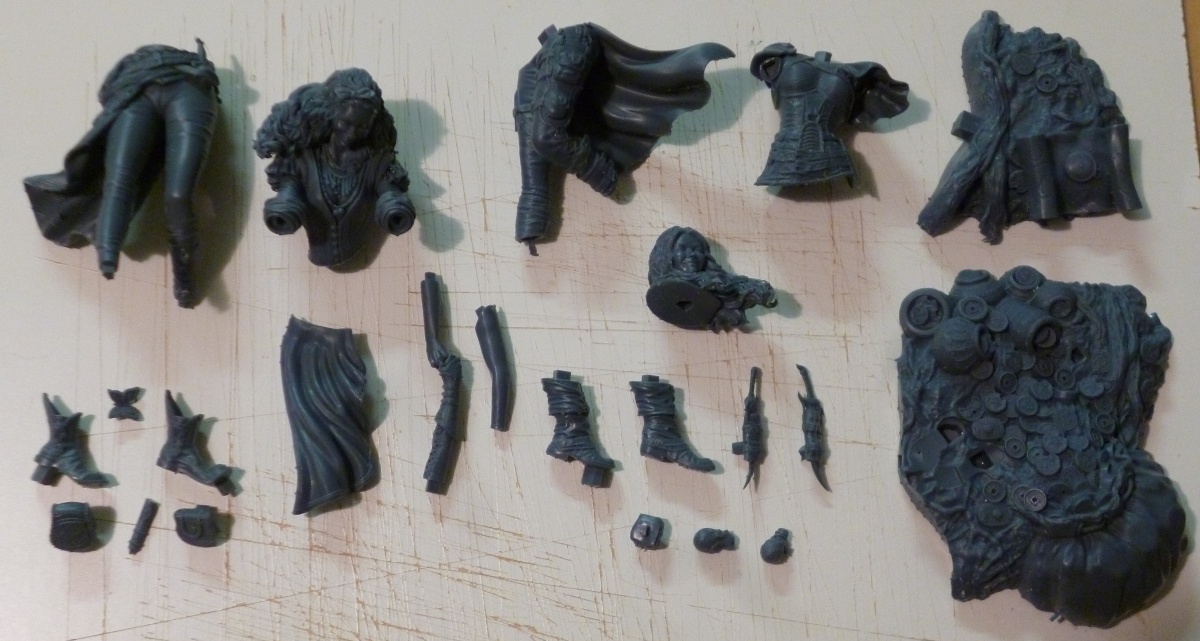
The printer spent 17 hours last Friday chomping away at the pieces. I took over chomping duties from the
printer today, and after digging them out of the supports, I now have the starting pieces for this project.
2026-05-06
I've gotten some initial sanding in on the two parts that make up the base. I really want to limit the amount
of filler used here, but these parts aren't making it easy. Neither is the resin, which has come out rock hard;
scraping doesn't work, which leaves wet sanding or grinding with power tools. The former takes forever, the latter
produces clouds of resin dust, which your don't want in your house and certainly not in your lungs. This will take a while..
Rough dryfitting has left me optimistic that the actual figures will fit better. Fingers crossed.
2026-05-06
I just realised this is the wrong order of doing things. There are 'footprints' in the base that will have to line
up with the ladies' feet. One of those footprints is on the smaller base part, and aligning the feet with anything
but the rest of the figure won't do, so I'll have to get the relevant legs and feet dry fitted first, so that I
can align the base with the result. No point in trying to close the gap if the feet demand it stays.
2026-05-07
I've mostly cleaned up the parts for "Enika", the woman that has a foot on both parts of the base. Fit of the
various parts is fairly good, although I've had to decrease the height of most of the locating blocks. So far,
the connections between the parts have been cleverly located so that small gaps won't matter, as the actual
interface between the parts is recessed into sleeves or boots or some such, which certainly helps. The parts
do seem to have a bit of wiggle room. For most figures, that would be ideal, but since these have to be properly
aligned with each other and the base, it might cause some impressive juggling during final assembly much later on.
Test fitting has shown that I shouldn't mess any more with the join between the base parts, so they're now glued together,
and the gaps will be sculpted over with milliput over the weekend.
2026-05-09
The main parts have been cleanup up as far as I can get without shooting on primer to reveal a gazillion minor flaws.
They'll be there..they're always there..
I'll start cleaning up 'Inithia', the other half of the pair, now, and leave the smaller detail parts for when I've
got the main components ready for painting. I intend to use oils for any bare skin, and that is a dangerous choice
when there's a deadline involved, even a generous two months one, so I want to get to work on the skin as soon as possible.
2026-05-09
The 'box art' render at the very top shows a pouch hanging from Inithia's belt from a pair of beaded cords. Looks very
cool, but sinde the pouch is a separate part, those cords are stiching out unprotected and unsupported until assembly
is complete. Well, that, or more likely, they break off at some point. Guess which option reality came up with..
I've got a printer, and I'm not afraid to use it, but I didn't fancy printing the whole lower half of the woman again,
with the same fragility issue. So some rapid digital hackery produced an STL for just the pair of cords. Since I hate
printing mostly empty build plates, multiple copies of the cords, plus whatever else looked workable with minimal effort
is currently being processed by the old resin zapper as I write.
2026-05-10
To my very happy surprise, the primer only revealed a very limited number of remaining defects in the cleaned-up parts.
Going by past experience with support scars, I either got very lucky, or I'm learning..
2026-05-13
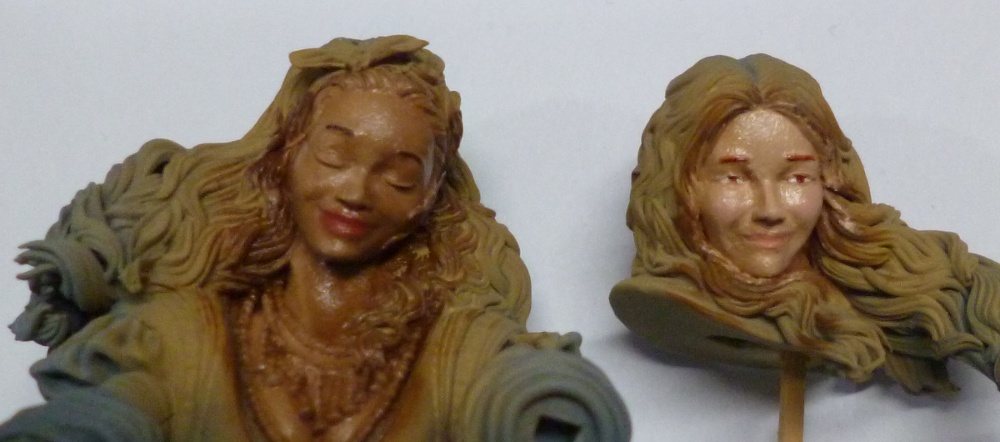
I've given all the exposed skin on the ladies a base coat of some variant of sand yellow. Next working session will
be all about skin in oils, and be critical to the project as a whole: a figure can never be better than it's face.
Fortunately, I'll have all day tomorrow for this.
2026-05-14
It took most of the day in increments separated by curing breaks, but I think the figures have a chance of turning out nicely.
The jewelry around Inithia's neck will be a nightmare to paint since there'll be exactly zero margin for messing up, but that's
for later; for now the oils need to cure for an estimated two weeks, during which I won't be going anywhere near these parts.
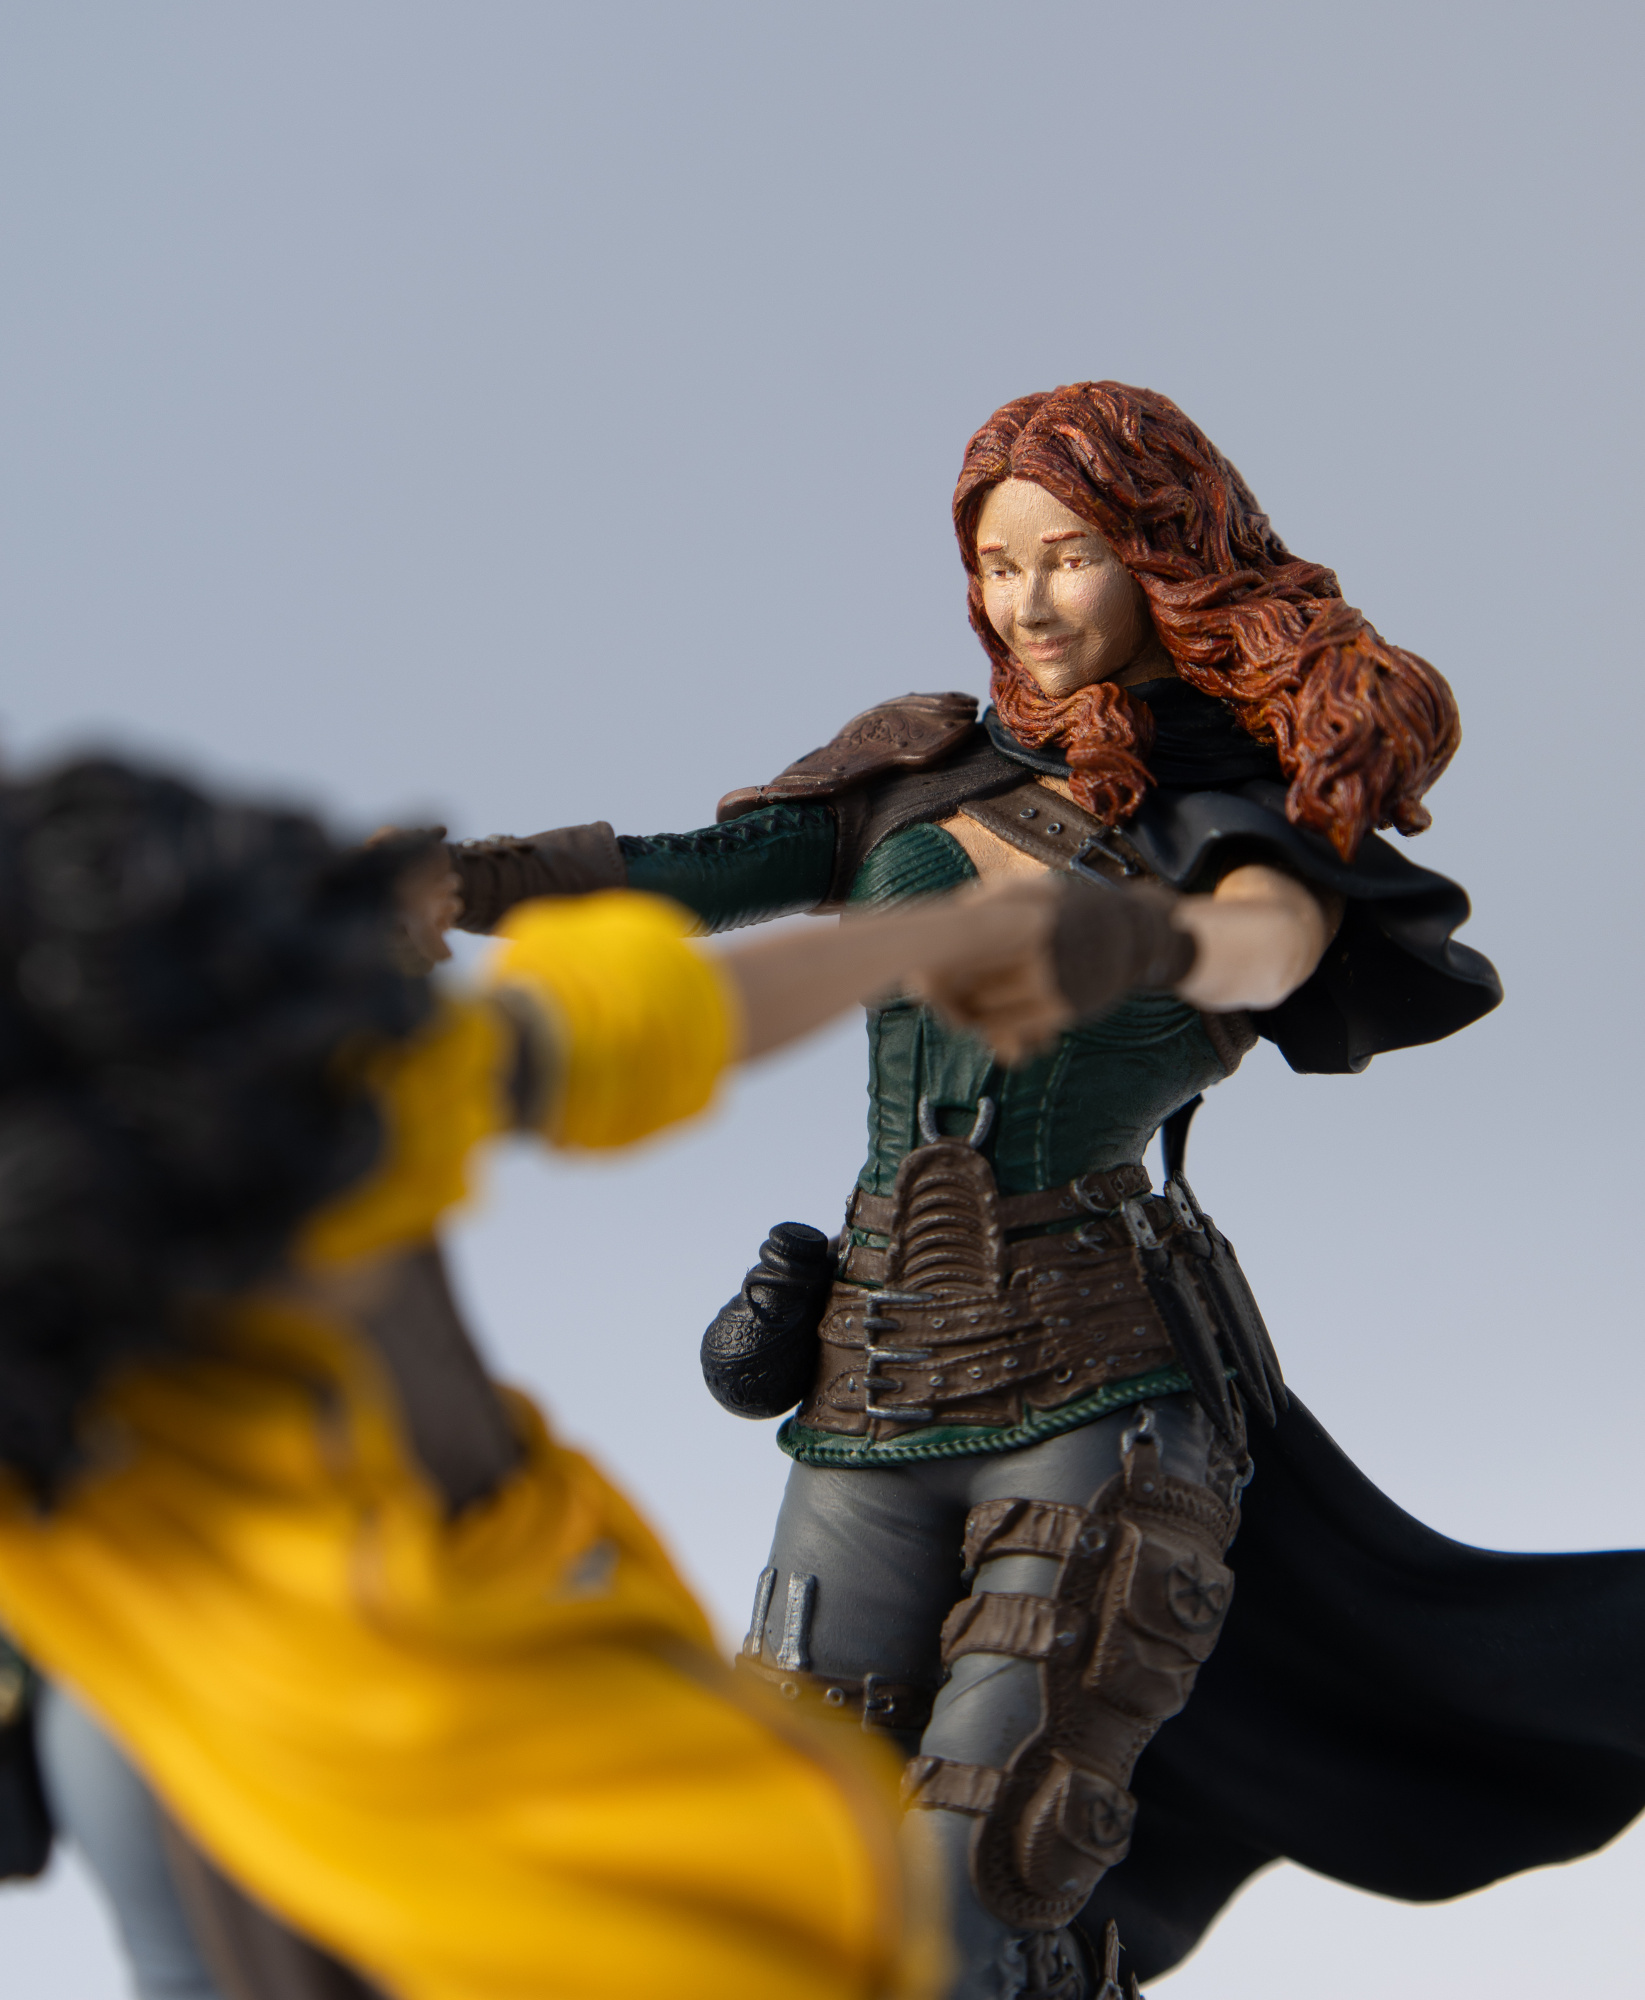
I've chosen to stick to Nerikson's suggestions for the colouration of the ladies, so Initia is dark skinned, and will have
very dark hair; her one visible ear declares elven blood, which means the implication that dark skin usually comes with dark
hair is quite weak, but it just looks right. Enika will be a redhead, and in humans, that means skin on the very pale end of
the spectrum. I overdid the paleness initially, leaving her face too close to white, making it lifeless, but fortunately, oils
are easy to correct and a bit of extra sienna fixed the colour.
This also makes for nice contrast between the clasped hands, which in their own way are rather essential to the scene.
2023-05-24
I've spent these past days doing loads of little things that are vital to any build, but don't make a good story or pictures. Part
of that was figuring out the color scheme. Inithia's main colours will be Chocolat Brown up top and RAL 7001 Silbergau below,
with Blue Angel Yellow piping, sash, ruffles, and cloak (with brown piping, so the inverse of her coat), while Enika's will be
Euro Dark Green top and Dark Sea grey bottom, with FS35042 Non Specular Sea Blue shawl/cloak and coat tail.
I've made a start getting some of that colour onto the resin, but I've found a few drawbacks to to colours chosen.
FS35042 is a lovely very dark blue, but also one of those colours that picks up stains and dirt like crazy; I'll have
to do very minor touch up already, and when that's done, I'm hitting it with varnish to stop it from picking up more.
Blue Angels Yellow is a lovely warm, deep yellow, but don't for one second believe it can be sprayed over grey primer,
because that mutates it into totally gross 'toxic waste' greenish yellow. Brrrr... I've started an experiment with a
desert yellow base coat.
The base is largely covered in scattered around coins. I count six different currencies, and just to be vile, I'll
use a different metallic gold or silver for each type. There's also some sort of compass thing sitting in the middle
of the scroll/map off to the side. I'm figuring this must be some sort of magical doodah that was instrumental in
finding that pile of coins, so that has been airbrushed with Alclad 'Gold Titanium', which should make it look just
different enough from all the other metal to stand out as something special.
All parts have now been dry fitted, and are ready for use.
2026-05-25
Desert yellow base coat was every bit as horrible, both with the airbrush and a traditional brush..
Final attenpt: a white base coat. Even if that succeeds, it's a setback. Aside from highlights (which can be
dealt with with some trickery) and the cloak (which is a separate part I can hit with anything I want, up to and
including printing a new one), some of that yellow needs to go unto parts I cannot replace without starting over
from scratch, and which I cannot airbrush due to the impossibility of masking the surrounding areas like the face.
Building up an even coat of white with a traditional brush and modern, ineffective paints takes forever and a
gazillion layers. I know it had it's drawbacks, but right now some oldfashioned lead white would be most welcome..
2026-05-25
The white base coat for yellow worked much, much better. It's not optimal, but I'll make it work,
and I've made a start on turning parts on Inithia's clothes white. It might in a way 'just' be
primer, but since it's often close to parts that should have their final colour, it's still precise
and high concentration work, so just a start for now.
2026-05-25
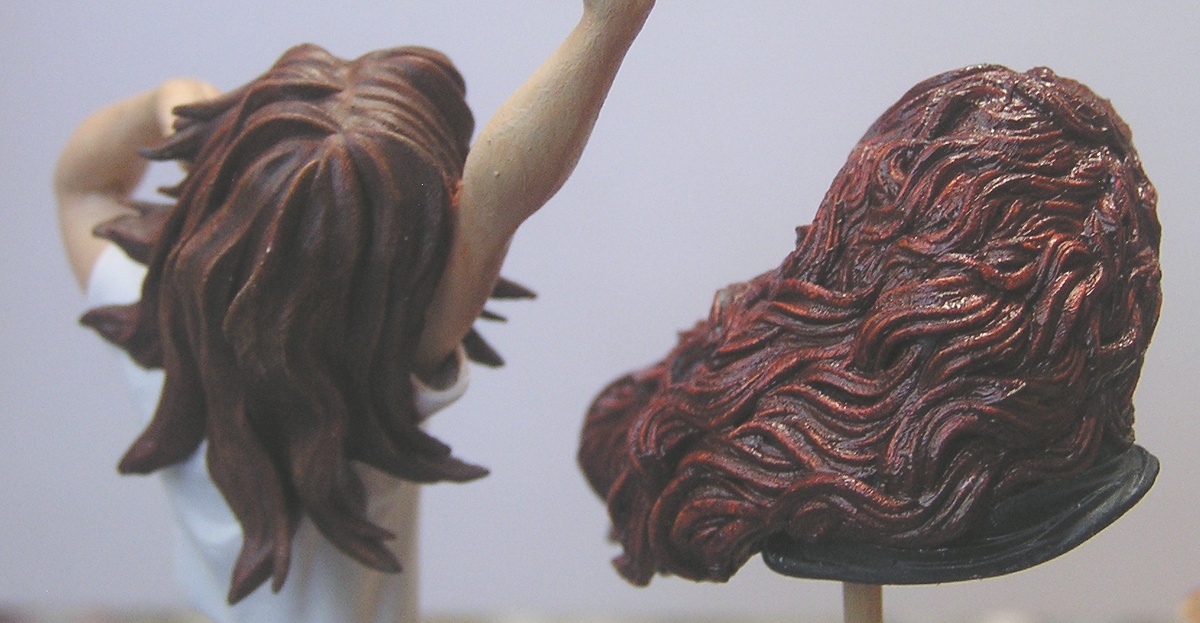
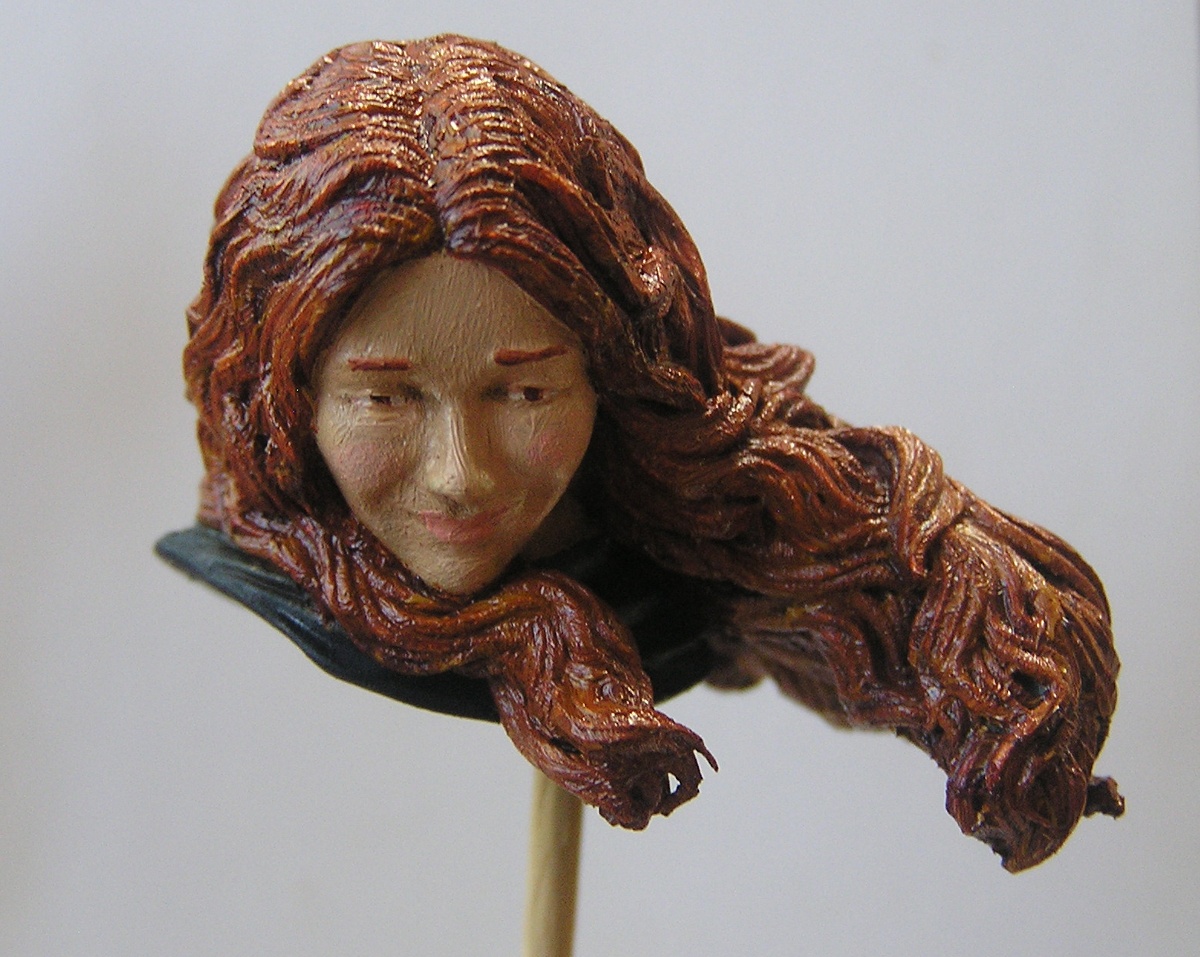
I'd done red-ish hair in a comparable scale before, so I expected no problem with Enika's. I wish...
The picture shows what should have been the exact same process, and thus the exact same result.
The main problem is that I thought I knew what I was doing, and used the grey primer dry brushed
with white as a base coat. The result was a henna soaked nightmare. Turns out my earlier hairdo
was base coated with 'basalt grey', much darker and probably different surface structure than
the primer, dry brushed with light grey, which is still a lot darker than white. The 'burned sienna'
was literally from the same tube as before. Note self, don't remember, check your logs.
So if the Henna Horror was unacceptable, trickery was called for. Using the same process I use for skin, I dotted the whole mane with 'gold ochre' and blended that into the sienna. I think I like the result.
2026-06-02
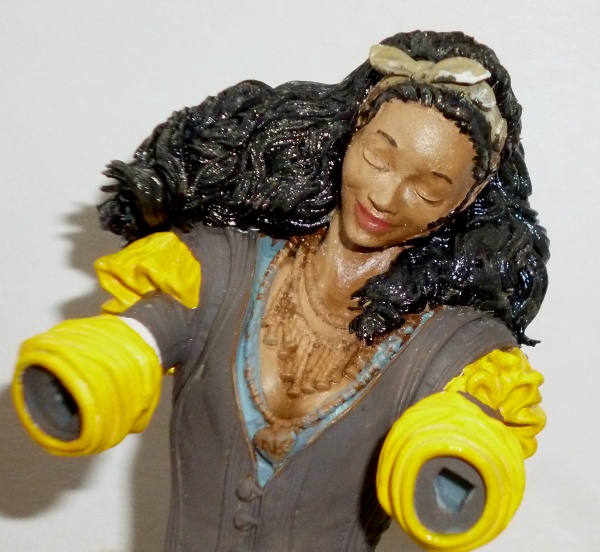
I didn't get a lot of work done over the weekend since one of the cats was ill, which left me too
jittery to deal with models even when there was nothing practical I could do. Add to that that work
with white and yellow takes multiple coats, and progress becomes glacial.
I did get to the point where I could do Initia's hair, which I just finished with. Same process as Enika's,
but with 'mars black' and a mixture of 'raw umber' and a bit of white.
The real thing isn't anywhere near as glittery as the pictures makes it, but the paint is still
quite wet, and may need a bit of dulling down in the end. I'll know more later; much later, since
this is once again oils.
2026-06-21
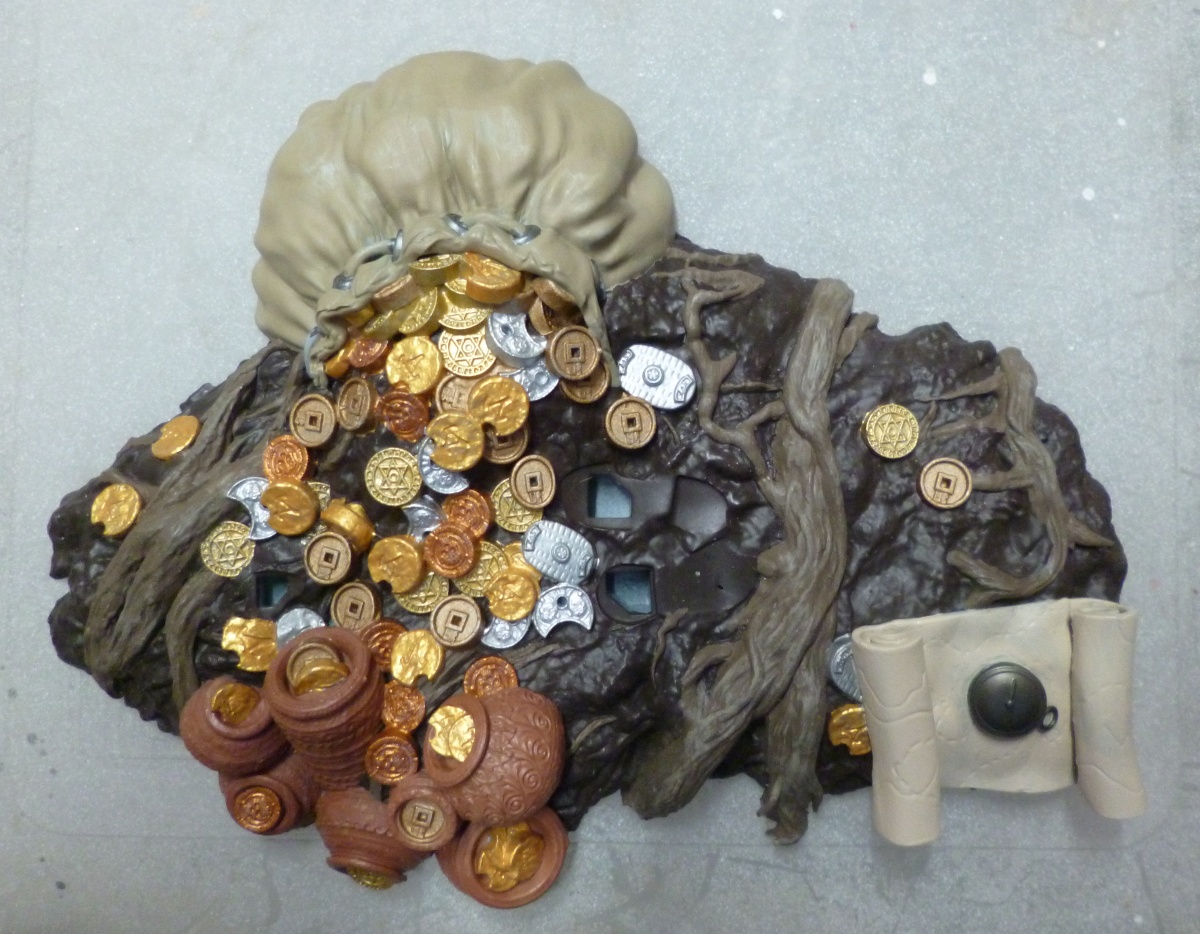
Lots of small steps over the last few weeks, none of wich were worthy of note, but the effect is that
the paintwork on the ladies is now mostly finished. The base plate followed a similar path, and is
almost finished. There's six different types of coin there, each with it's own distinctive gold or
silver variant. I was very afraid that giving all the coins the same colour would look boring and
lifeless, but the flip side was that I had to paint each coin individually, which makes that pile
of treasure rather intimidating.
2026-07-27
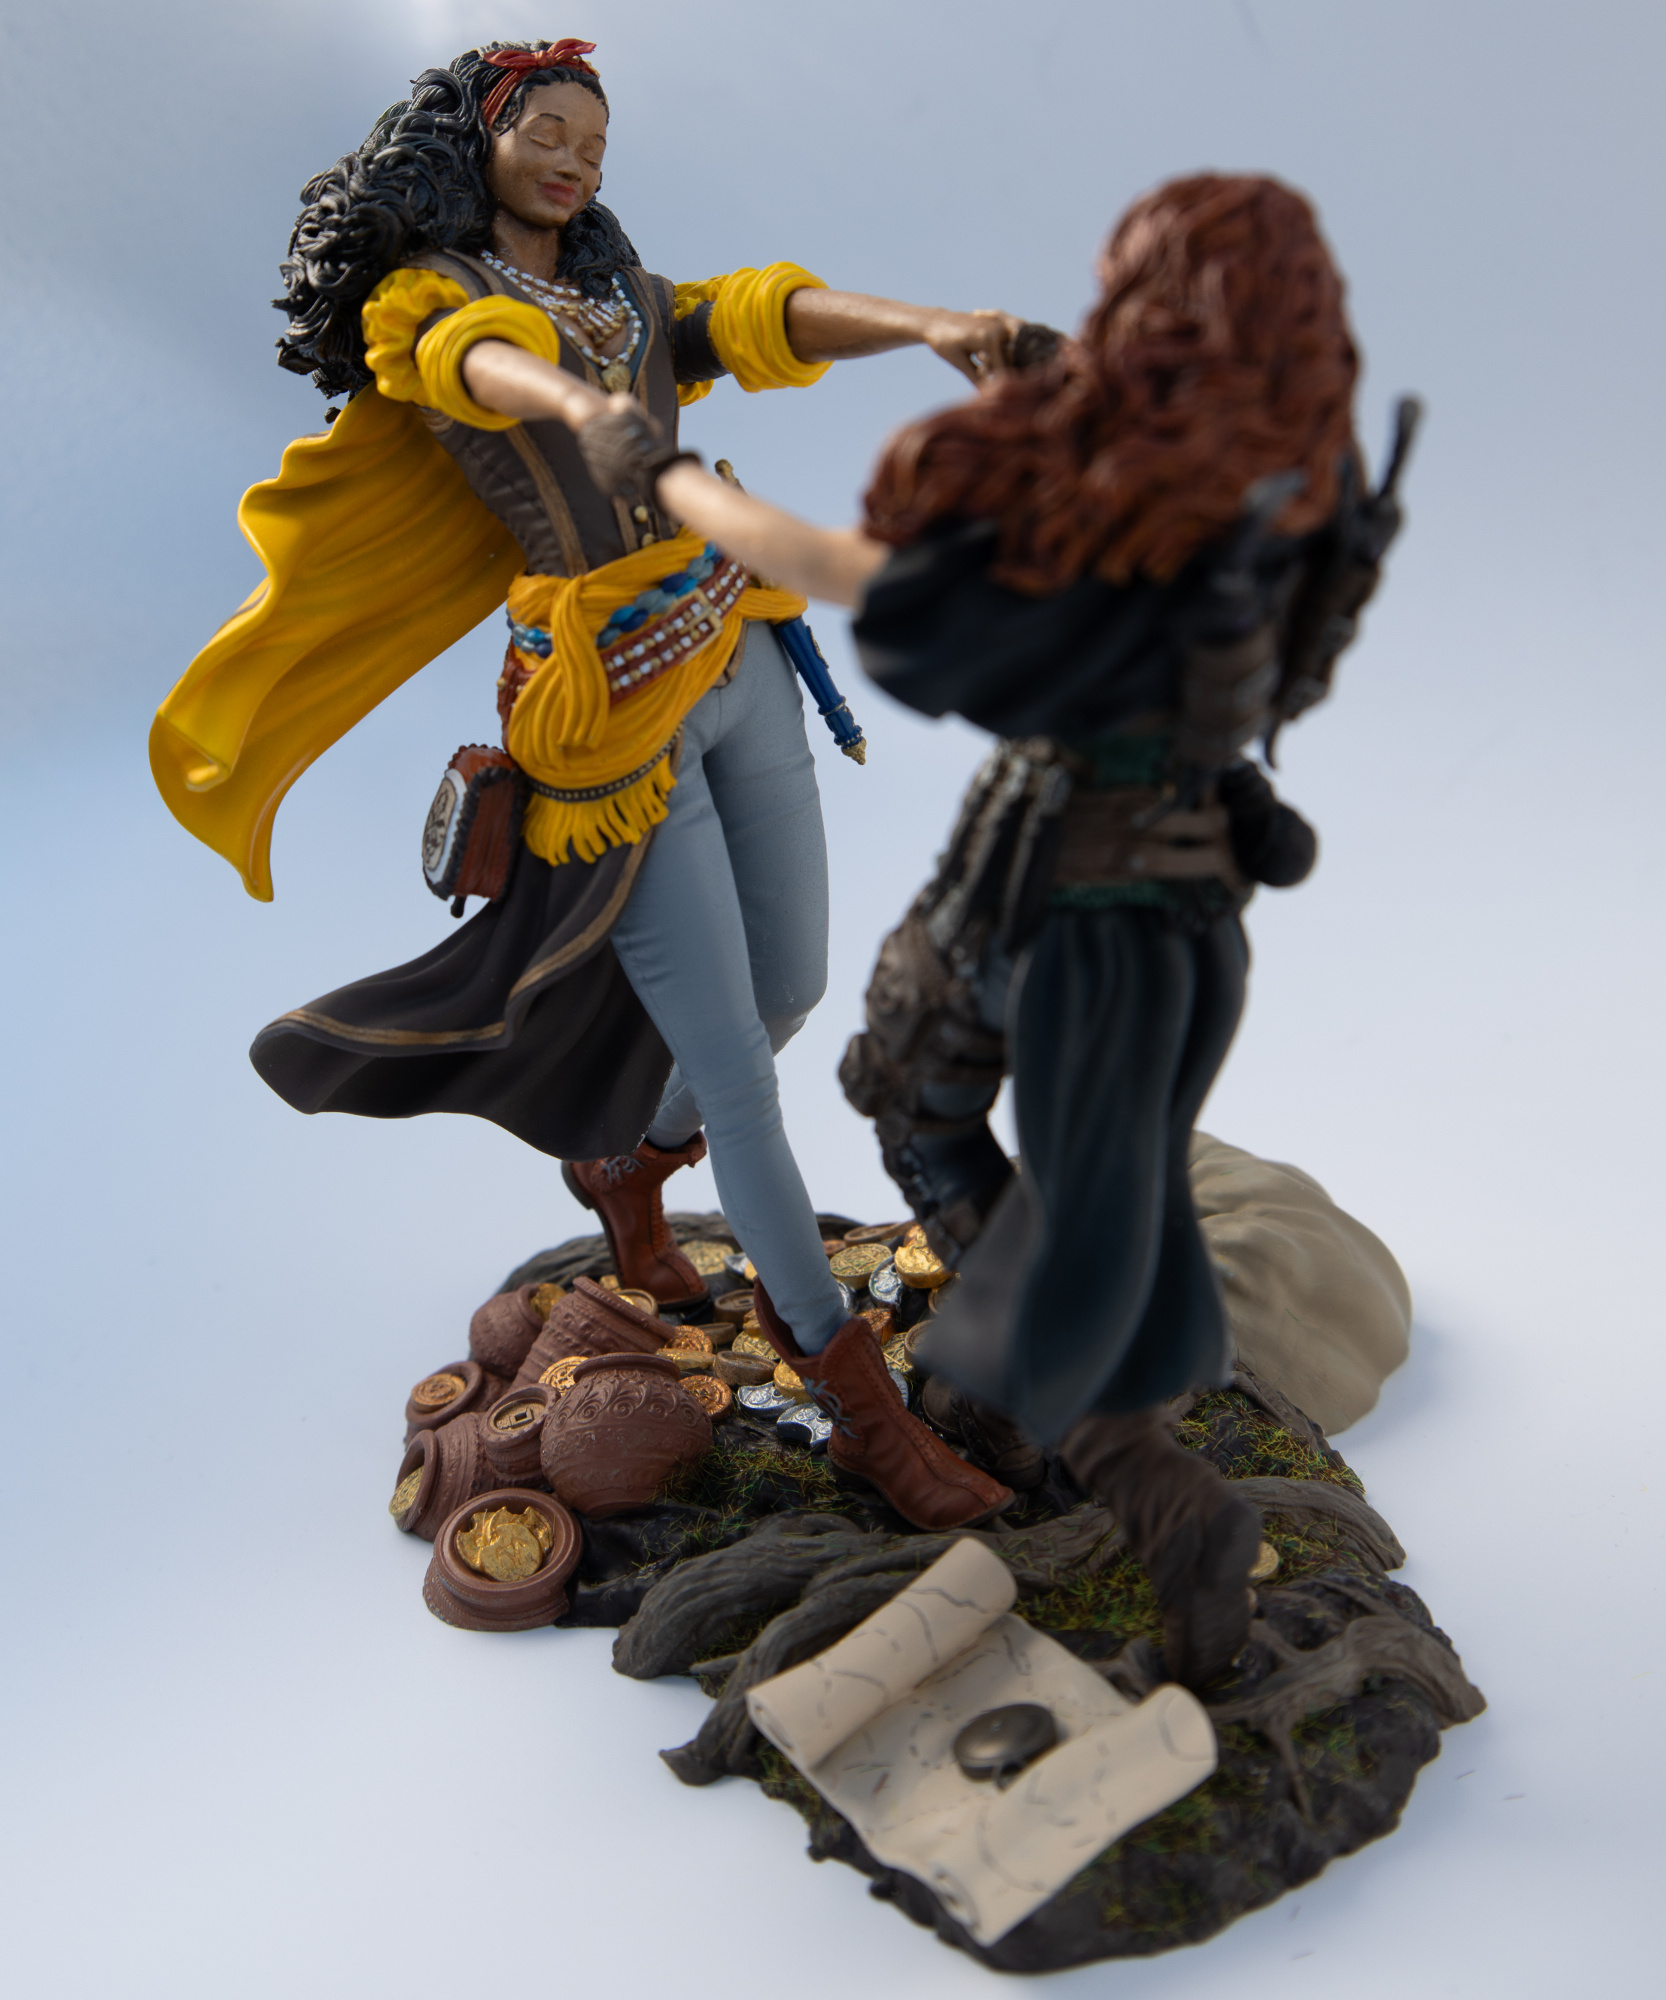
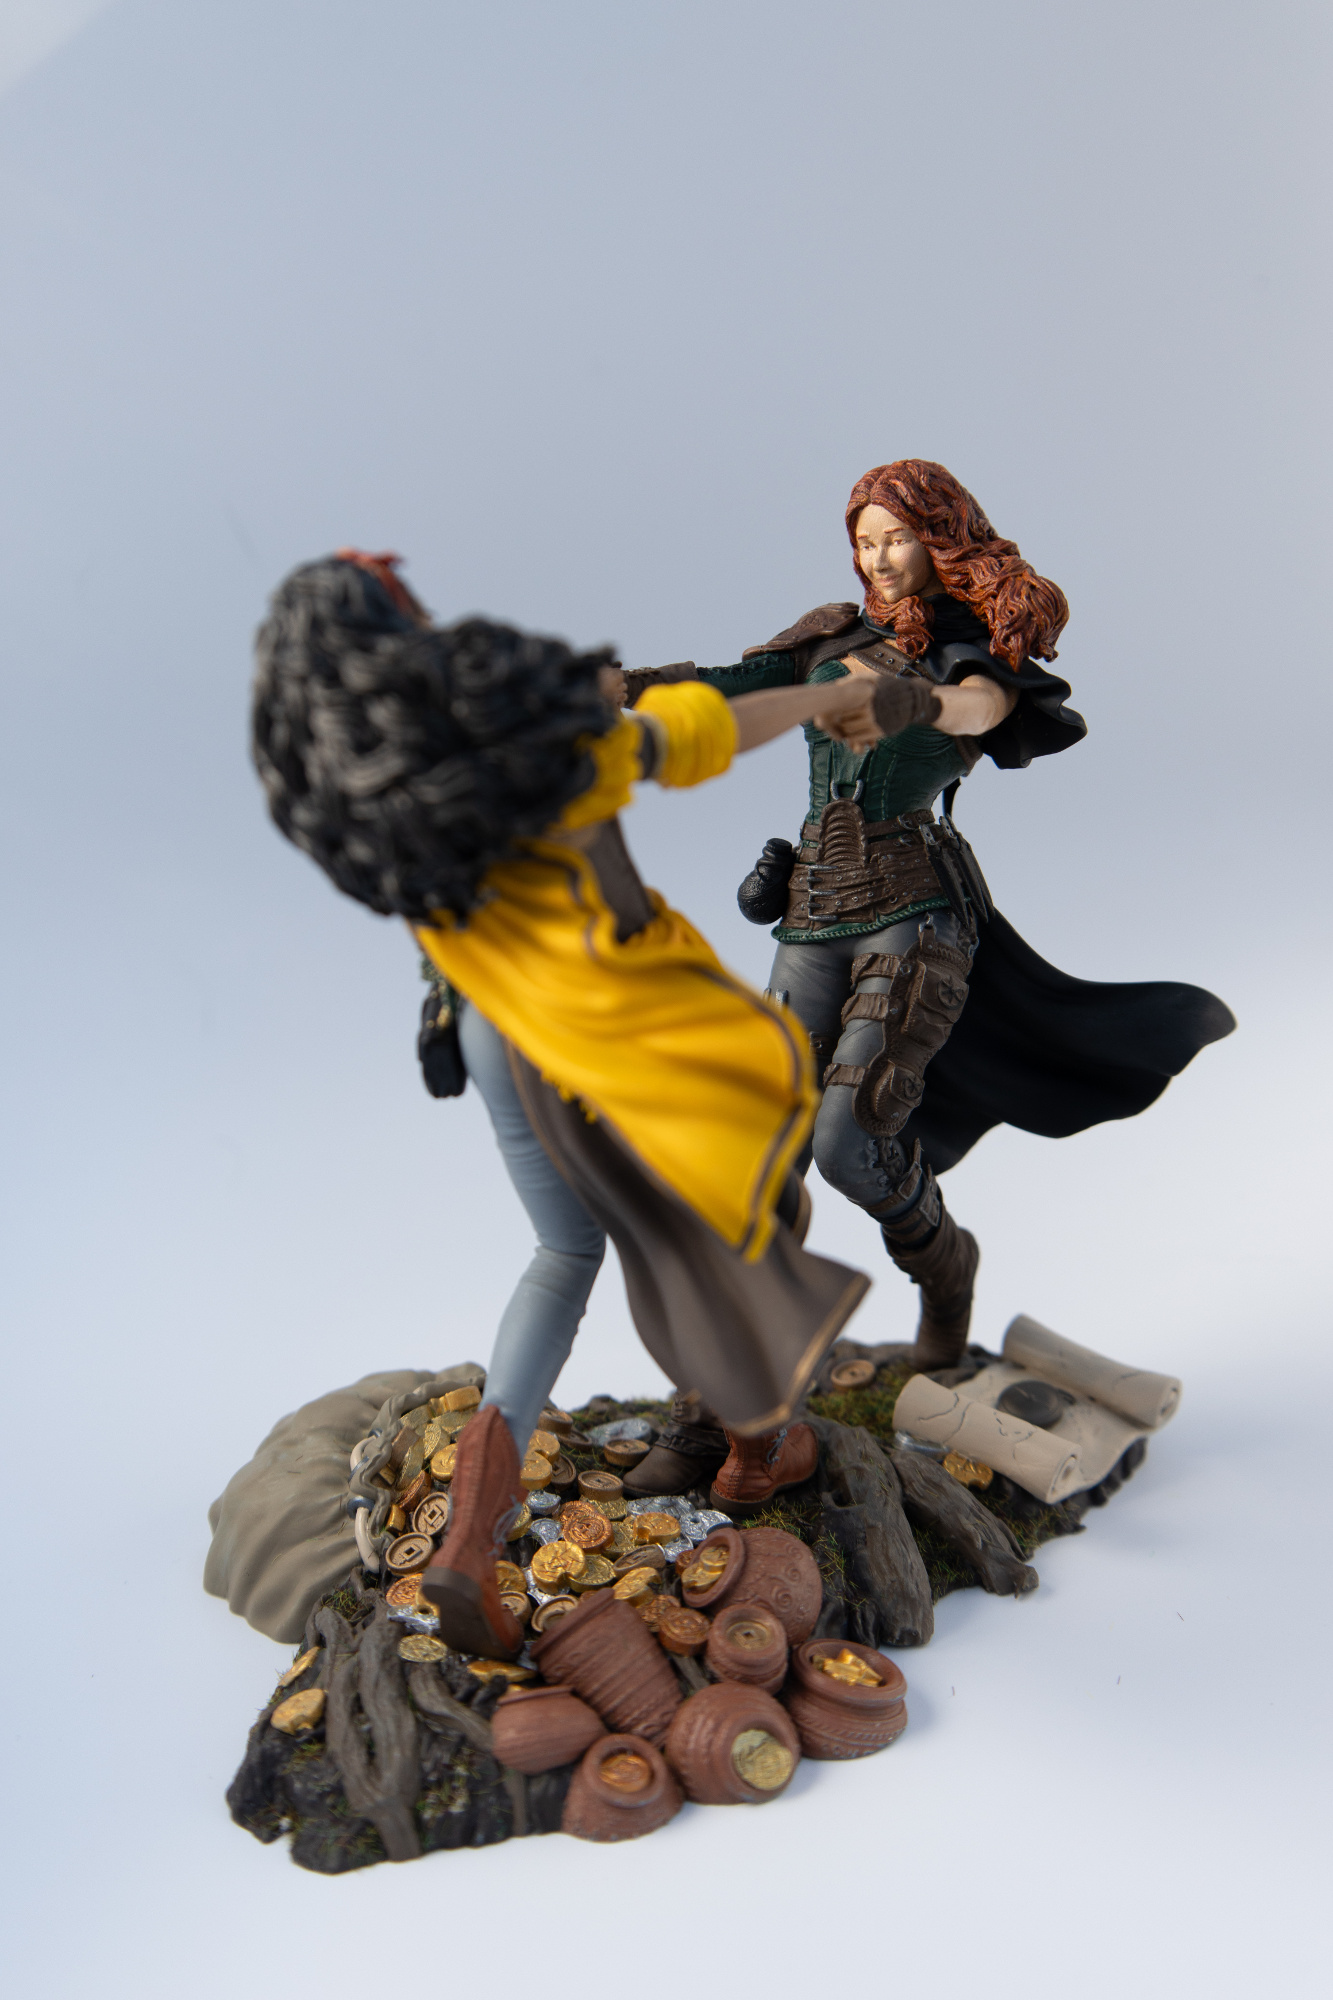
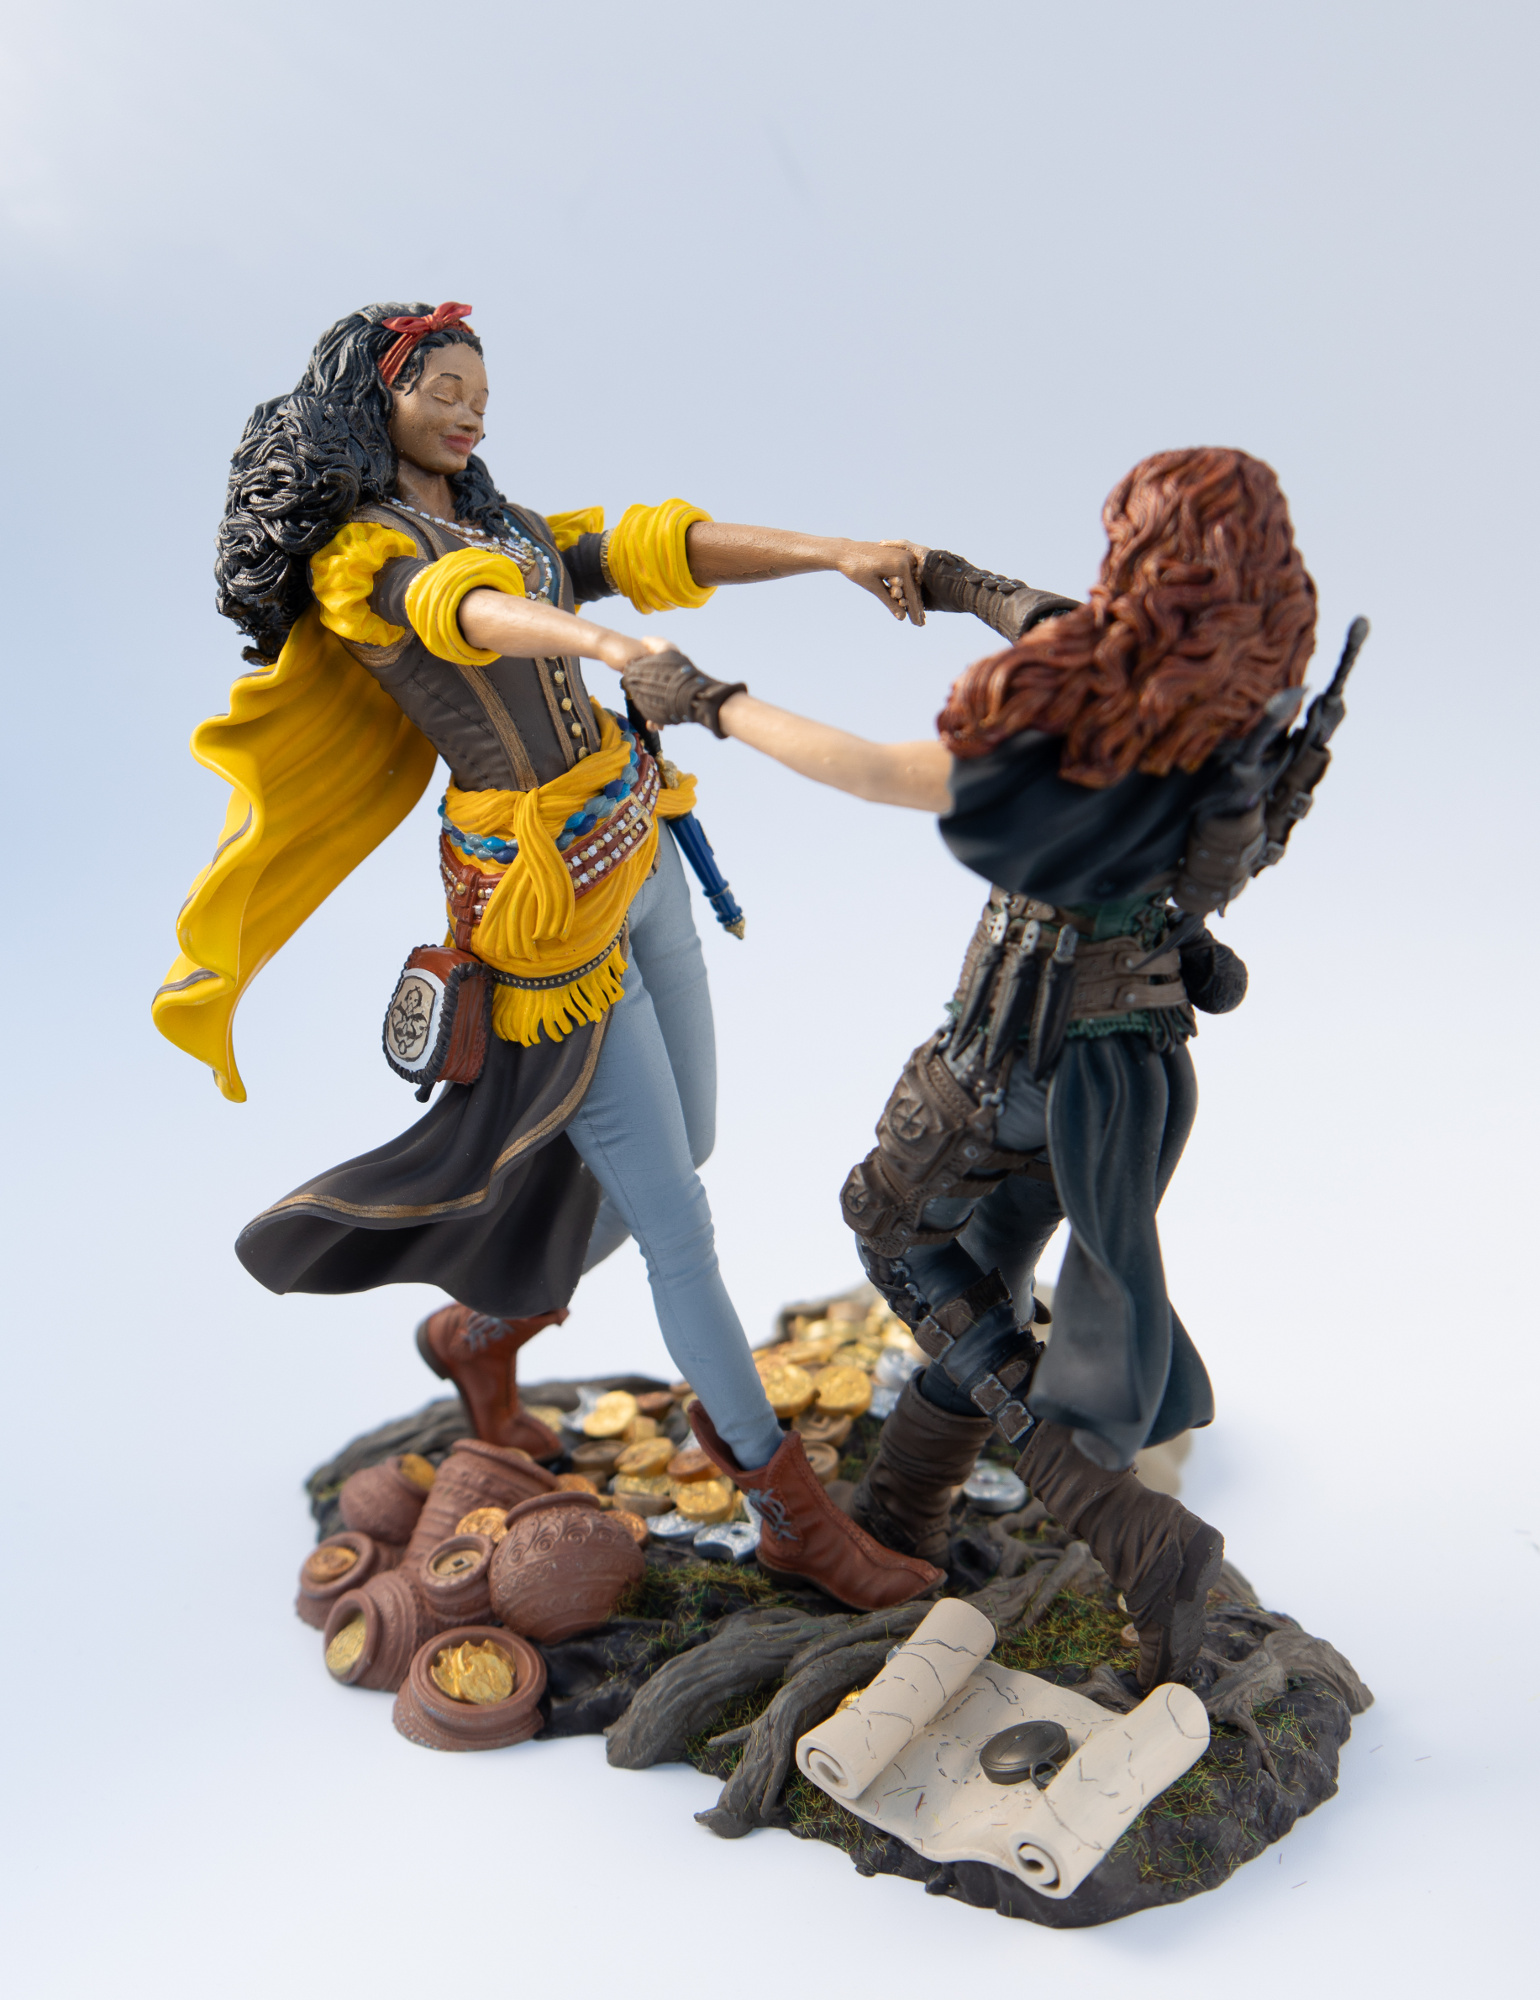
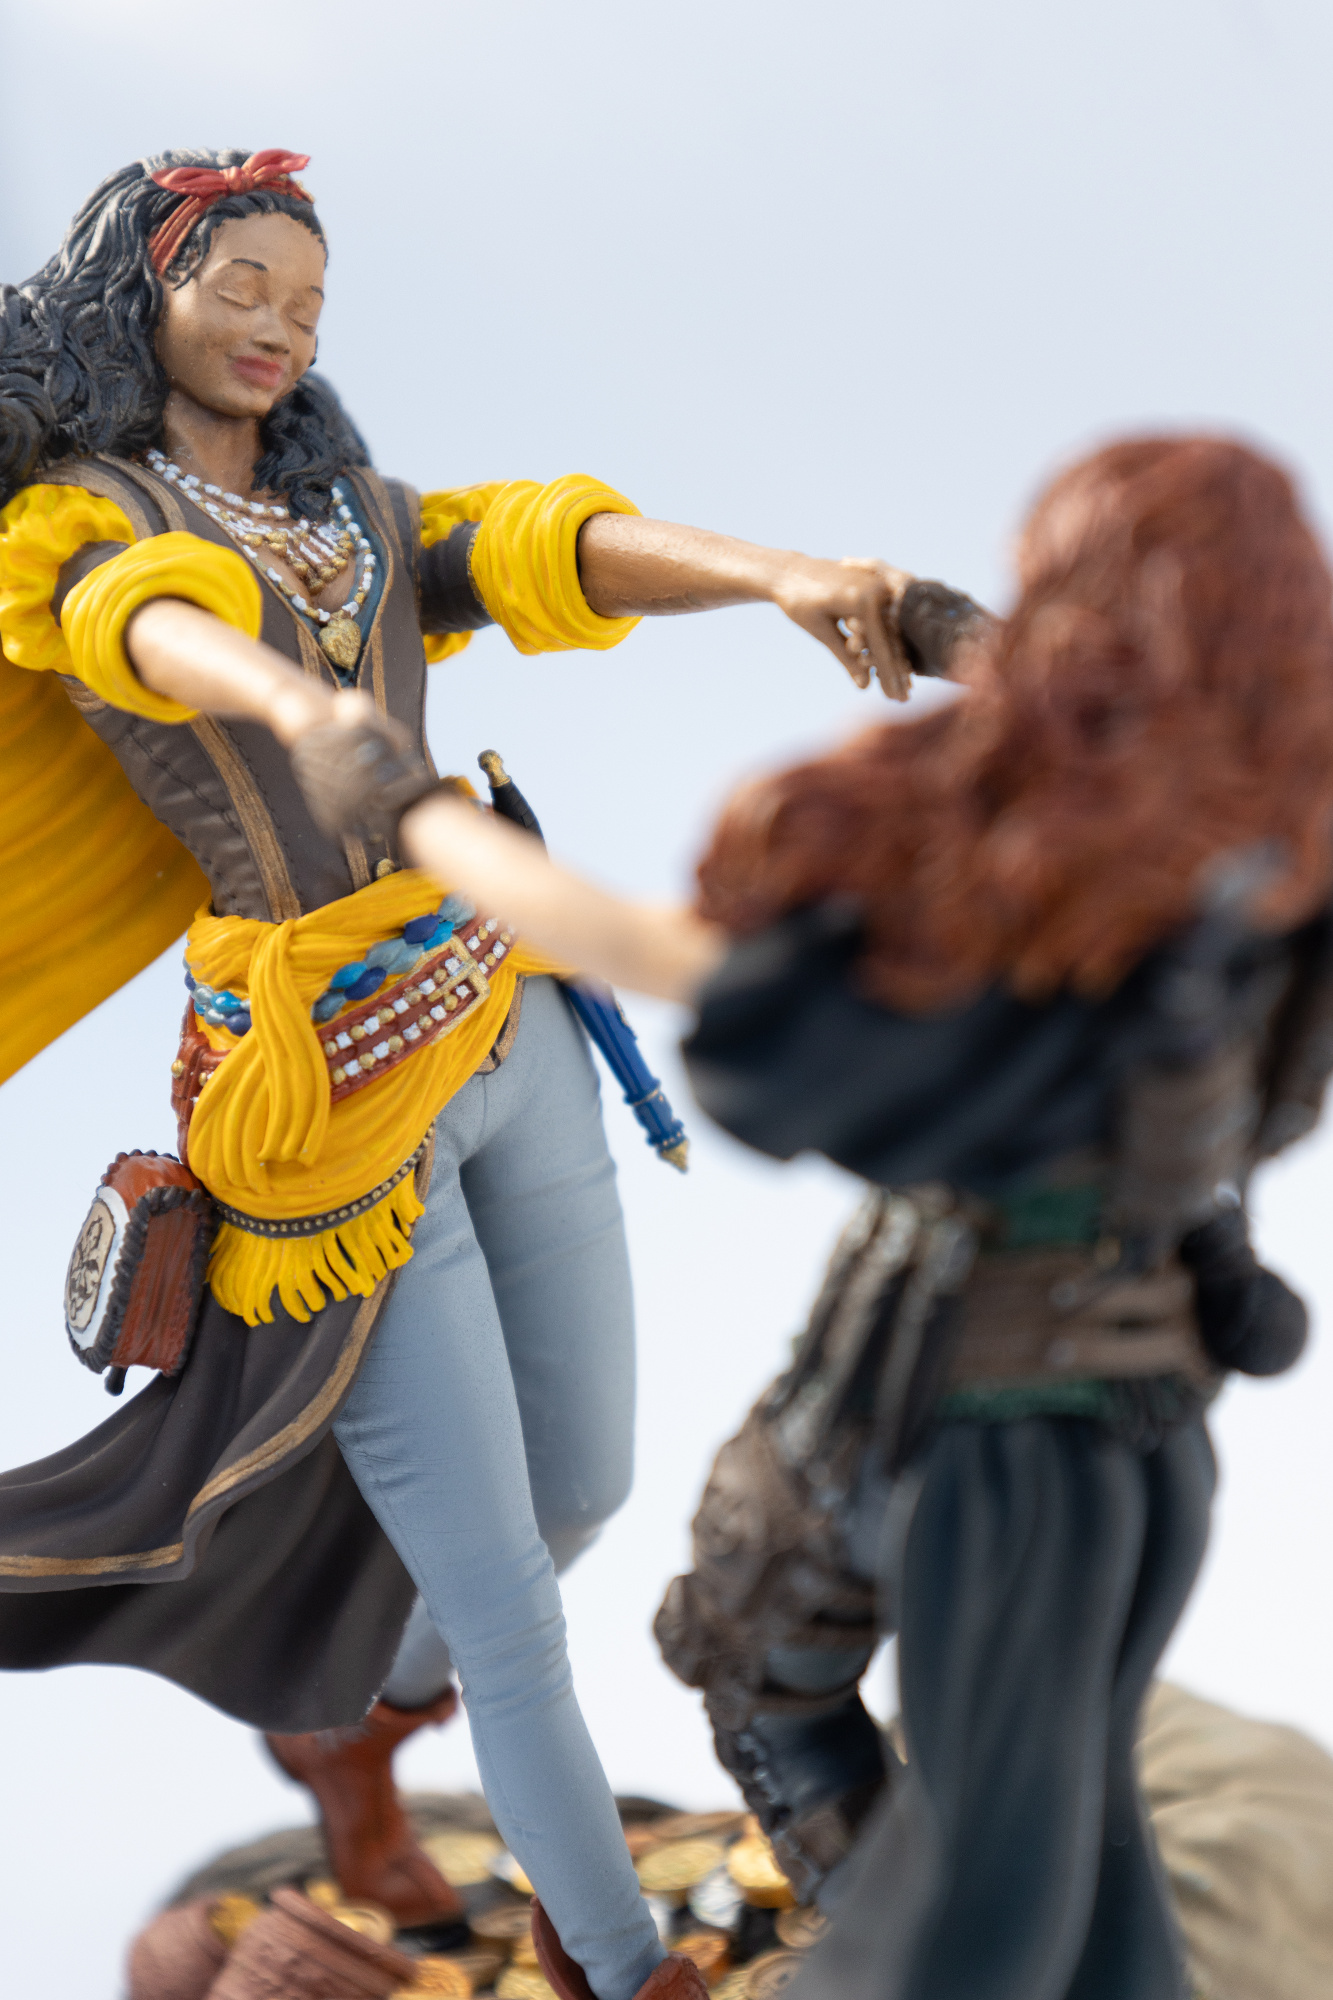
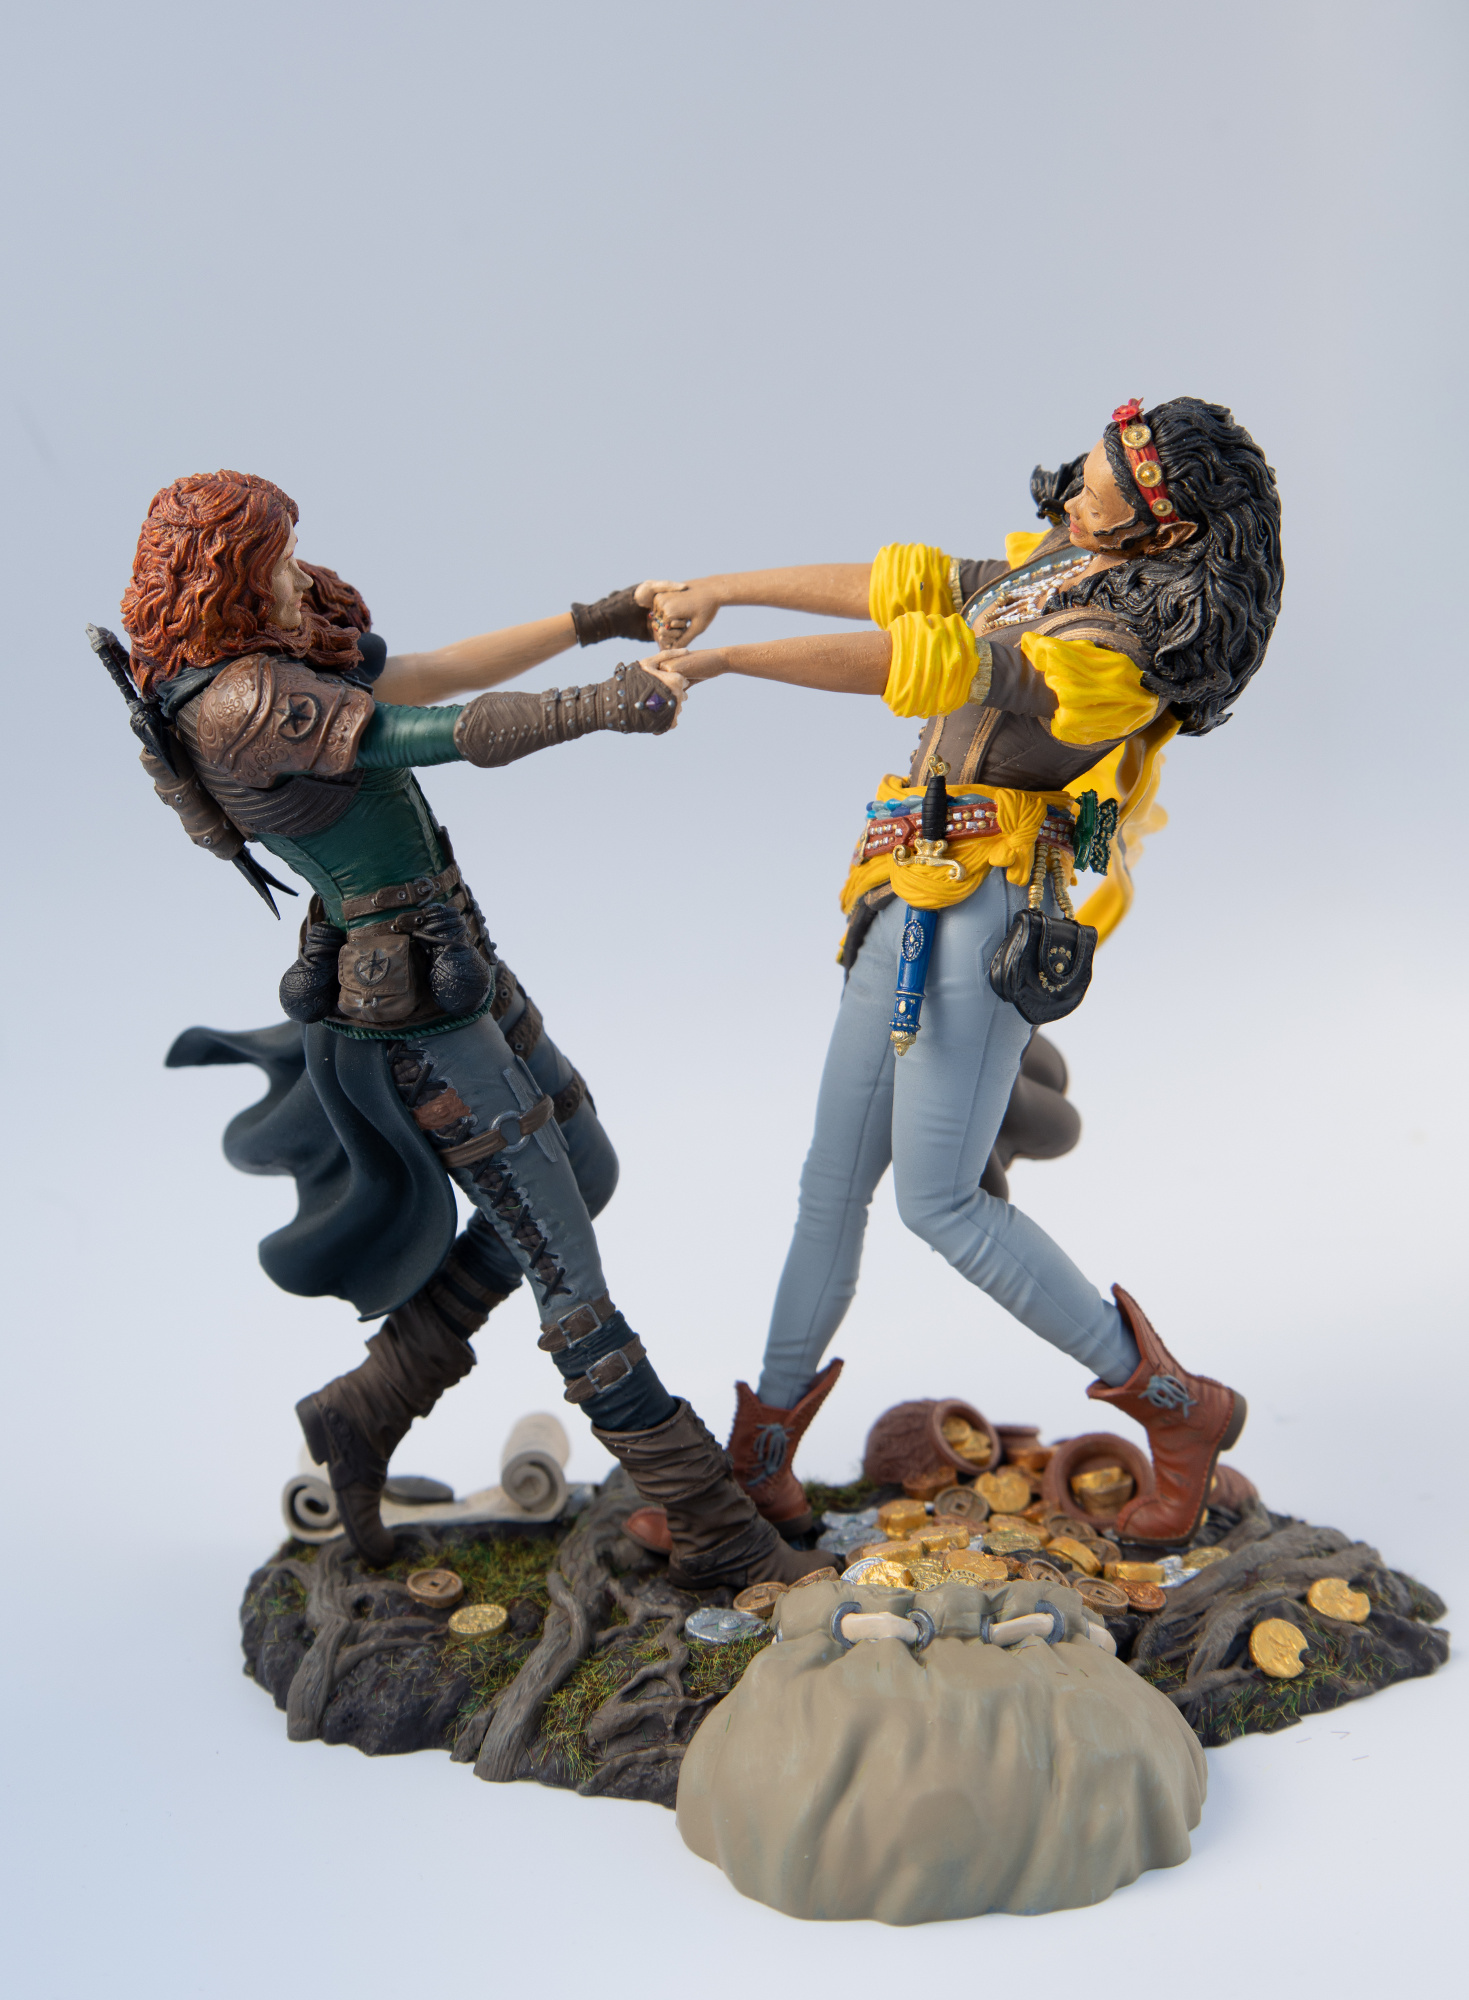
I'm calling this done.
I added some static grass to the baseplate, just to add some 'life'. Assembly of the figures was,
thankfully, a non-event; I guess all that dry fitting at the start paid off. Many of the parts are joined
without glue, and held together by a tight fit and friction only. The boots are glued to the baseplate,
and Enika's are also grued to her legs. Due to the angle between the lower legs, Inithia's are fixed
in position as long as the boots can't move, and from there it's just a chain of part X can't move unless
part Y can, all the way back to the boots and base plate.
|
|
|
|
|
|