
Airfix multipose German infantry
Project start 2018-01-01
2018-01-01
This is probably the single most frustrating re-issue I ever ran into.
A lifetime ago, in the early 80's, I got my hands on a set of the original issue,
loved what I saw, but somehow, the build failed. I don't recall what went wrong,
but the result was that I wanted a re-match. Don't for one moment believe a replacement
set was available anywhere within my reach. So I searched, for years, and came up empty
handed. This particular set was apparently released in 1990, but this too never showed
up in my range. In the late 90's, I finally stumbled into a set of the original issue,
and pounced on it. This was now the closest thing to a collector's item in my stash, and
was torn between building it or keeping it around for it's nostalgia value (I wasn't doing
a lot of bulding at that time).
A couple of years later, internet, and in particular, eBay took off, and suddenly, this
re-issue was available everywhere. Woohoo, I could have my cake and eat it! When these
re-issues arrived (all six sets, of course; I now had a budget and a source..) I was
rather disappointed. OK, you effectively got two sets per box, but the plastic used is
some of the worst I've ever seen. Rock hard, yet with no particular desire to hold detail.
Not at all what you want for kitbashing or conversion, and I had ambitions in just that
direction (never got beyond ambition, of course). This generation of multipose figures went
onto the "who knows, maybe someday I'll find a use for them" pile, while I built up a supply
of original issue sets.
By the time I'd built up a decent supply of originals, Airfix did another re-issue of the
multipose figures. Not expecting a whole lot, I bought some, and was pleasantly surprised
these were once again in old style plastic.
So, in the end I had more good quality sets than I'll ever use, plus a bunch of rather dubious sets from the 90's. Just before the 2005 re-issues, I decided that since these weren't going to be much use for anything else, I would start building them OOB, in the rare cases where I take some kits with me to build in the field, so to speak. Slow going then, but I did manage to complete the British infantry set eventually. The 8th army set is in a "just started" state.
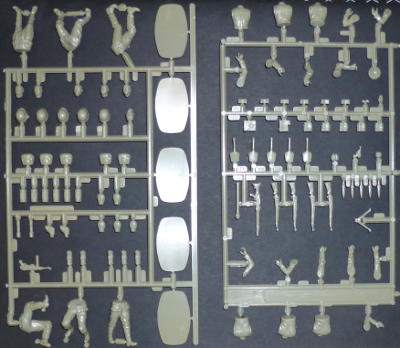
Background aside, what do I have here..
If we ignore the plastic, and the rather incompatible scale, this is still one of the
nicest sets of WWII figures around. The multipose sets beat anything out there in terms
of animation, detail, and flexibility when they came out, and can, in my opinion at least,
still hold their own against kits 40 years newer. I consider that pretty impressive.
On the down side, even a relative amateur in this field, like me, can see these are early
war uniforms, yet they are combined with relatively late war weapons. To the expert, there's
probably half a million other things wrong with them. I'm no expert, I just like the figures.
2018-01-01
Although the leg-to-torso joins seem large and sturdy, it's entirely too easy to push
them out of alignment if you continue too soon, and once they are completely set, they
are indeed all but impossible to correct. Just to be paranoid, I'll leave them to set
for a bit; I don't want to start this build by messing it up.
2018-01-01
I've reached the point where I'm ready to apply the first helping of primer, primarily
to help spot any remaining problems before I take the next steps. All the men with rifles
will have their munition pouches fitted before further construction, as these might get
in the way of further posing. The (sub)machinegunners will be painted with only one arm
attached, as will the man with the panzerfaust. The second arm will be painted separately,
and attached at the same time as the weapon.
2018-01-21
I finally got some bench time in again yesterday, and started putting cartridge pouches on
the ones that carry them. These pouches are mounted tightly against the belt and as such
take some fitting to line up with the rest of the figures. This took a certain amount of
bending parts, and grinding off bits of coat detail and folds that would be flattened in
real life. The officer (where the pistol holster has similar characteristics) and the
grenade thrower presented little trouble, but as I had feared, the walker only worked out
of the box without the pouches; with the pouches in place, they block the area where the
rifle is supposed to go. This means that to preserve the pose, the right arm needs to be
further from the body, so the rifle can be clasped between pouches and hand, rather than
between hip and hand. Some chopping required..
The gaps on the rear were blobbed over with dissolved sprue, both to fill the gaps and
to add strength once completely cured, so this figure will have to be parked until next
weekend.
I expect similar trouble from the kneeling guy with the Panzerfaust, but we'll see.
2018-01-21
The guy with the Panzerfaust is even worse, in fact, I think the phrase "trainwreck"
is appropriate.
The way he's posed, I'm fairly certain the idea is that he's not merely reading the
label or admiring the workmanship of the weapon. That's a problem, because the rear
end of the tube is pointed at his torso. Out to about ten meters, the rear end of a
firing Panzerfaust is every bit as lethal to anything made of flesh as the front. Any
halfway sane soldier would take really good care not to point this secondary business
end at his own guts.
The problem is made worse by the fact that the Panzerfaust is almost comically undersized.
It should have a total length of 31.25mm, but it measures only 25mm, and this makes it
harder to keep the rear end someplace safe. Something will have to be done, either
scratching a new shaft for the weapon, or simply replacing it with a much closer to size
1/35 Tamiya part. The former could be a problem, the latter is cheating..
Oh, and all that is before noting that the arms are positioned in a way incompatible
with the presence of cartridge pouches, and not lined up to each other and the weapon either..
2018-01-21
Scratching failed when I made a mess of drilling out the head to accept a new shaft;
cheating it is. Lining up the left arm for the new part proved doable, although it will
still need work, but that will have to wait.
Which brought me up against the next problem: the submachinegunner's ammo pouch. The
real thing was hooked up to the belt at about 45 degrees, and was flexible (the magazines
inside weren't, obviously), so it would behave like three sticks at set distances from each
other. Kit parts (here, and in every other kit I've seen thus far) are planks, or sometimes
curved inward. The former might be made to work on a soldier standing up straight, but neither
will work in any other case. The curved ones, if anything, are worse than the planks, as
they are curved in the wrong direction for this setup.
Long story short, they don't fit the figures worth a damn. No immediate idea how I'll fix
this; the cowards way of dangling the pouch straight down from the belt (as all to many
kits suggest) doesn't have much appeal right now. Cutting loose the individual magazine
holders, putting them on a metal strip, and re-sculpting the area where then squash (probably
uncomfortably) into the soldiers body seems a major project.